Pupil Pages
 Updated
To access the Pupils page, click on the Pupils button in the main menu bar.
Here you'll find content and reports that focus on individual pupils.
In this guide, we'll cover the format of the Pupils area, including the main features of each tab.
Pupil photos grid
When you first select Pupils, you'll see a photo thumbnail grid of all pupils in your current filter. If you have any grouping applied, such as Year Group, the grid will also respect this. The number of pupils will also be shown, including against any groups.
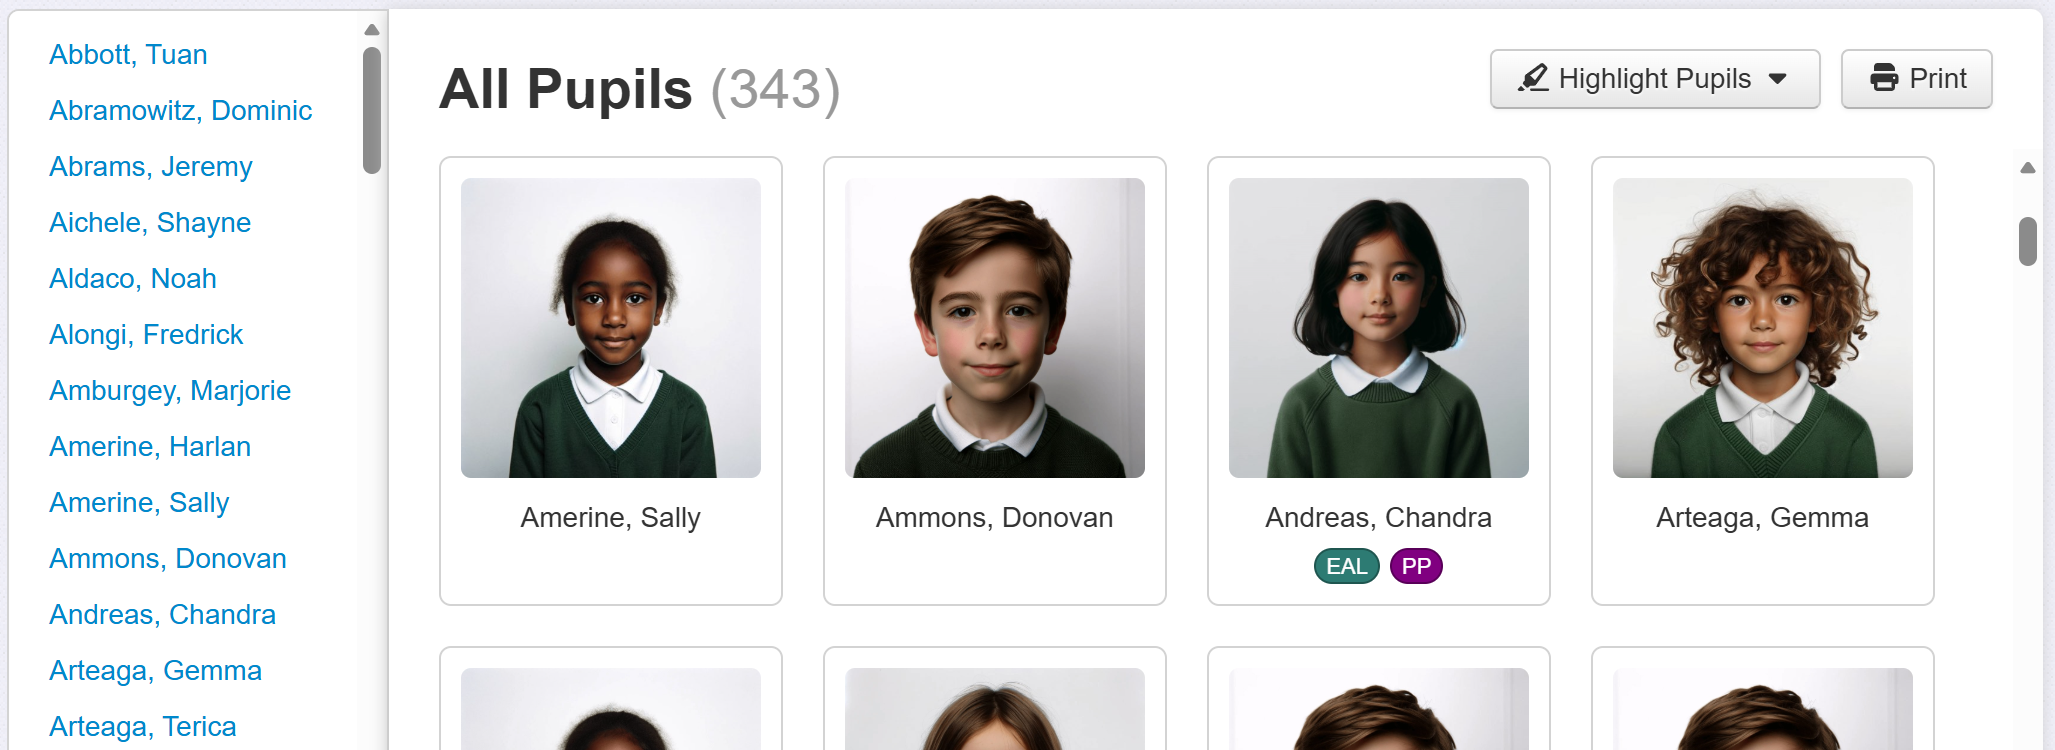
This grid can be useful, simply, to 'put a face to a name' and provide context. Or for other tasks, such as providing an overview for a supply teacher.
The grid also includes a Highlight Pupils button. Use this to add text beneath the pupil names for a variety of selectable aspects.
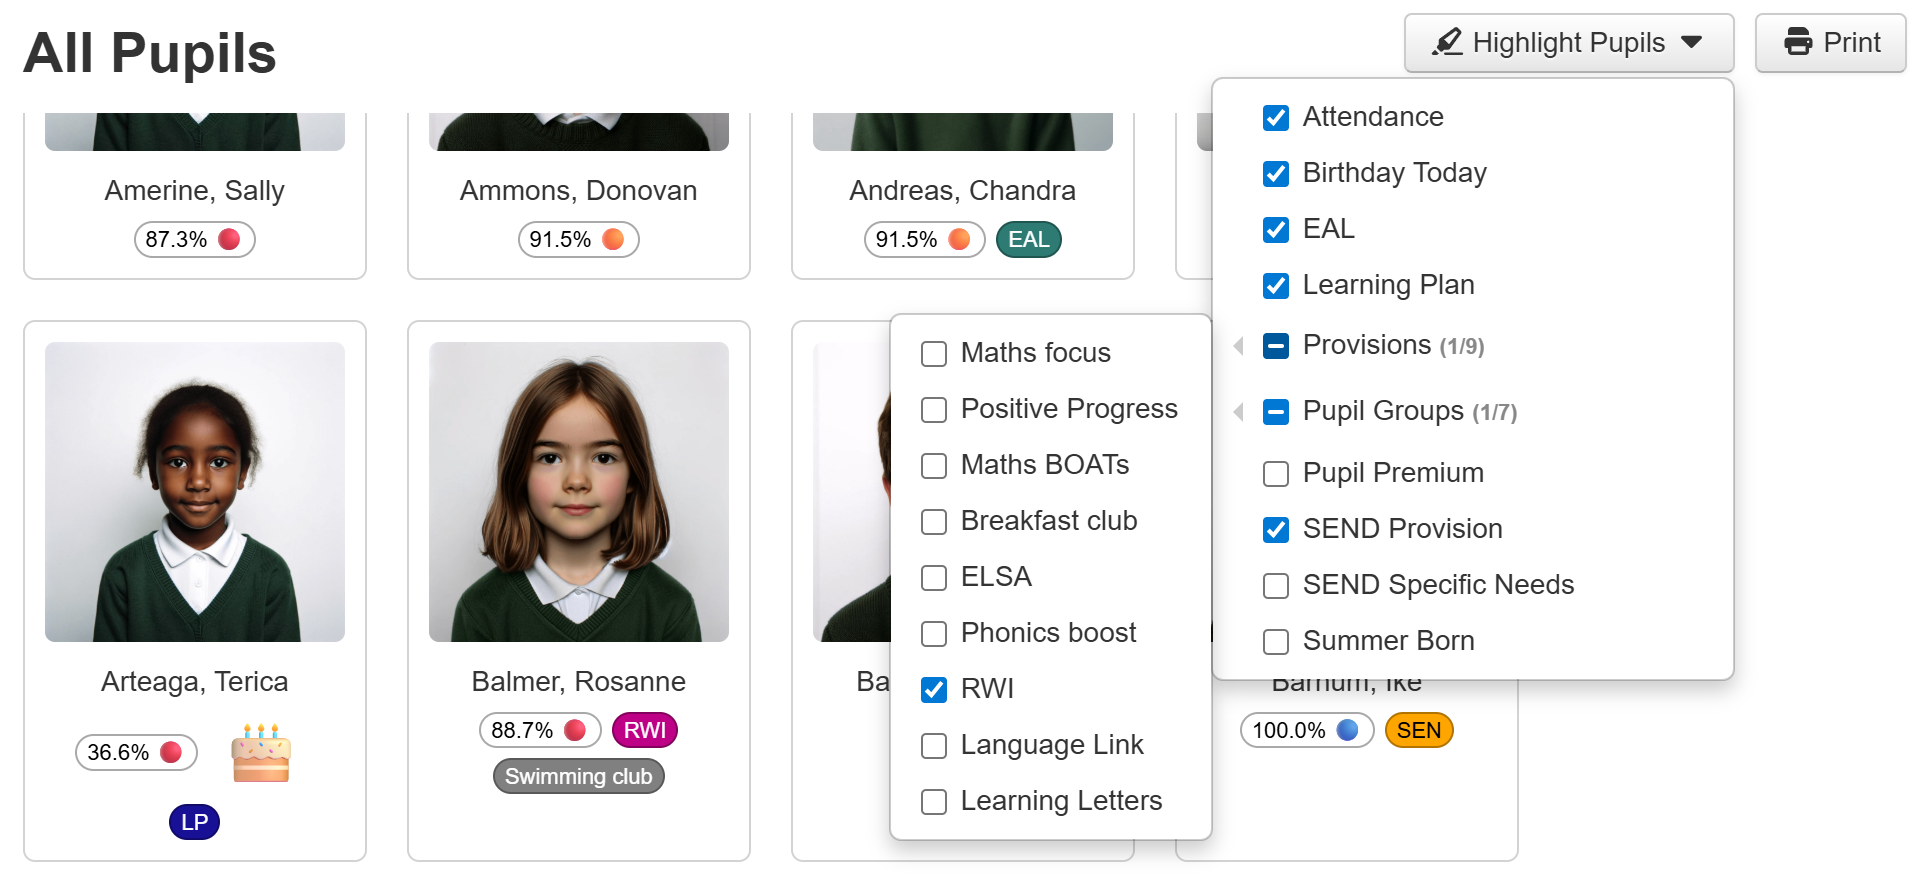
These can be useful to aid group intervention discussions, or simply to better understand the contextual makeup of a particular class or group. For any abbreviated text, hovering the mouse over it will display the unabbreviated version. For example, Summer Born pupils will be highlighted with SB.
Attendance will show the pupil current attendance percentage with a circle shaded according to the school Attendance Threshold ranges. If a pupil has no current attendance data recorded, nothing will be displayed.
Birthday Today will show a birthday cake icon for any pupils who have their birthday on the current date.
The Learning Barriers highlight will show the learning barrier score for each pupil.
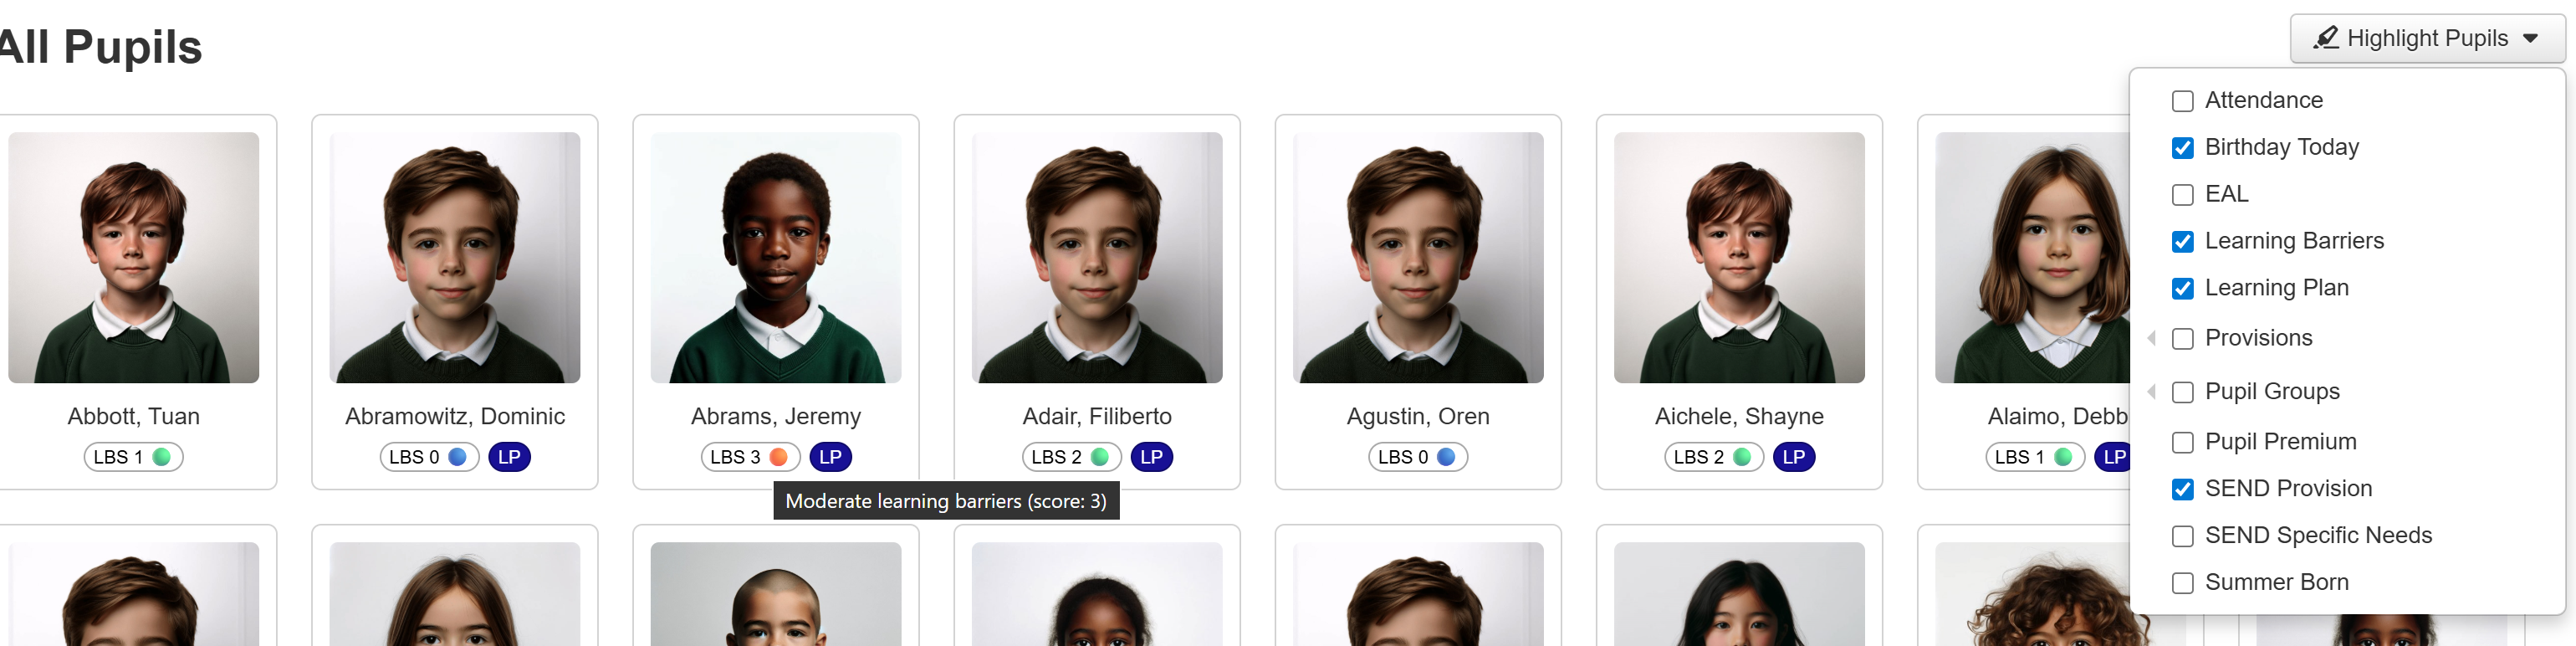
The LBS circle icon is coloured according to your set learning barrier evaluation range.
The Provision Groups highlights provisions a pupil is in receipt of in the current academic year. It will indicate if the pupil was/is in a provision group, for the selected provision type.
Highlight Pupils is a per-user view, so making changes will not affect what any other users see.
The Print button will also generate a print formatted version of the screen, which could also be saved as a PDF.
Clicking a pupil photo will open the page for that pupil. Click Photos, at the top of the pupil list, to return to the photo grid.
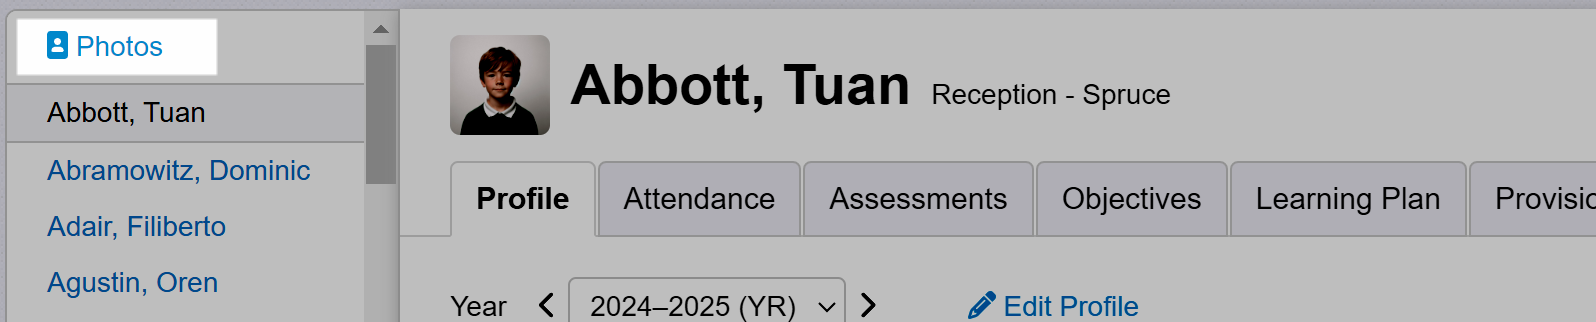
Profile
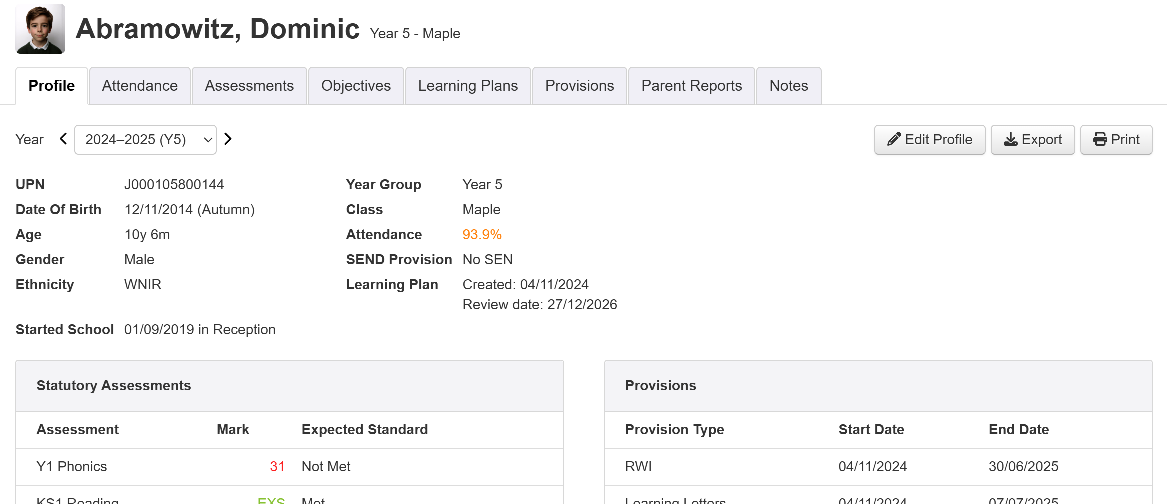
The Profile tab includes school census information: UPN, Date of Birth, class, key characteristics, date started, and colour coded attendance.
If you're syncing pupil photos with your MIS you'll see a thumbnail picture to the left of the name. Click the photo to see a larger version.
Beneath the main pupil information are any statutory assessments the pupil has completed, on the left.
On the right is a list of Provision Groups (if applicable). See our Provision Mapping guides for more.
Beneath any Provision Groups will be any Pupil Groups this pupil is part of. These are bespoke, school-defined groups that can be managed using the Pupil Groups tool, or you can assign a pupil into a group by clicking on the +Add Group button here on the Profile tab.
A Learning Barriers section will indicate any barriers to learning for the pupil, their associated score and total and whether the score represents minimal, moderate or significant barriers to learning. See the guide on managing learning barriers for more.
Editing the Pupil Profile
If you are an Admin user, you can click the Edit Profile button to see more details and make edits.
If you have an MIS sync enabled, you'll see a warning message.

As a general rule, any changes to pupil details should be made in your MIS, rather than Insight, as they'll sync through automatically when the sync next runs. If you want to make changes, you can click the Unlock To Edit button.

You can make changes as needed, for example to add a Pupil Photo.
For more detail on managing pupil contacts, see the parent report help guide on managing recipient email addresses.
Ensure you click Save when finished.
Export
You can download all data pertaining to the selected pupil by clicking the Export button, in the Profile tab. This will download a zipped folder containing an HTML document showing all the data for the pupil and a further folder with any other files such as photos.
The folder will need to be uncompressed to view the pupil photo in the HTML, when opened in a browser.
Attendance
The Attendance tab uses daily attendance session data. As such, it can only function if you are syncing data with your MIS.
The full detail of this section is in the Pupil Attendance Report guide.
Assessments
The next tab covers Assessments. By default, all assessments for all subjects made in the current year are shown.
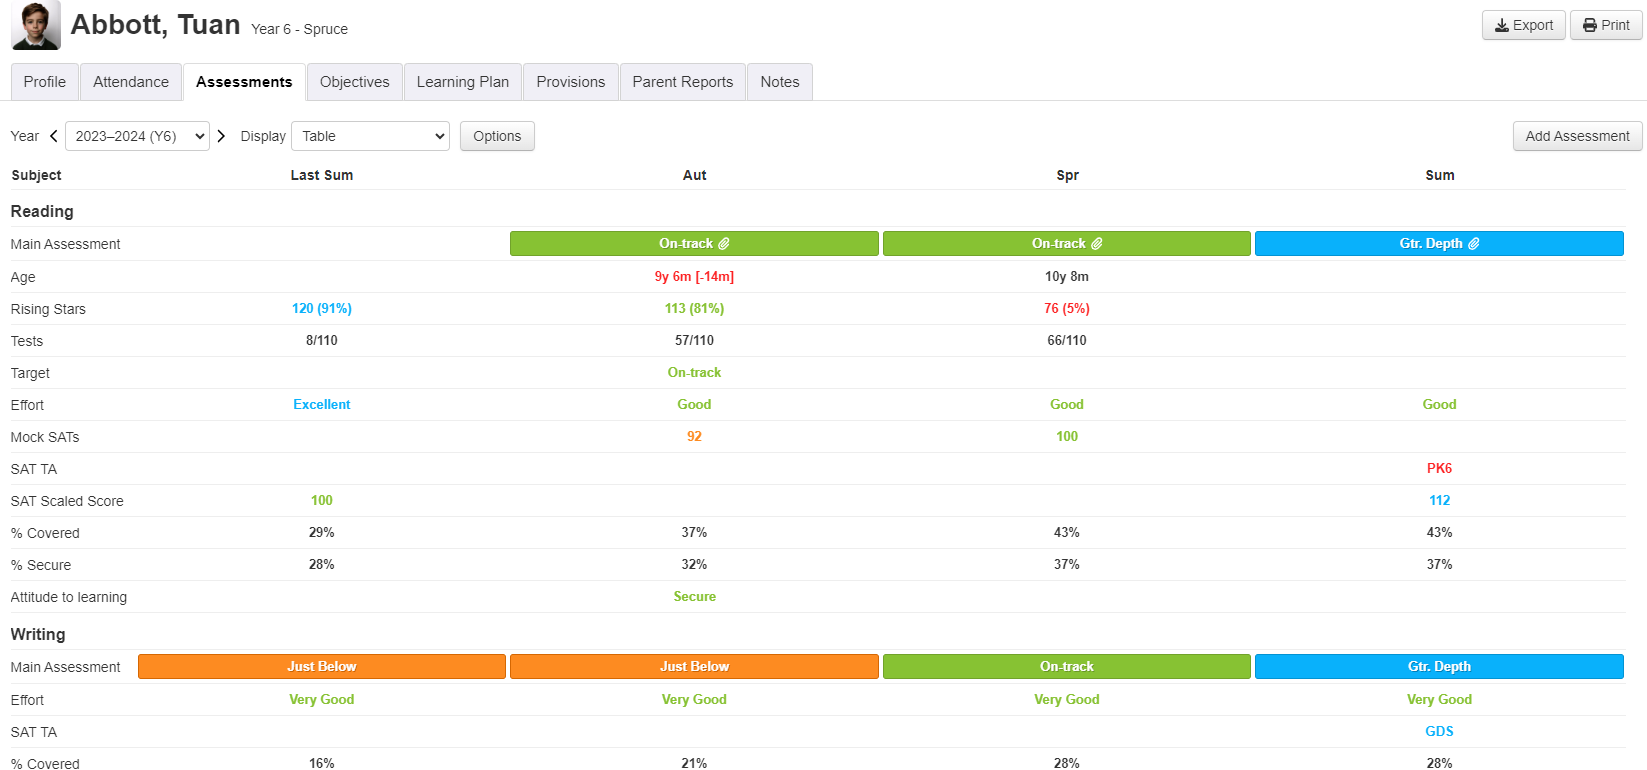
You view data relating to other years by clicking on the year menu and choosing the year you want.
To change which subjects and assessment data are displayed, click on the Options button (highlighted in screenshot above).
The Options button allows you to select what data is shown on the pupil page, including progress metrics for the year and key stage. It also allows you to group assessments by subject (the default) or by name. The latter would group all the standardised test data together, for example.
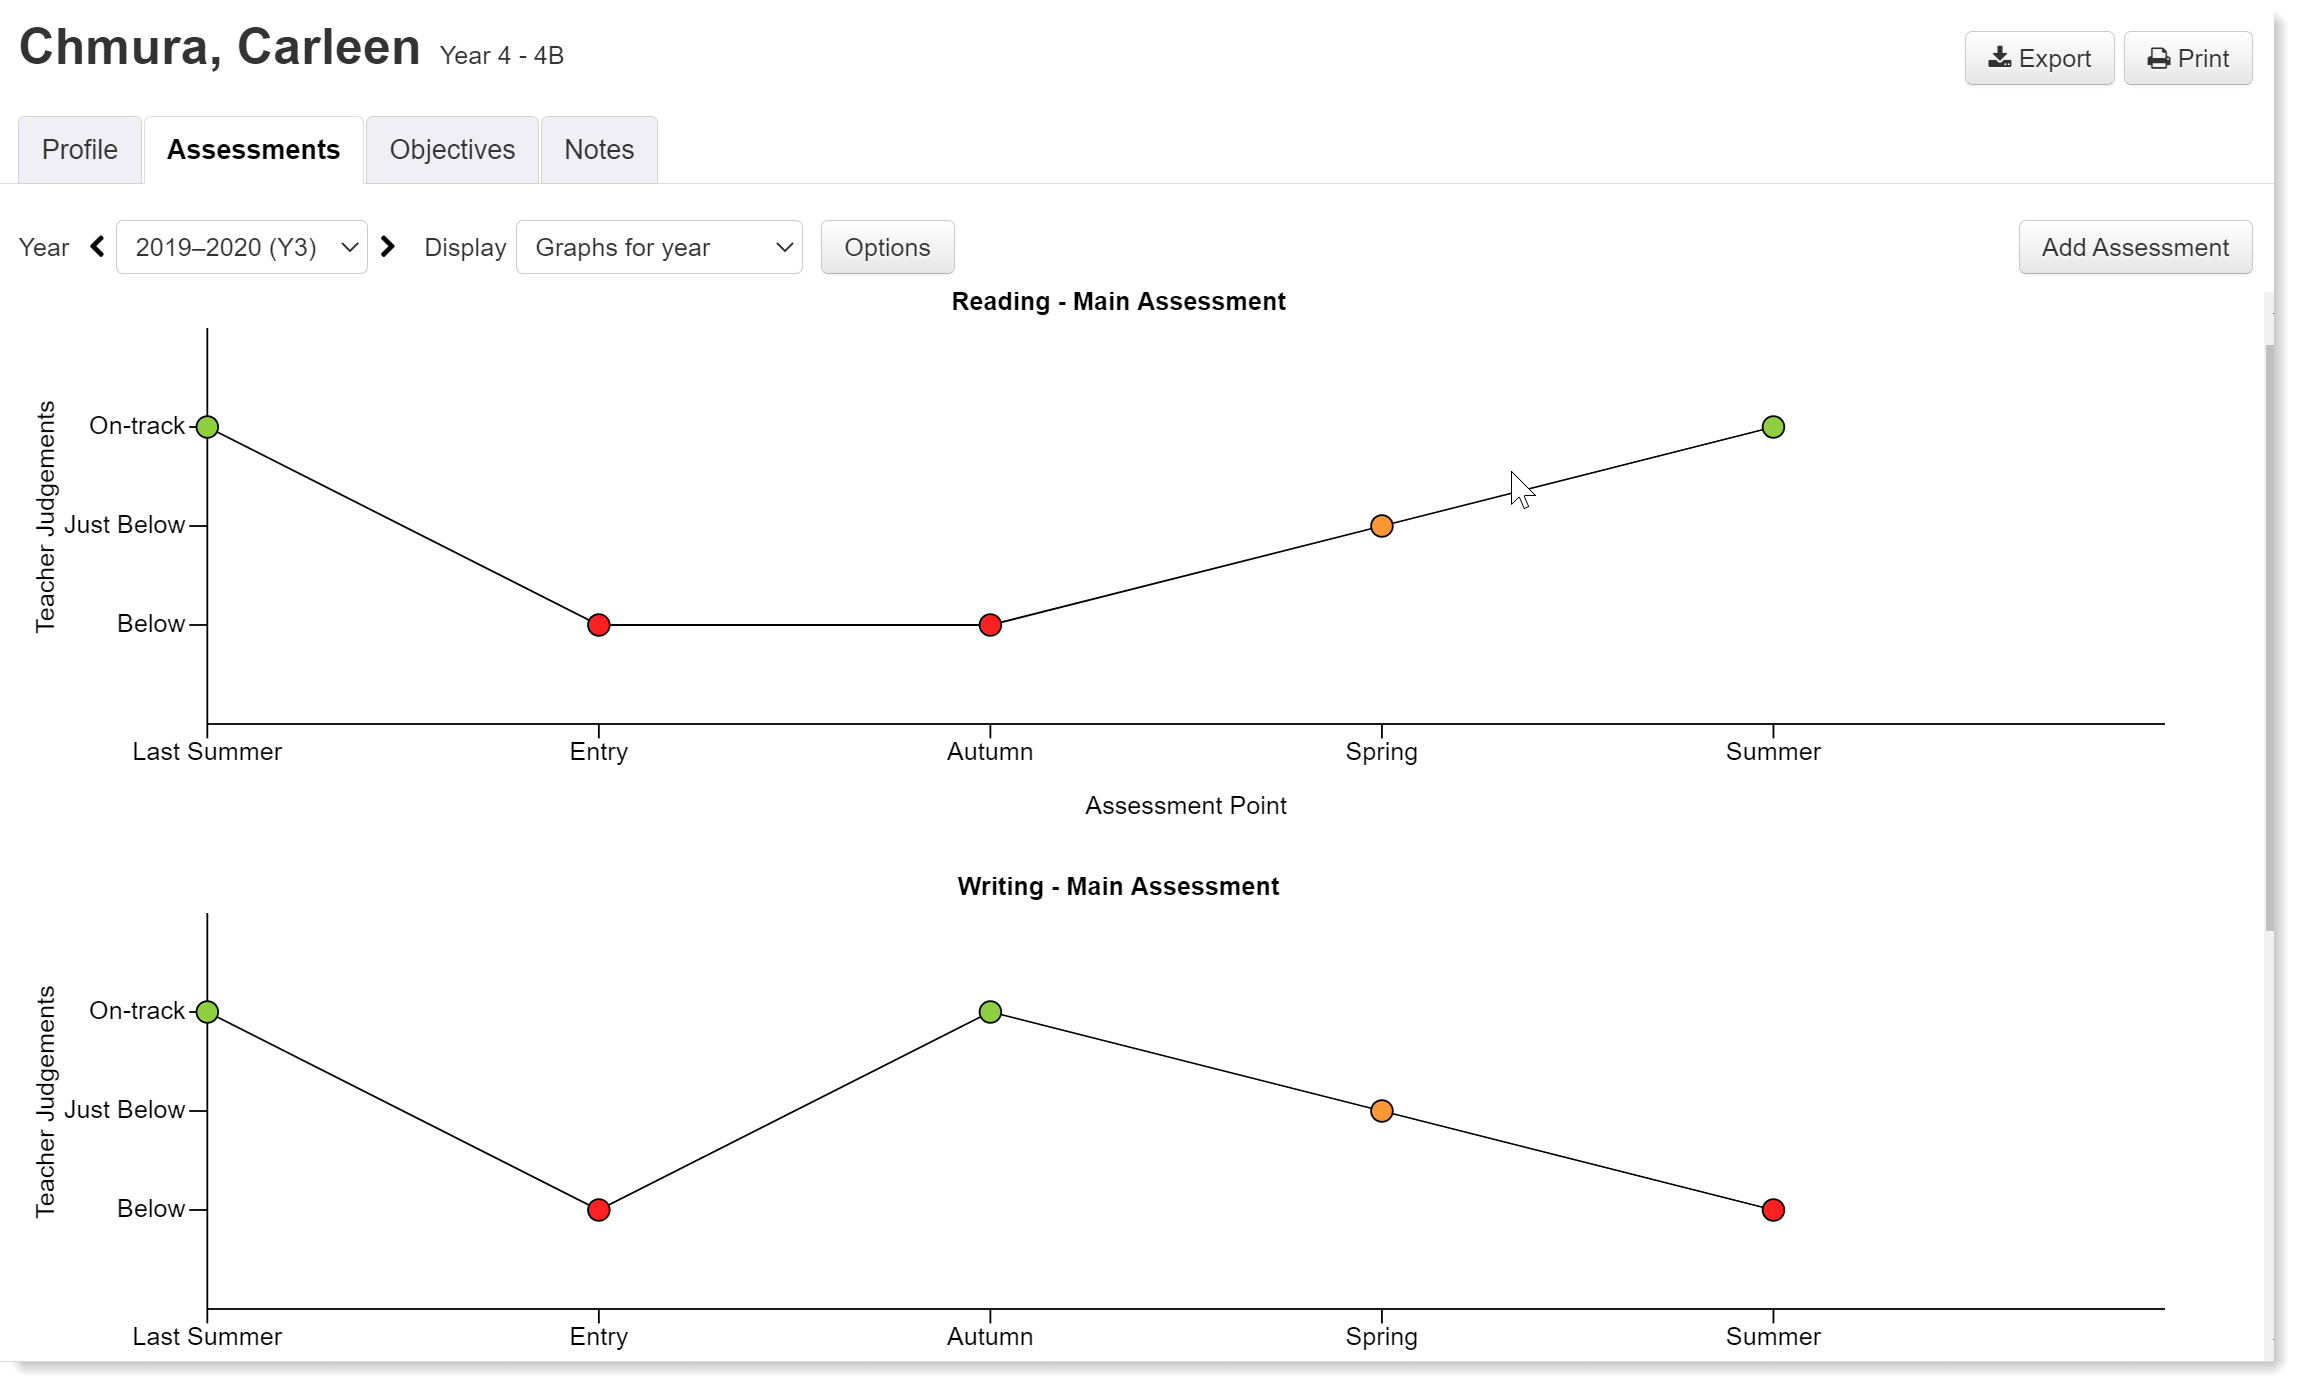
The Assessments tab also has a dropdown to change the data view from a Table (the default) to a graph (for the year
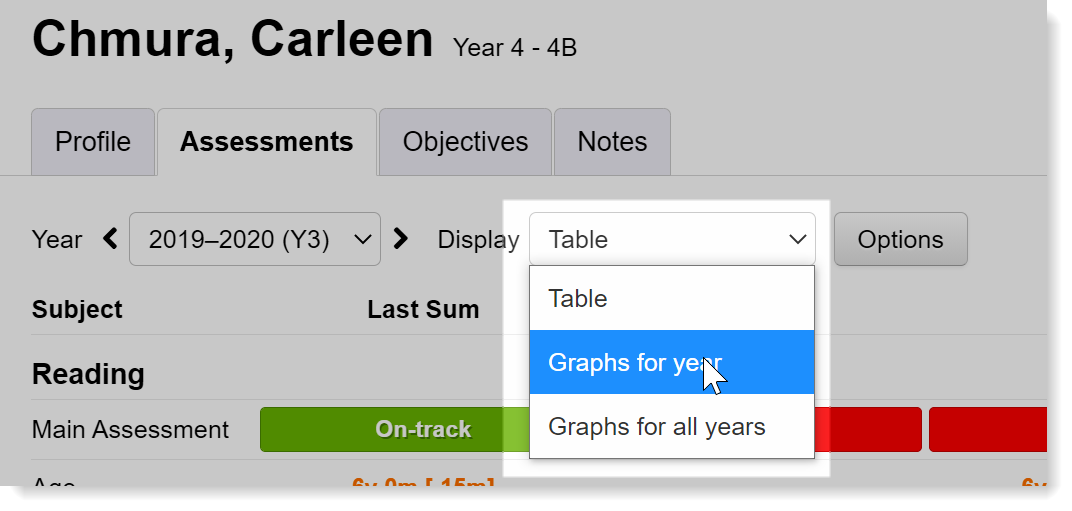
The graphs for year option essentially converts the table of data shown above into a graph that displays assessments for each term:
The graphs for all years option will show a record of data from the earliest assessment point, which, in the example below, is over 4 years.
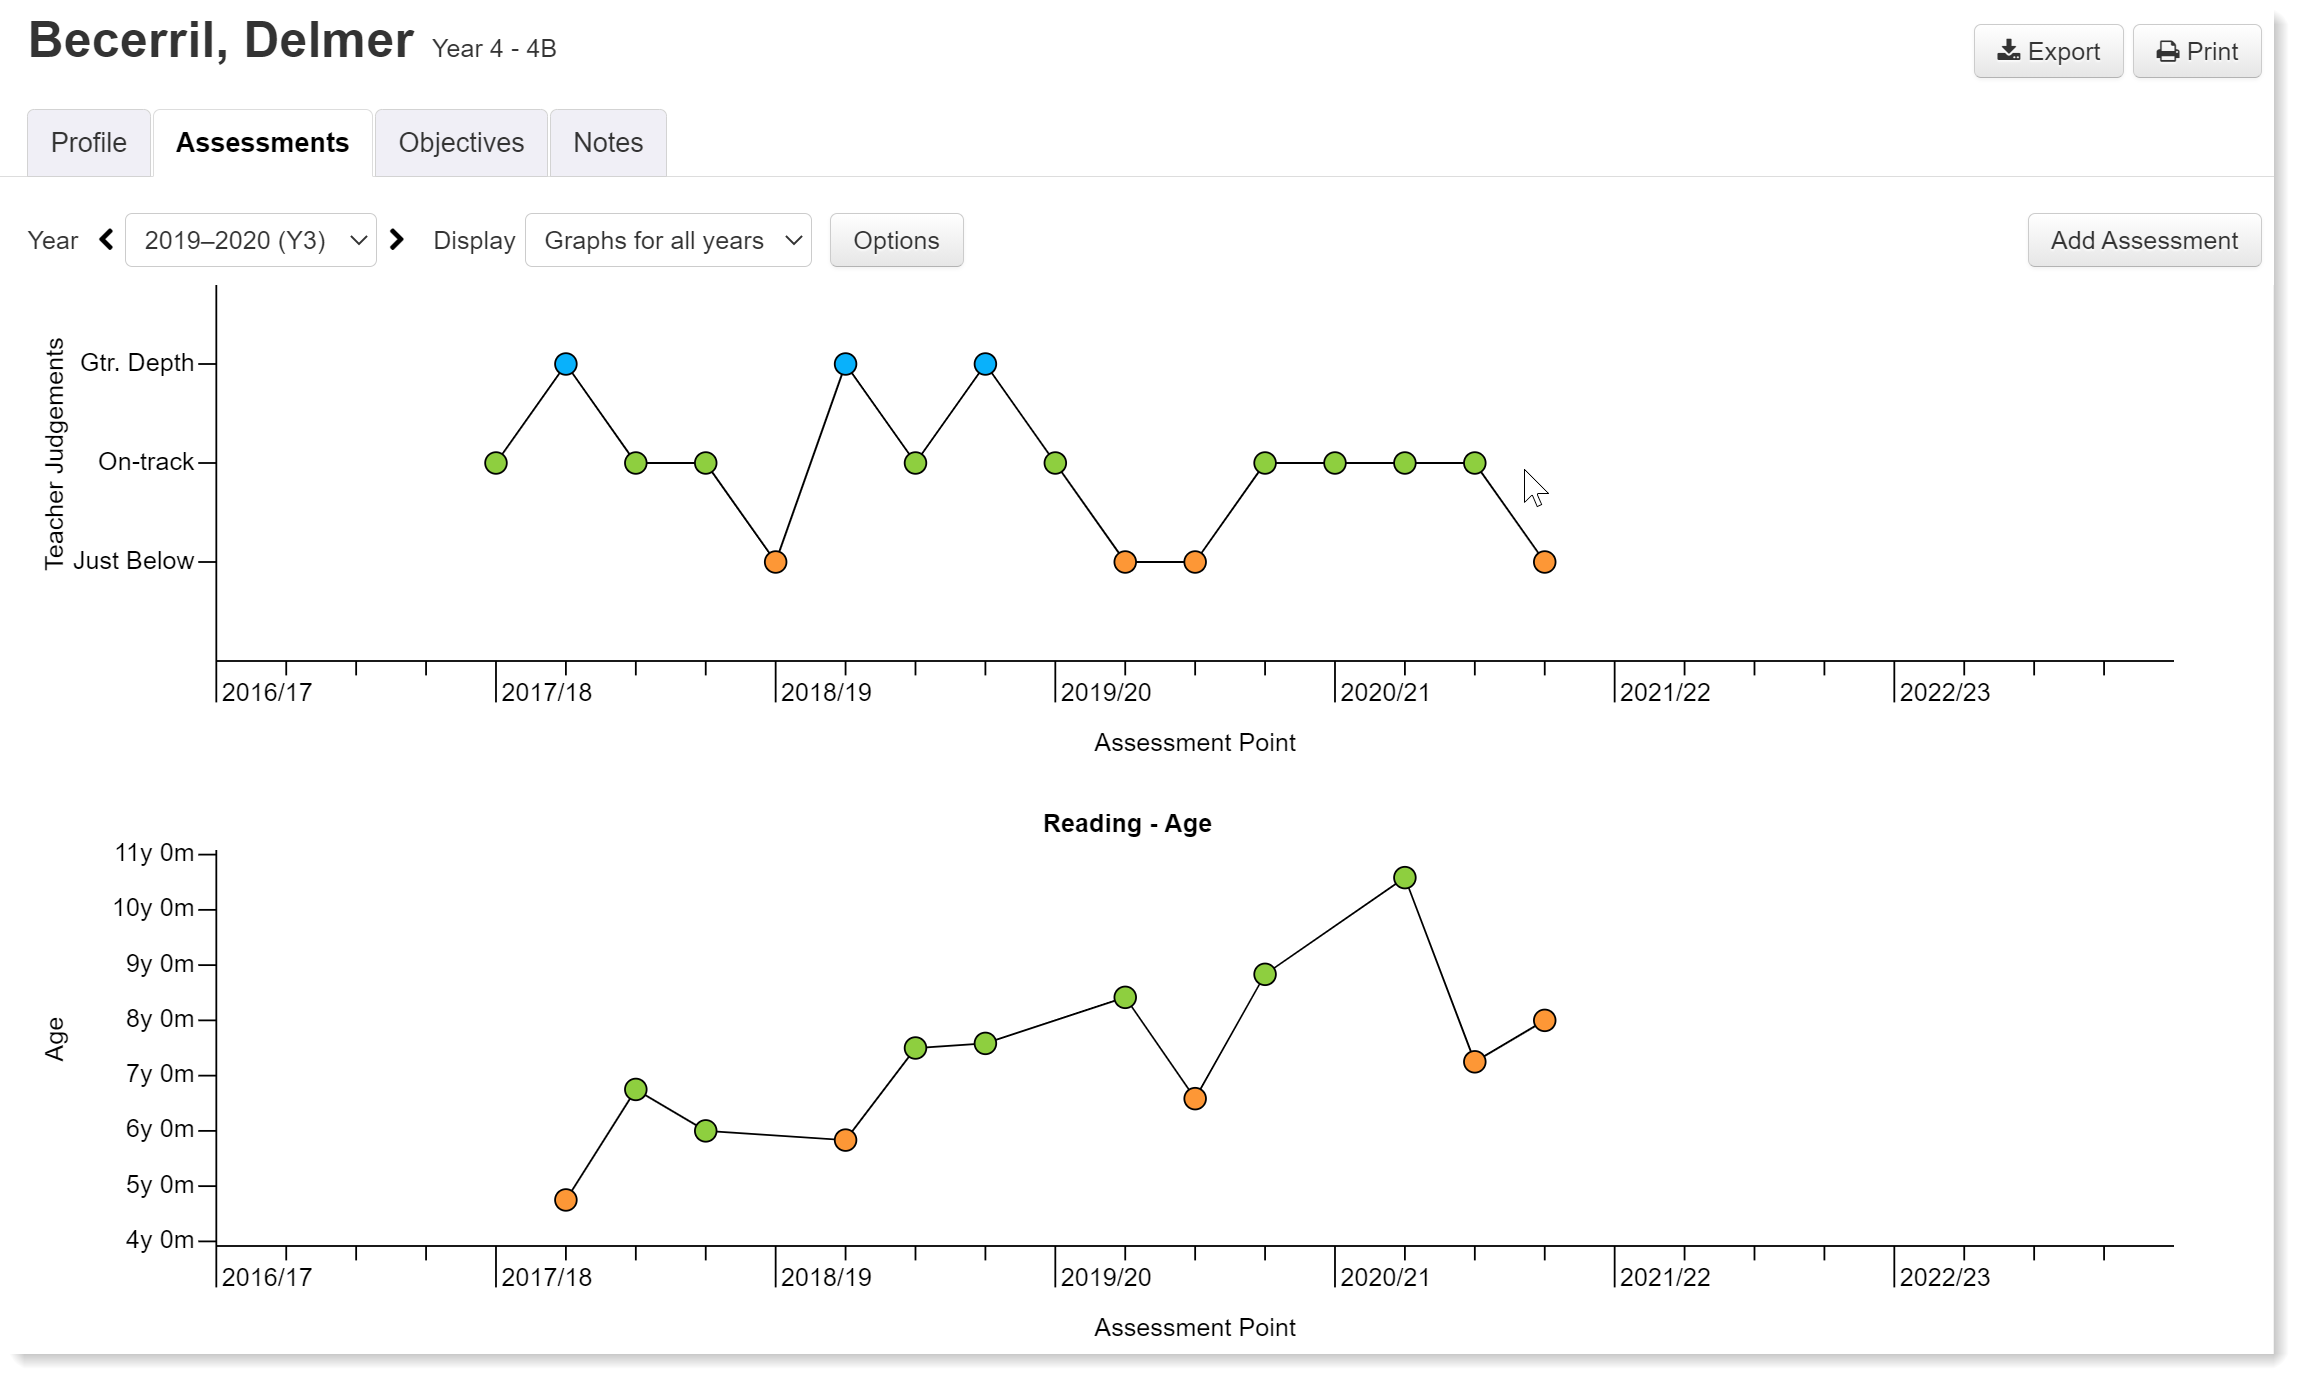
Here, we can see standardised scores and reading ages over time. Again, you select which data is displayed via the options button.
Objectives
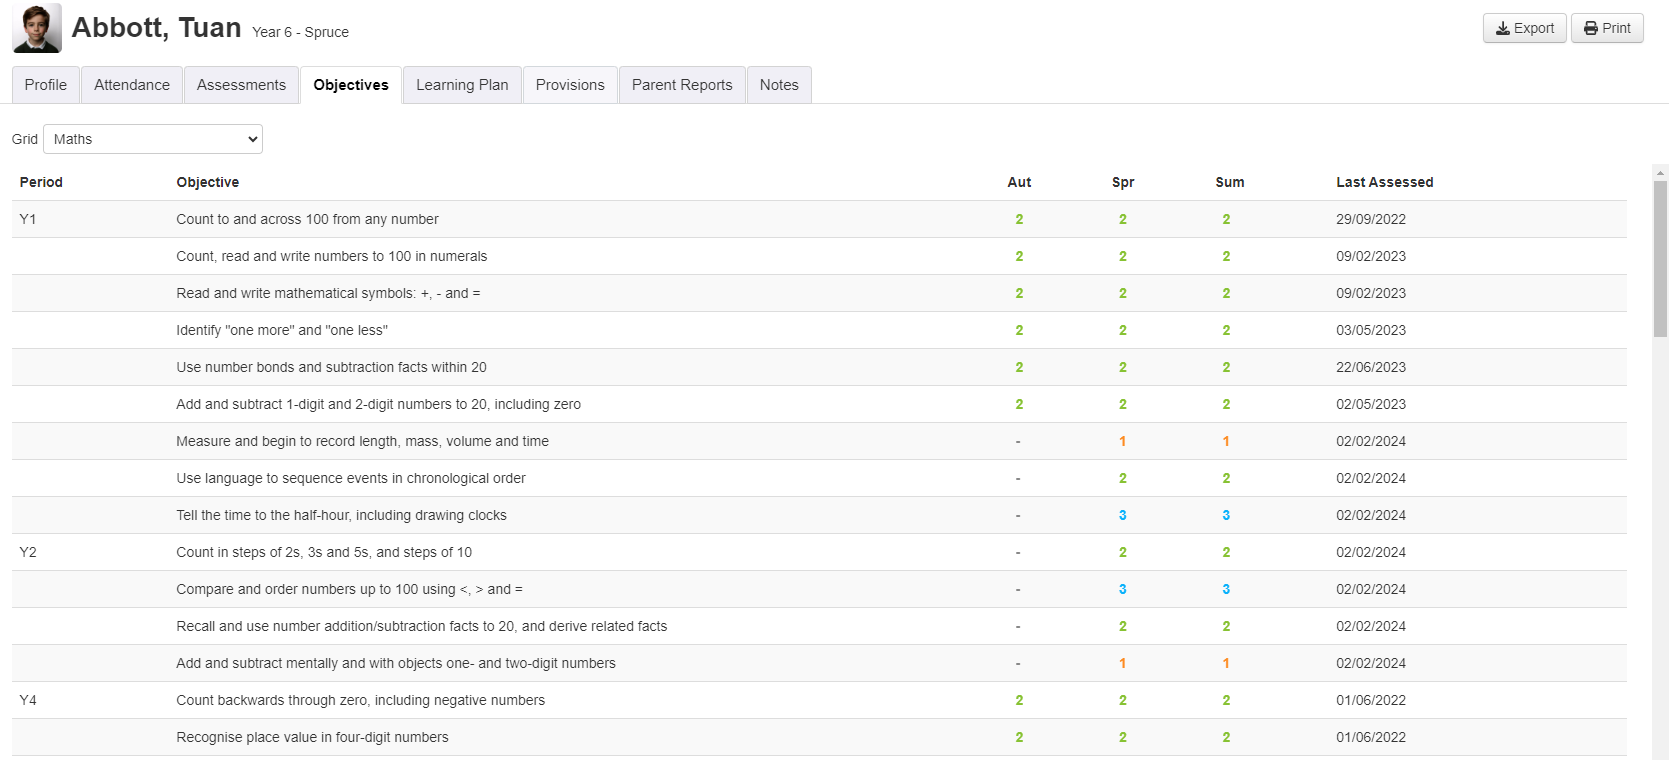
Clicking on the objectives tab shows the marks given for each objective assessed so far in the current year. Click on the Grid dropdown to change subjects.
The displayed objectives will show the period/year if the pupil has been assessed in more than one during the current academic year.
Learning Plans
See the learning plan guides for details.
Provisions
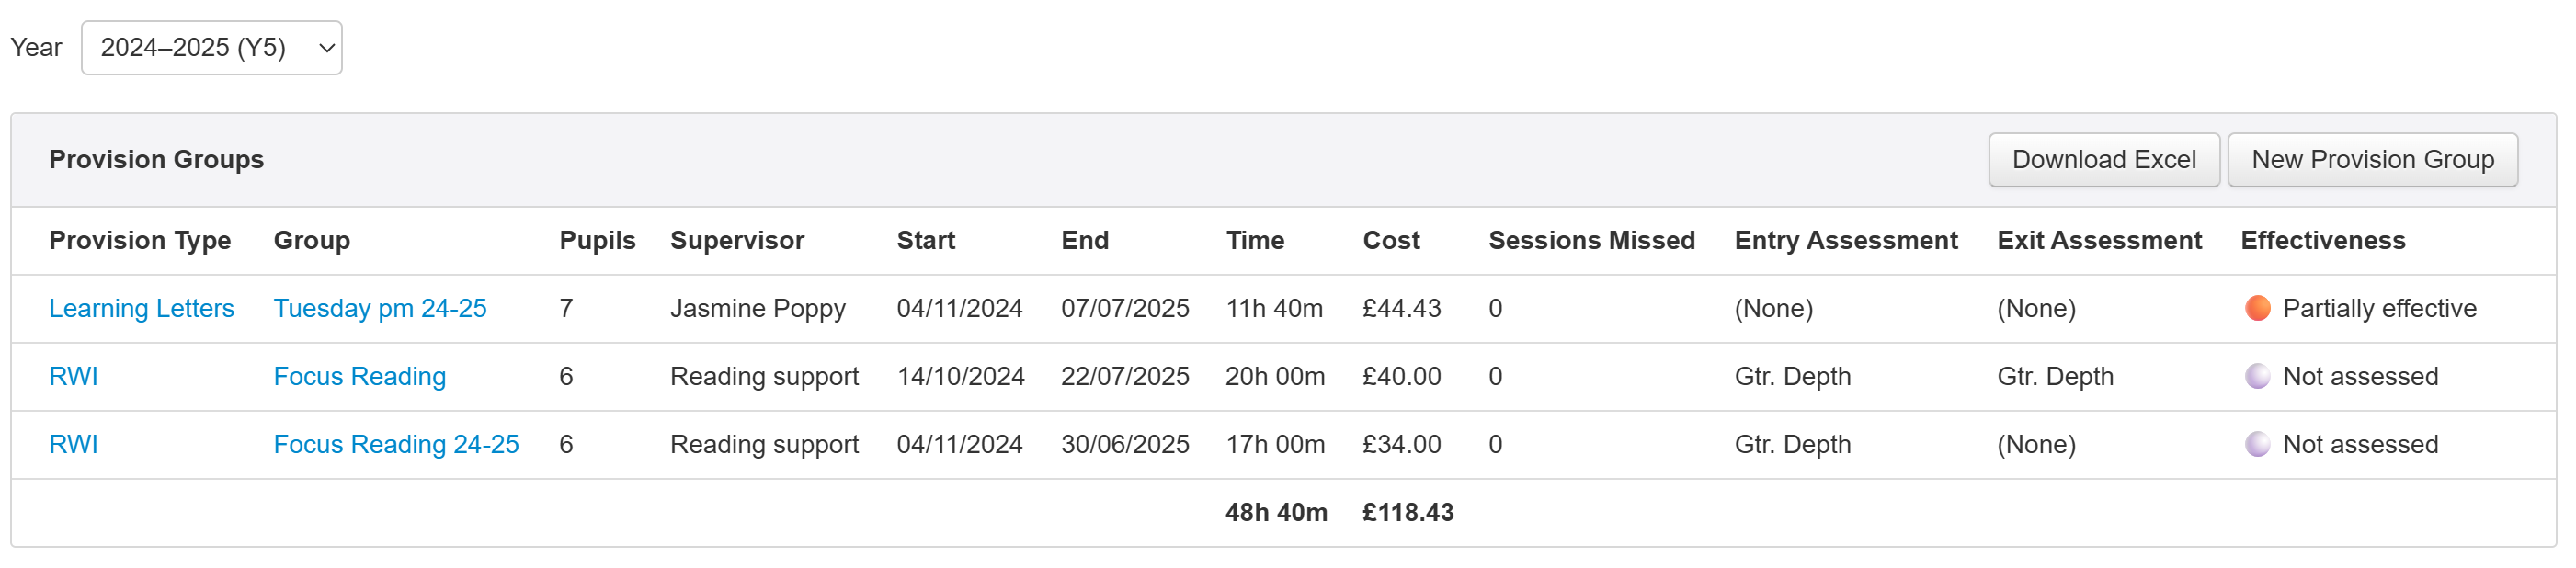
The Provisions tab lists any Provision Groups a pupil is part of.
It provides a useful summary, including total time and cost, for the selected pupil.
By default, the current academic year is displayed, with any provision groups with start or end dates within it shown. Use the Year menu to choose a previous academic year, if required.
The Download Excel button provides a simple way to download this view, in a sharable format.
The New Provision Group button begins the process of creating a new group with the current pupil already added.
See the provision mapping guides for more details.
Parent Reports
See the parent report guides for details.
Notes
The Notes tab allows you to store comments and evidence in the form of attachments (including photos) for each pupil, as required.
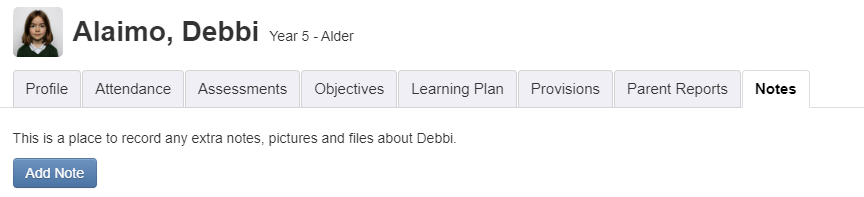
A record of comments, evidence and other important information can therefore be built up over time. This is a particularly useful tool for recording additional information on pupils with SEND.