Provision Mapping - adding provision groups
 Updated
This help guide shows how to create a provision group, assign pupils to it, schedule sessions and add costs.
Click Provisions, in the menu bar, to get started on the Provision Map page.

Adding a Provision Group
If the Add Provision Group button is missing, see our setting up and managing guide to learn how to add provision types.
The provision map acts as your central hub to see any groups that are currently in progress or concluded, plus make changes and review their success. See our using the provision map guide for tips on how to get the most out of this tool.
To get started, click the Add Provision Group button.
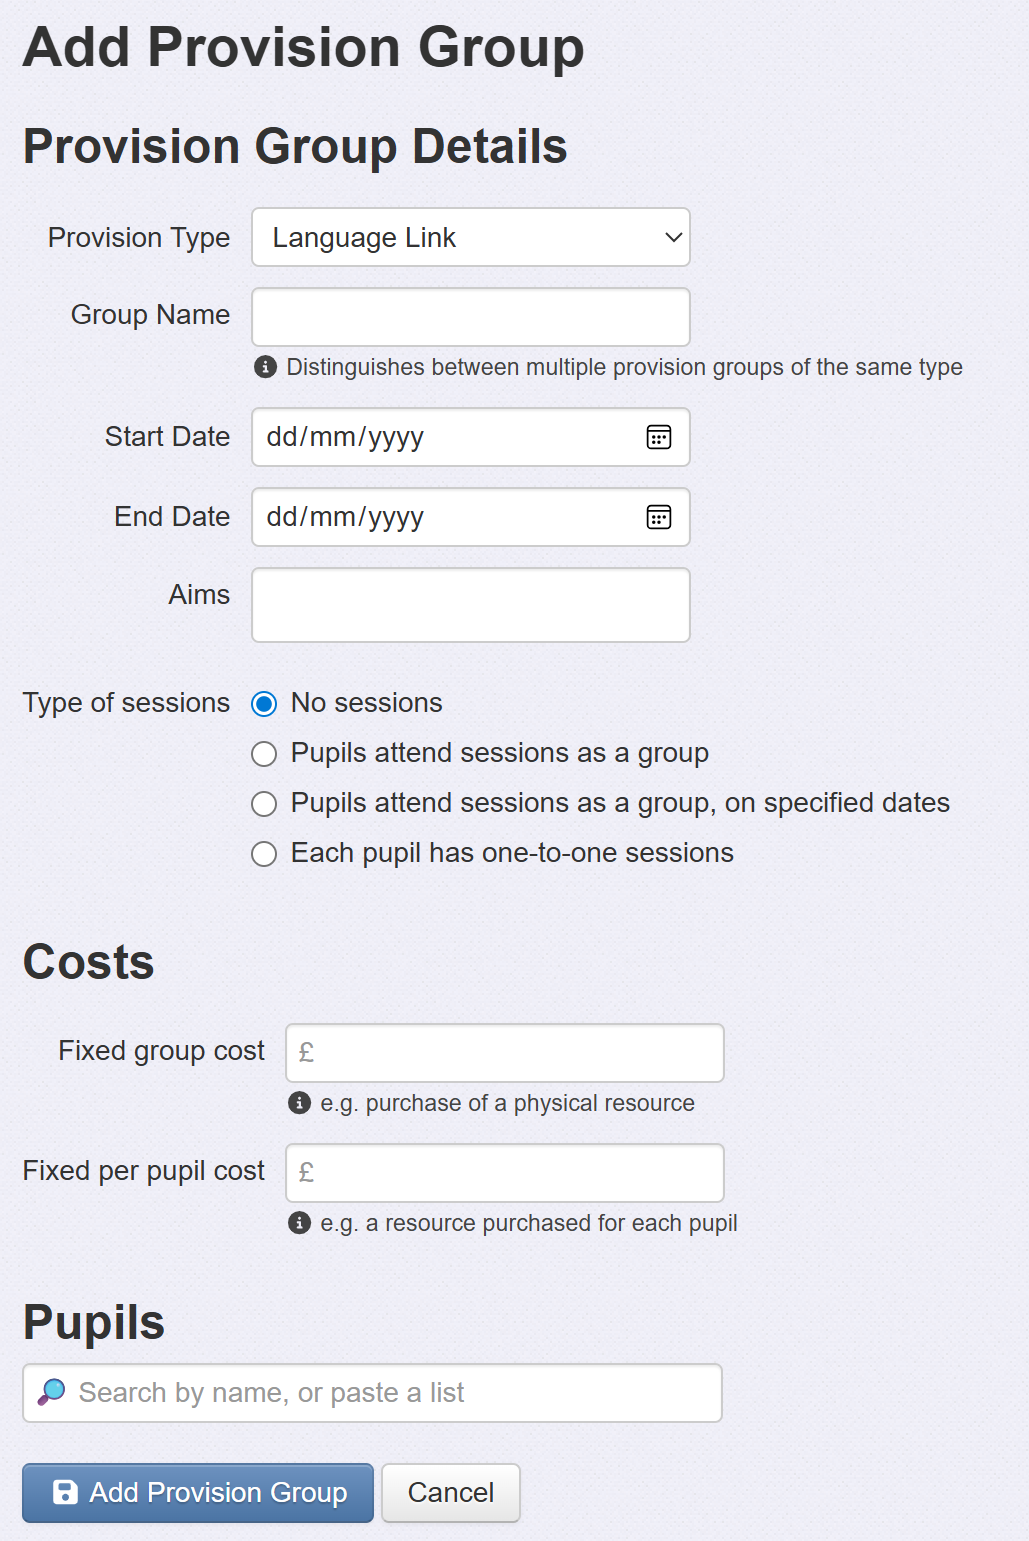
This is split into three sections. All the entries may be returned to and changed later if required.
Provision Group Details
- Provision Type - Choose from the provision types that have been added for your school.
- Group Name - This enables you to distinguish each pupil group from the overall type of provision they are engaging with. So try to use a name that has meaning for you in your school. This could be based on when the group takes place (Wednesday session for example) or the year group(s) it focusses on (KS1 session for example).
- Start/End date - A date the sessions begin and end on is required for all group types.
- Aims - An optional section to enter any broad aims or targets for the group. If left blank this will not appear when viewing the group later, but aims could still be added by editing the group.
- Type of sessions - These allow you to fine tune how the sessions are delivered. Your choice impacts on how staff costs are calculated.
- No sessions - This provision has no specific sessions. It might be a something integrated into normal lessons or delivered on an ad hoc basis. A start and end date is still required to indicate the time frame this will be active for. No staff costs will be added for this option.
- Pupils attend sessions as a group - All the selected pupils attend scheduled sessions together. Staff costs will be added on the basis of the duration of each scheduled session. The staff cost will be the same regardless of the number of pupils in the group. You need to give the number of sessions and how long each one is. You can also add the staff member, or role, that will supervise and run the sessions. It is possible to add multiple supervisors for a group. Any associated costs will be calculated accordingly.
- Pupils attend sessions as a group, on specified dates - This is the same as the previous option, with the additional ability to define the days and dates for the sessions if this is useful for your records. You can use the Days of week tick boxes to indicate repeating sessions, and/or click a specific date in the calendar (show in blue) to add ad hoc sessions (show in green). For example, you could have a repeating session on a Monday but click to remove one of them and add an ad hoc session on the Tuesday instead.
- Each pupil has one-to-one sessions - Some provisions may be delivered on a one-to-one basis. This means that the number of sessions you enter becomes per pupil. So, if you create a one-to-one group with two pupils in it and enter the number of sessions as one, then each pupil will get one session, meaning there will be ten sessions overall.
Costs
These are optional and allow you to add any fixed costs that might apply to this group.
Staffing costs can also be calculated, but this function is only available to Admin users.
Default costs may have already been added for groups of this type. These may be changed if required. For example, there might be a standard fixed cost for a type of group, but you may know that the one you're adding now incurs an additional fee for some extra resources.
Pupils
Type or paste the names of the pupils in this group.
Finally, click the Add Provision Group button to enter and save your group.
This will display a summary view of your group detail. From this view, you can make changes, add comment notes (for example, there might be a specific target this group is focussing on achieving) and record other information once the sessions are underway or completed.
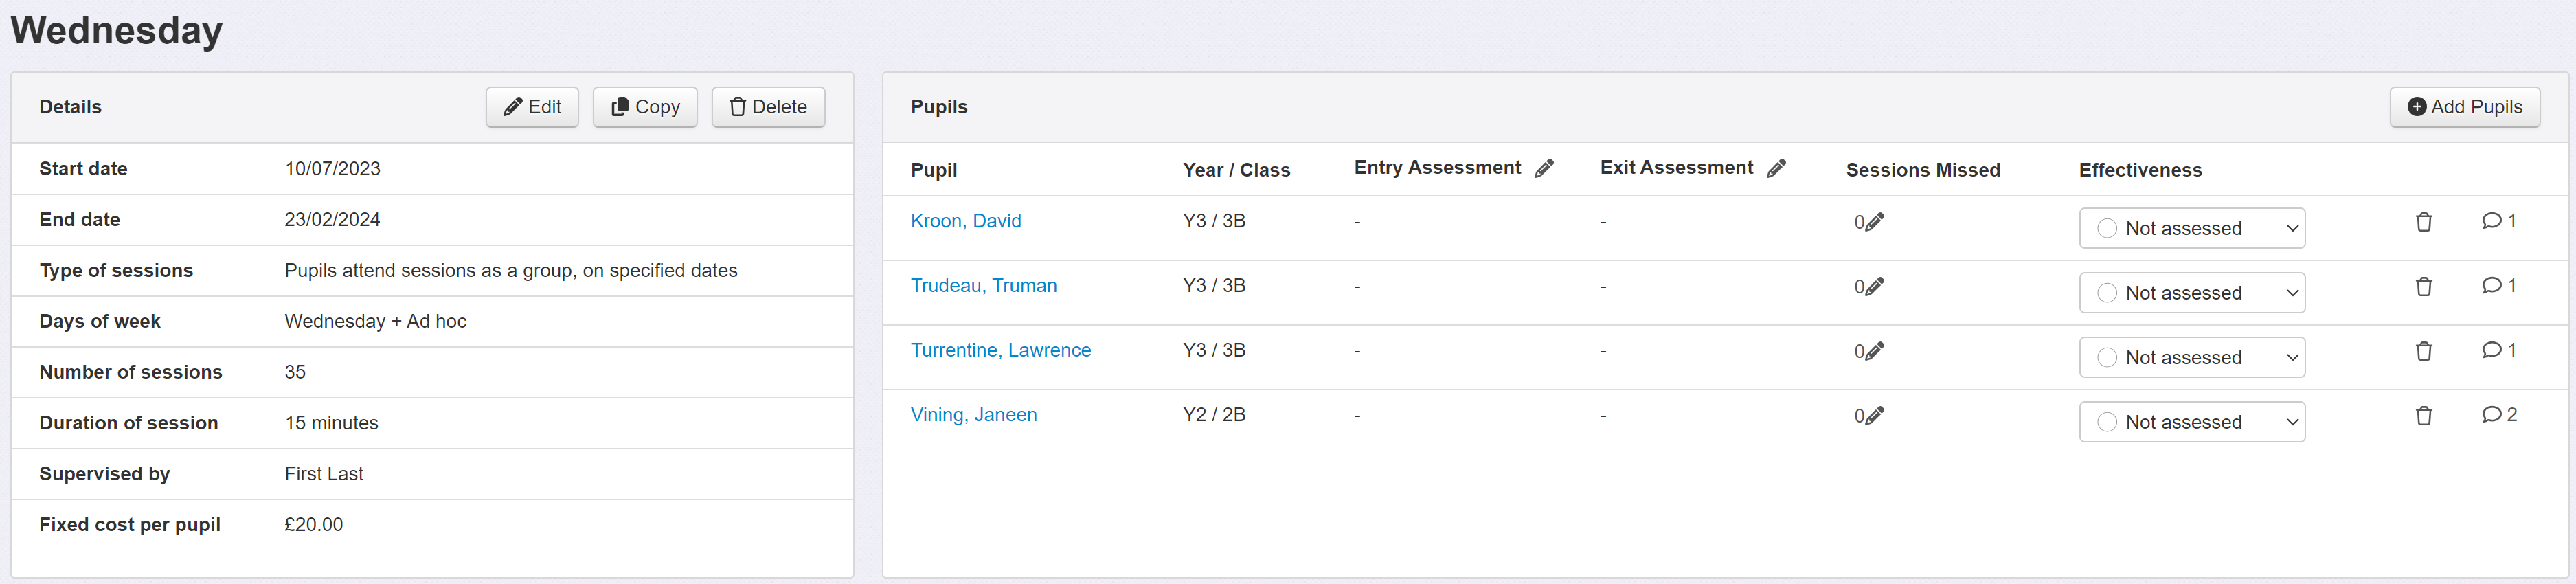
Adding Entry and Exit Assessments
Once your group is set up, you may want to add some entry assessments.
Click the pencil icon next to the Entry Assessment column header to begin.

At this point, you can choose from the following options -
Link all assessments to existing assessments - Choose this option if you want to use standard assessments in Insight. All the assessments must be the same type, subject and term. This is the quickest, and simplest, option. It re-uses assessment data you are already collecting.
Choose the assessments you want to link to.

Click Save to create the link. If assessments have already been entered, they will appear in the column and the header will update to describe the assessments in the column.
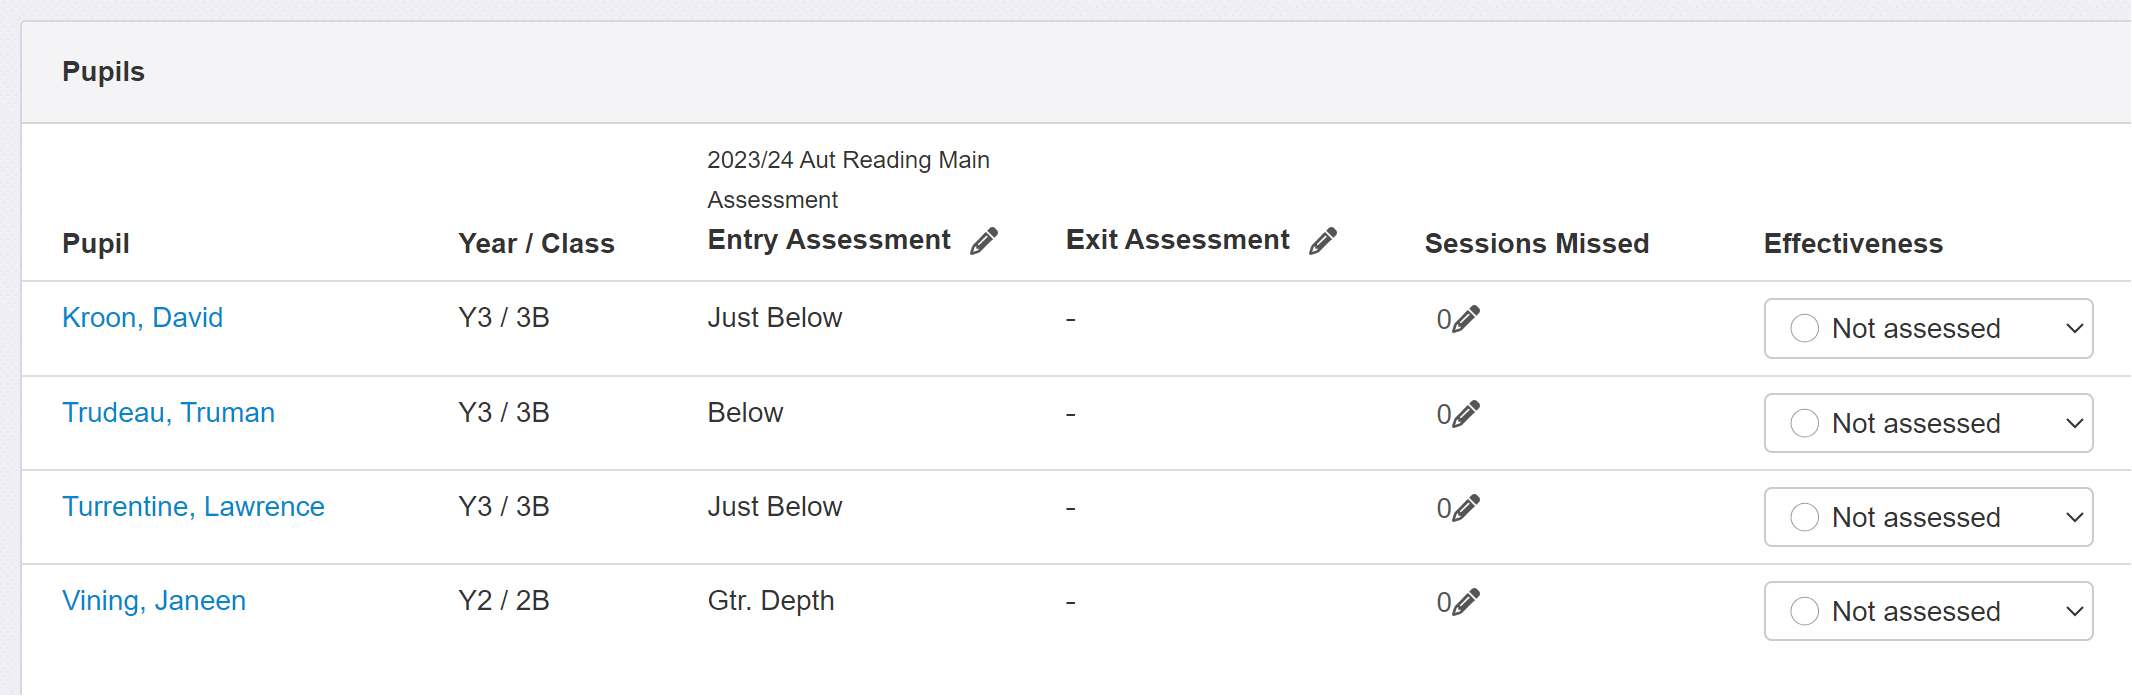
If any of the assessments are amended, they will also update here.
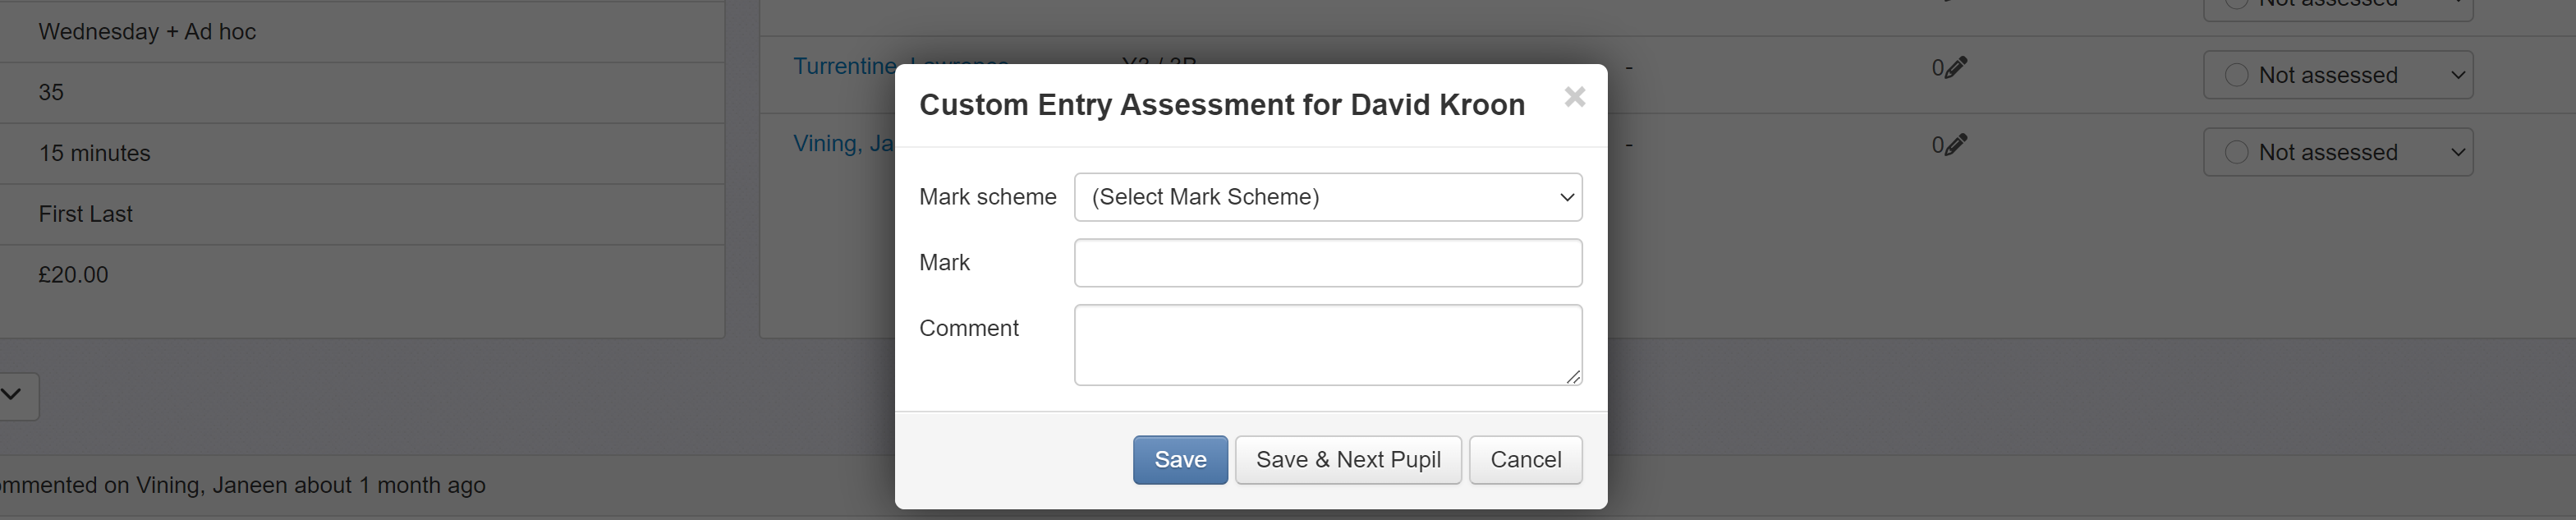
Enter custom assessments for each pupil - Choose this option if you want assessments that are separate from those entered as standard in Insight. For example, they may not fit within the standard termly or half termly assessments you collect. This option requires new assessments to be entered, and they are not usable elsewhere in Insight.
Choose the mark scheme and enter the appropriate mark. You can also enter a comment if required. Click Save & Next Pupil to save the entry and move to the next pupil in the group.
If you want to make changes at a later date, just click the column header again and choose the desired option.
Once you also have Exit assessments, the process is the same.
See our guide on using the provision map to see how you can evaluate the group and record progress.