Learning plans - Adding and using plans
 Updated
Learning plans enable you to capture and monitor information about pupils with SEND, to ensure provision is effective, and that pupils are making good progress towards their targets.
This guide details how to add and manage a pupil learning plan, using one of the Insight provided templates.
To begin, click Pupils on the main menu bar, followed by the pupil you need to begin a learning plan for.
Choose the Learning Plan tab, and you will see a button inviting you to Create Learning Plan. If your school have more than one Learning Plan template, you'll be able to select which one you want to use for your new plan.
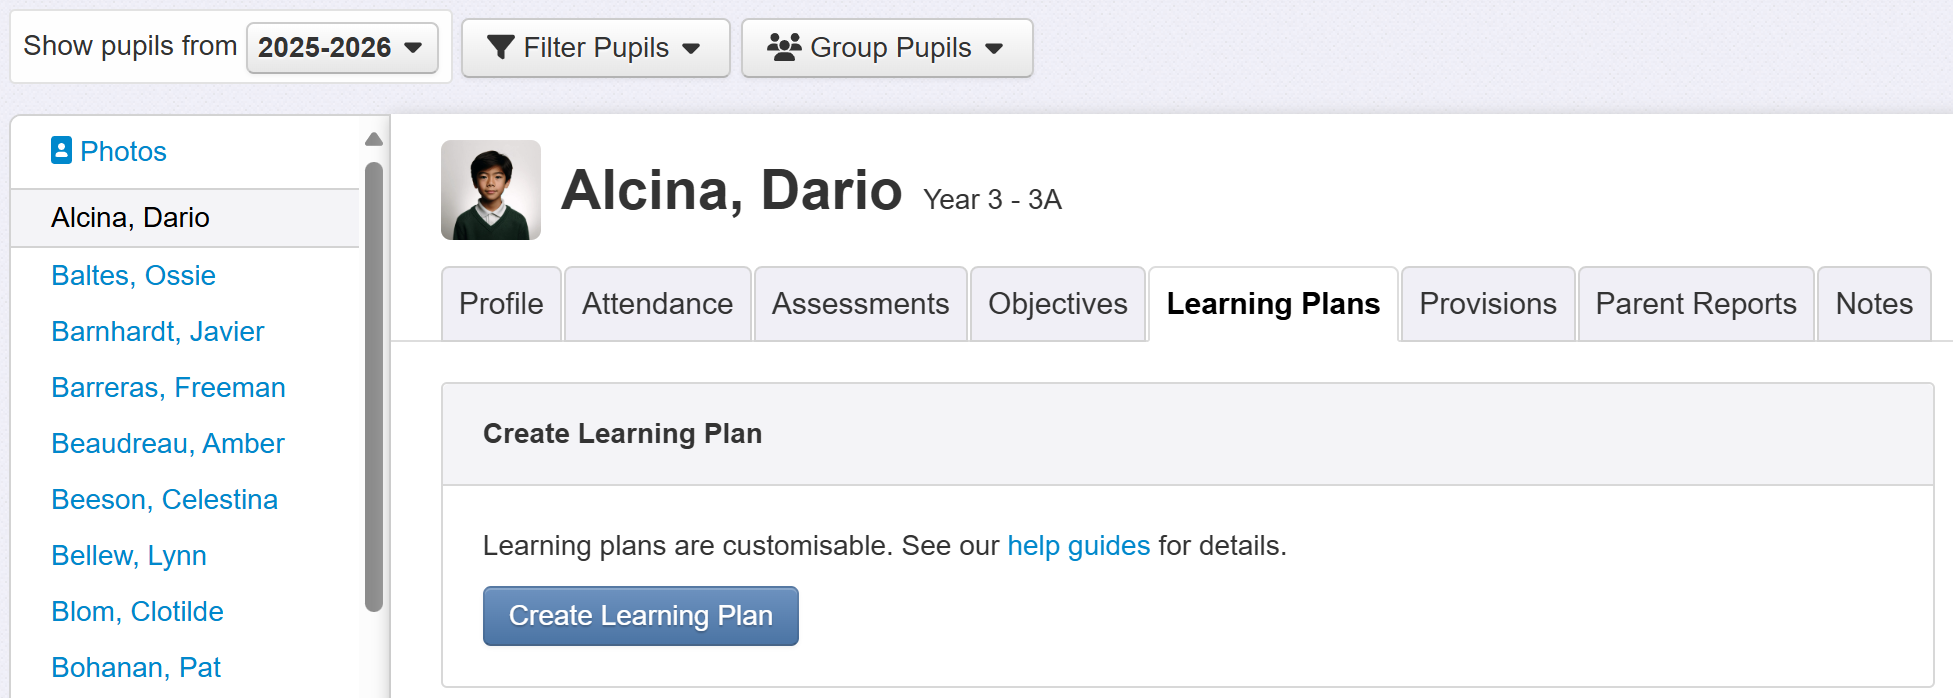
Click the button to be presented with a blank plan.
At this point, the new plan is saved, and it will continue to auto-save as you enter data and make changes.
Standard options
Each text box allows you to type the required details directly.
There are a number of other features and options detailed below.
Owner - The Owner is the member of staff with overall responsibility for the Learning Plan. Click the pencil icon to edit. You do not have to be the owner to make changes to a Learning Plan.
Start date - Initially, the date the Learning Plan was created. This is editable as, for example, you may be adding a plan that has already been running for a while or want to set one up to begin next term.
Review Date - Allows you to indicate a date by which the learning plan should be reviewed. It is recommended to enter this as Insight can automatically send a reminder email based on the date. Review dates can be set for past dates, retrospectively, if required.
Review - This could be the end of this plan or a point at which you want to check and discuss progress. When you want to complete a review, this button will offer the following three options:
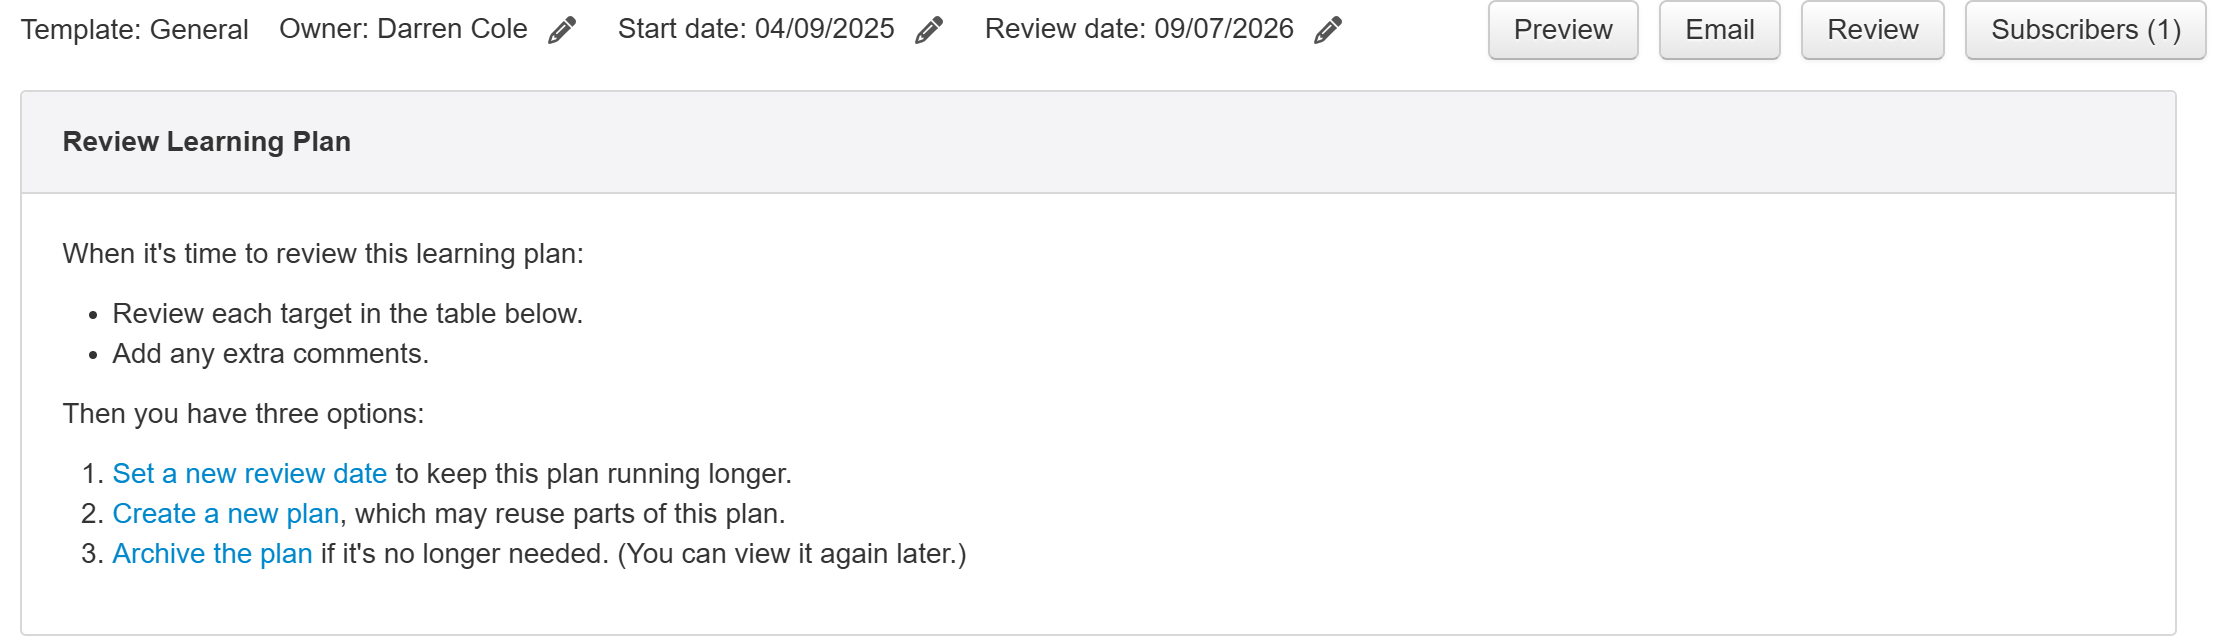
1. Set a new review date to keep this plan running longer - This option treats the learning plan as a working document and is useful if you want to continue to work on the same targets, which may include adding additional ones, and append additional comments.
2. Create a new plan, which may reuse parts of this plan - Your review may result in the existing plan being completed, with a need for a new one with new targets. This option will archive the current learning plan but give you the option to copy certain elements into the new plan to save time. You can choose a different template to the original plan if required.
3. Archive the plan if it's no longer needed (you can view it again later.) - Your review may conclude that the learning plan has been completed, with no need for a new one. Archiving the plan does not delete it, and any archived plans are still available to view.
Preview - View the Learning Plan as it will appear if downloaded or emailed. This will include any visual elements included as part of a Word template. Previewing also gives you the option to download the plan as a PDF or a Word file. Learning plans may be downloaded in bulk from the Learning plans report.
Subscribers - Related to the review date, this allows you to indicate any staff to email when the review date is approaching. Click the button to see a list of users in your school (excluding any governor user types) and select as appropriate. Staff will be emailed before the review date (3 days before by default but an admin user can change this setting), including a link to the learning plan concerned. The Learning Plan Owner is automatically added to the Subscriber list and cannot be removed. If you subsequently change the Owner the previous owner will remain on the Subscriber list but may be removed.
The number of subscribers will be indicated on the button once added.
You do not have to be a subscriber to make changes to a Learning Plan.
Comment Boxes
Depending on the Learning Plan template used to create the plan, there may be a number of comment boxes.
These should be completed as appropriate.
Assessments
It may be useful to reference certain existing assessments as part of your learning plan.
Depending on the Learning Plan template used to create the plan, there may be the option to add assessments.
Click Add Assessment to see assessments for the current pupil. The current year, and last summer, is shown by default, but the Academic Year menu allows you to choose any period.
Just click any assessment to add it to the learning plan.
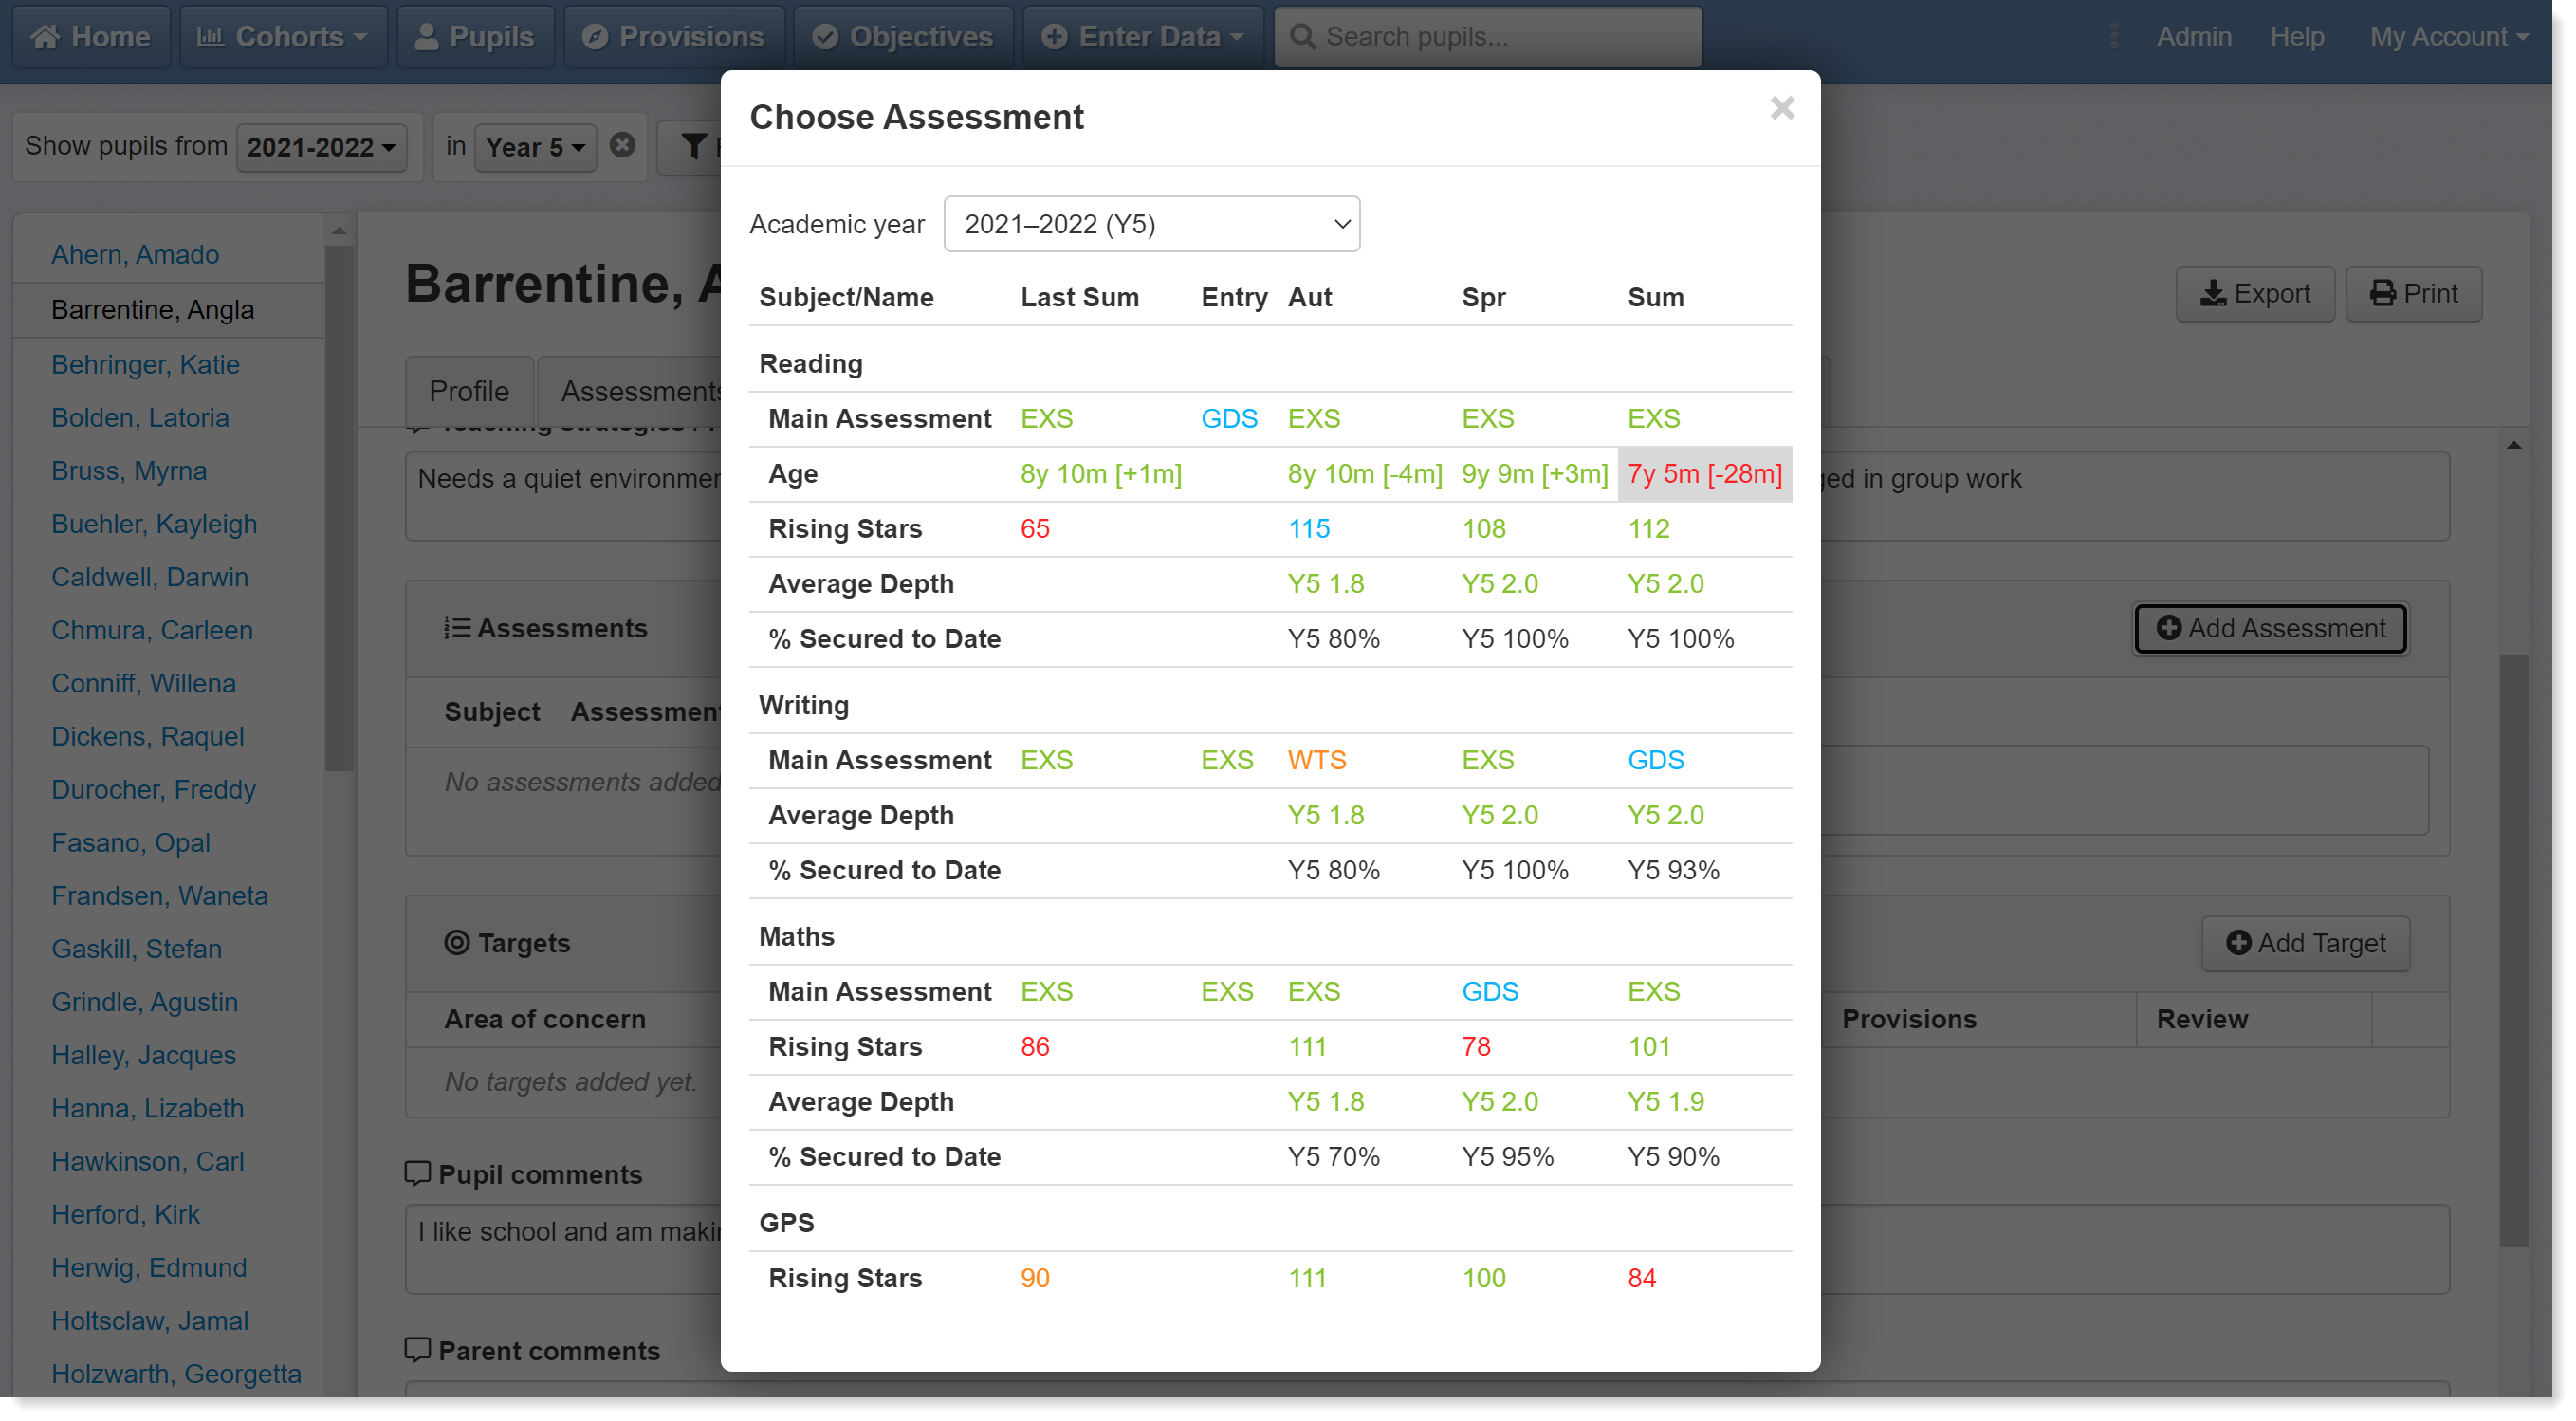
Once added, you can use the arrows icon to drag assessments to place them in the desired order. The small trash icon allows you to remove any assessments if you need to.
It may be useful to add a narrative or additional assessment information. Use the Other assessments/notes box for this.
Targets
Depending on the Learning Plan template used to create the plan, there may be the option to add targets.
Targets enable you to give clear expectations and an outcomes focus to your plan.
Click Add Target to add a new target row to the table.
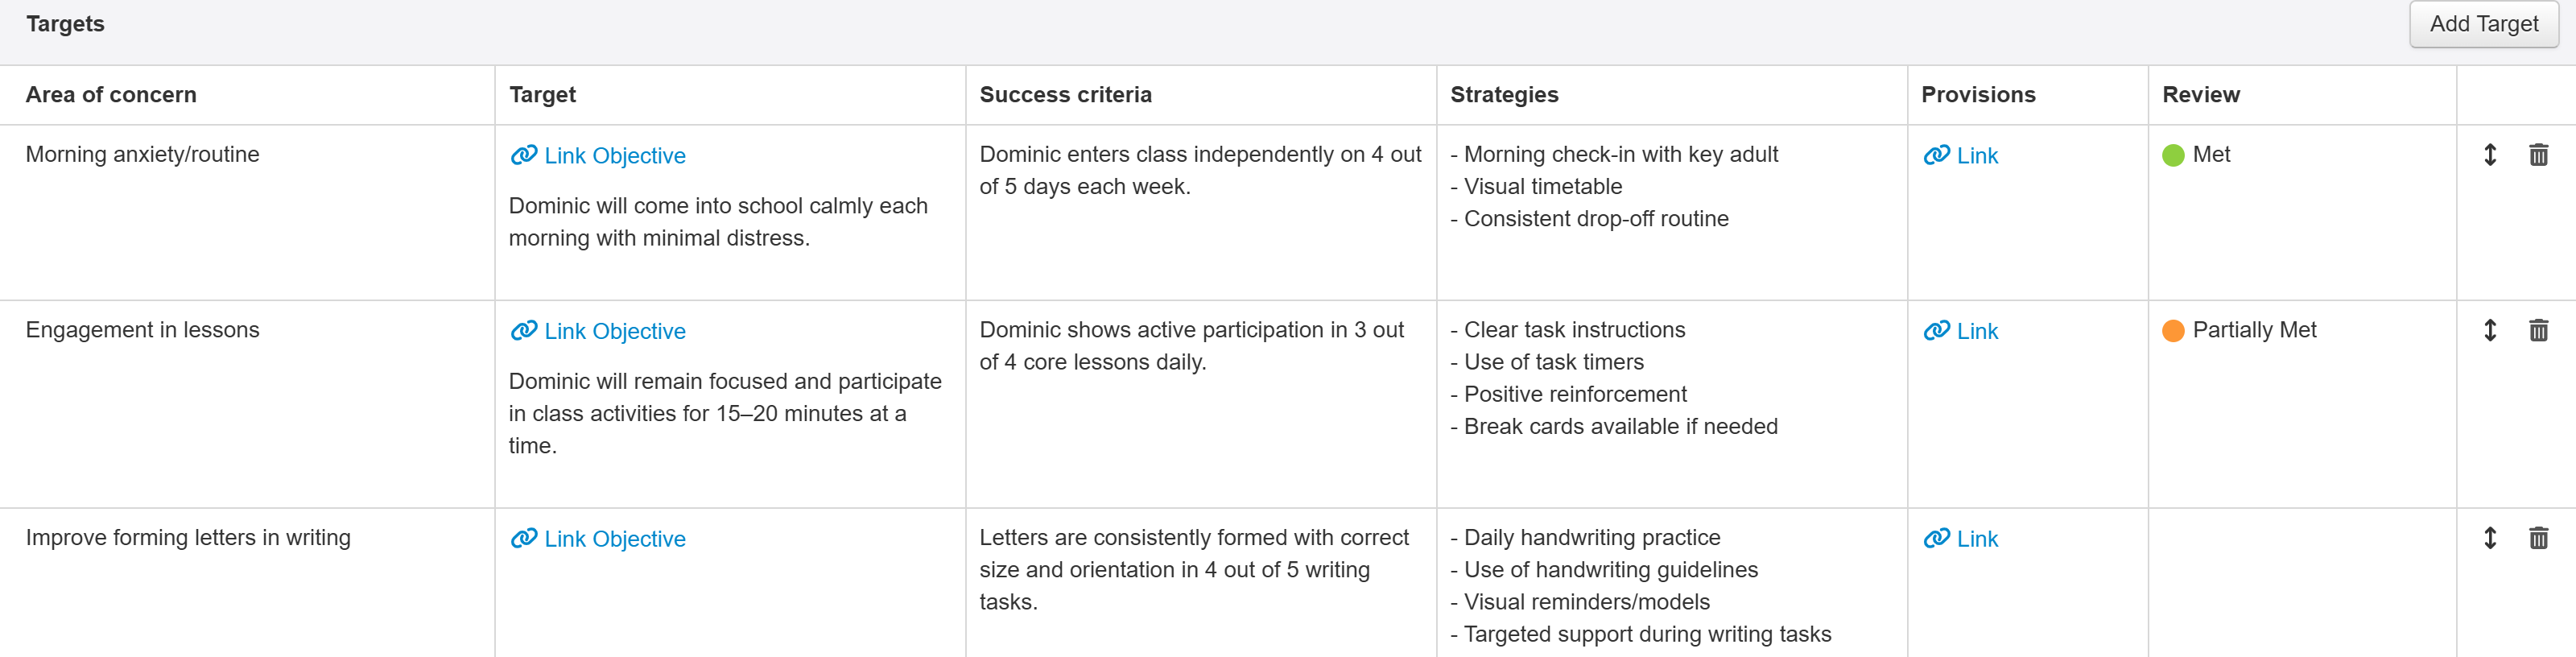
Simply click in each section and type to complete it.
If you add multiple targets, you can change the order by clicking and dragging the double arrow icon on the right of the target table.
The trash icon allows you to delete targets.
Linking Objectives
Depending on the template, you may have the option to Link Objective. Objectives are those found in the Objectives feature and may be useful to link to your targets, particularly if you have a set of standard objectives you'd like to use for consistency and time saving.
Click Link Objective to begin. This will ask you to select a collection. These will be any of the grids you have available in your school.
Once selected, you can scroll through the objectives to find the one you want, or you can type any words to search for.
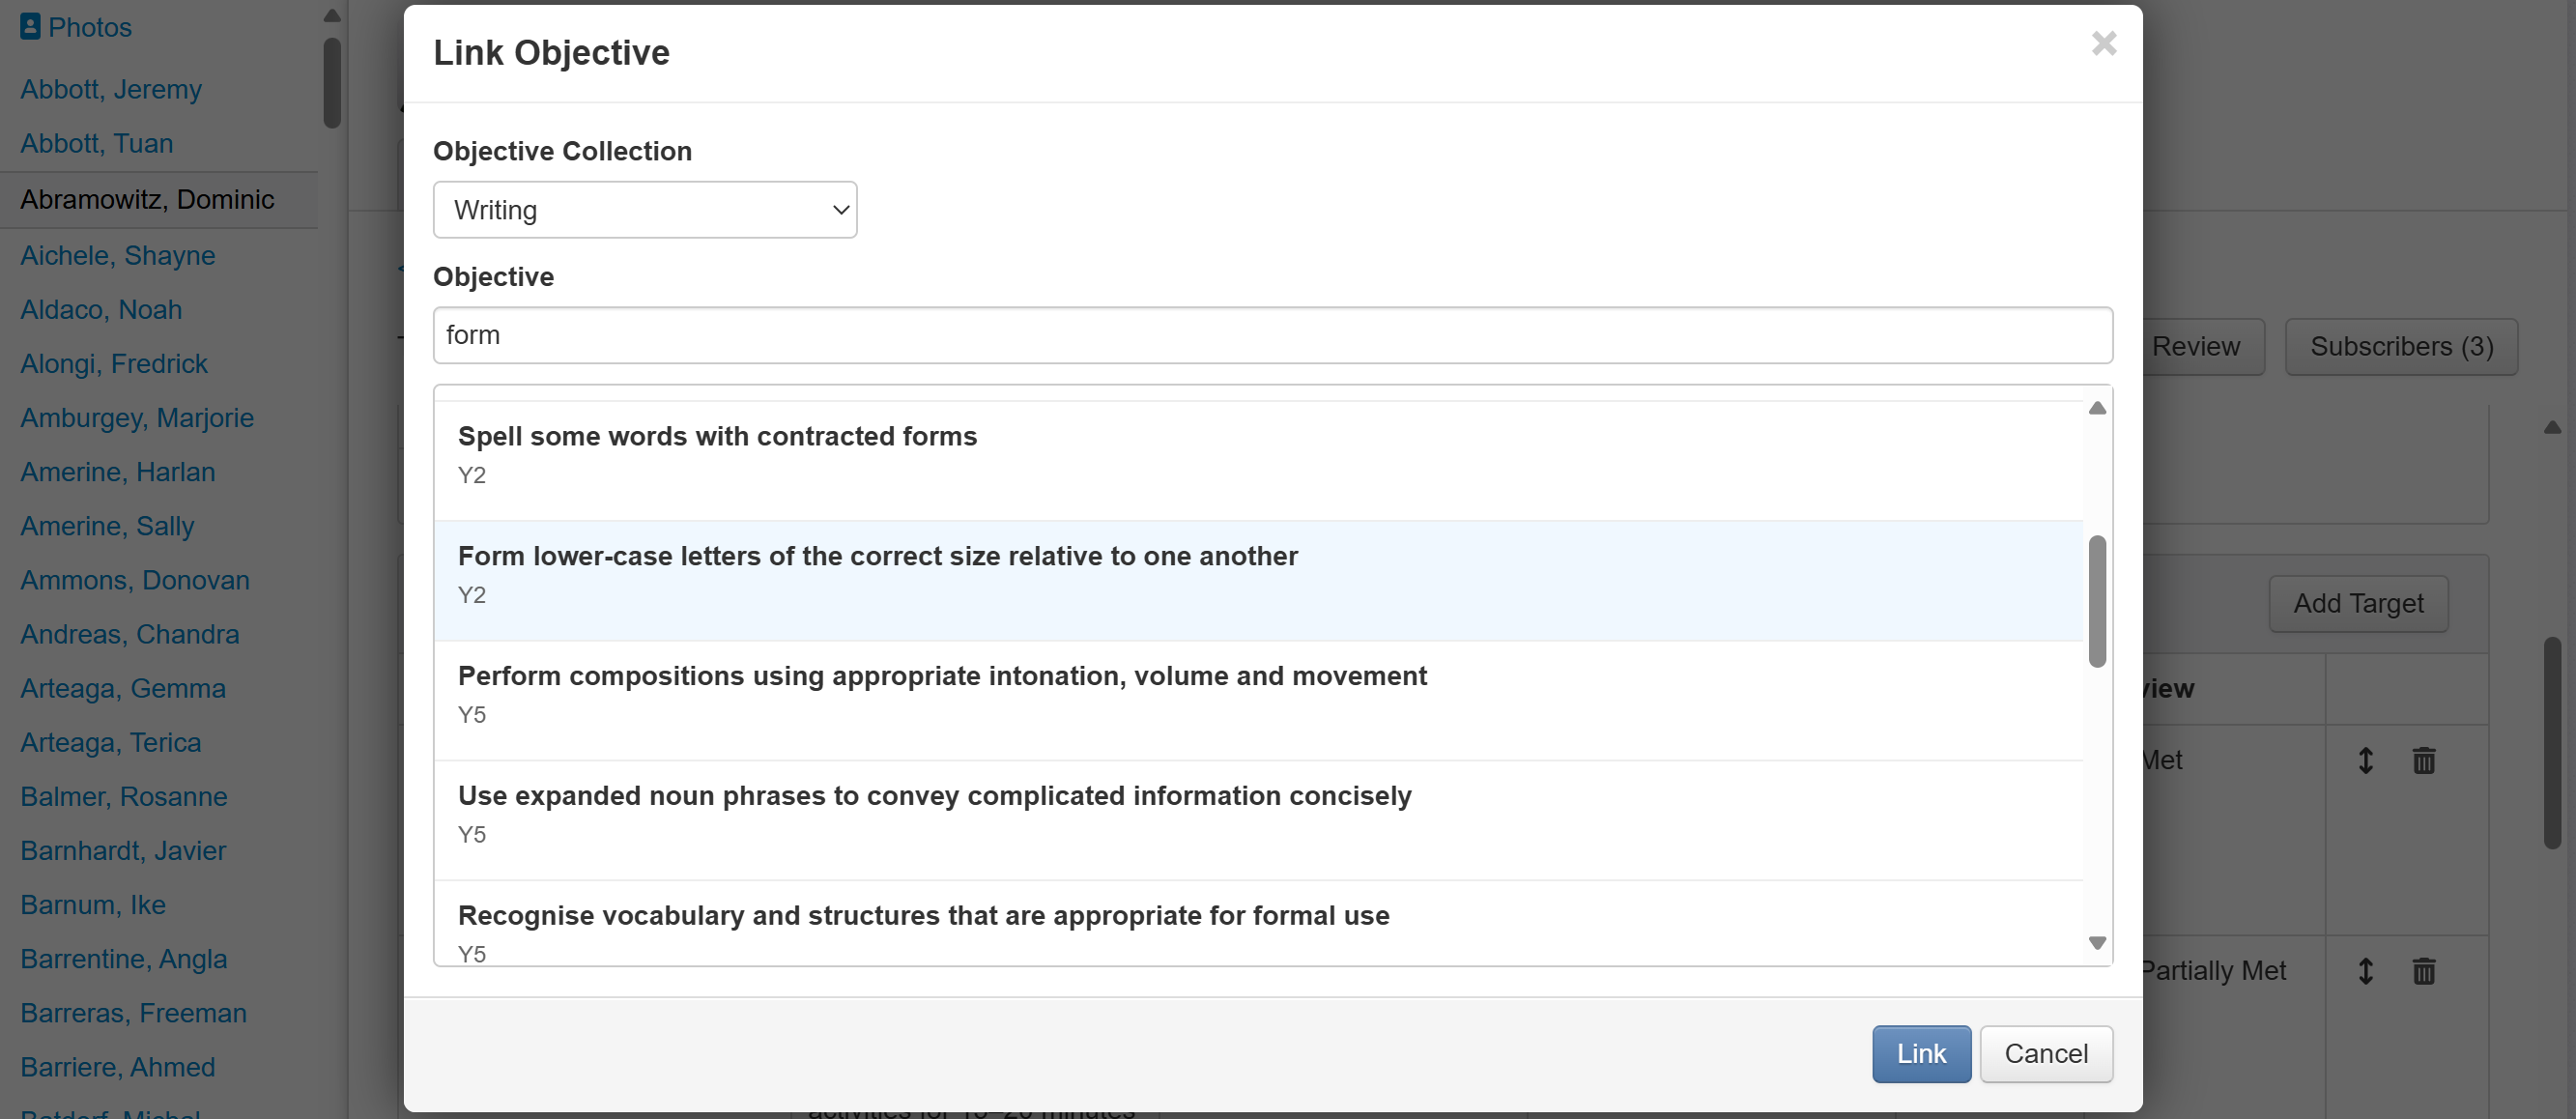
Click to select the desired objective and click Link.
The objective will appear in the cell. The shaded box will indicate any existing assessment recorded for that objective.

You can also add any additional text by clicking and typing beneath the linked objective.
Just click Unlink objective if you want to remove it. See the section on Review, below, for how you can alter the assessment against the objective.
Linking Provisions
The Provision cell allows you to link to any provision groups you have in your school. Click the Link to see your list of provision groups.
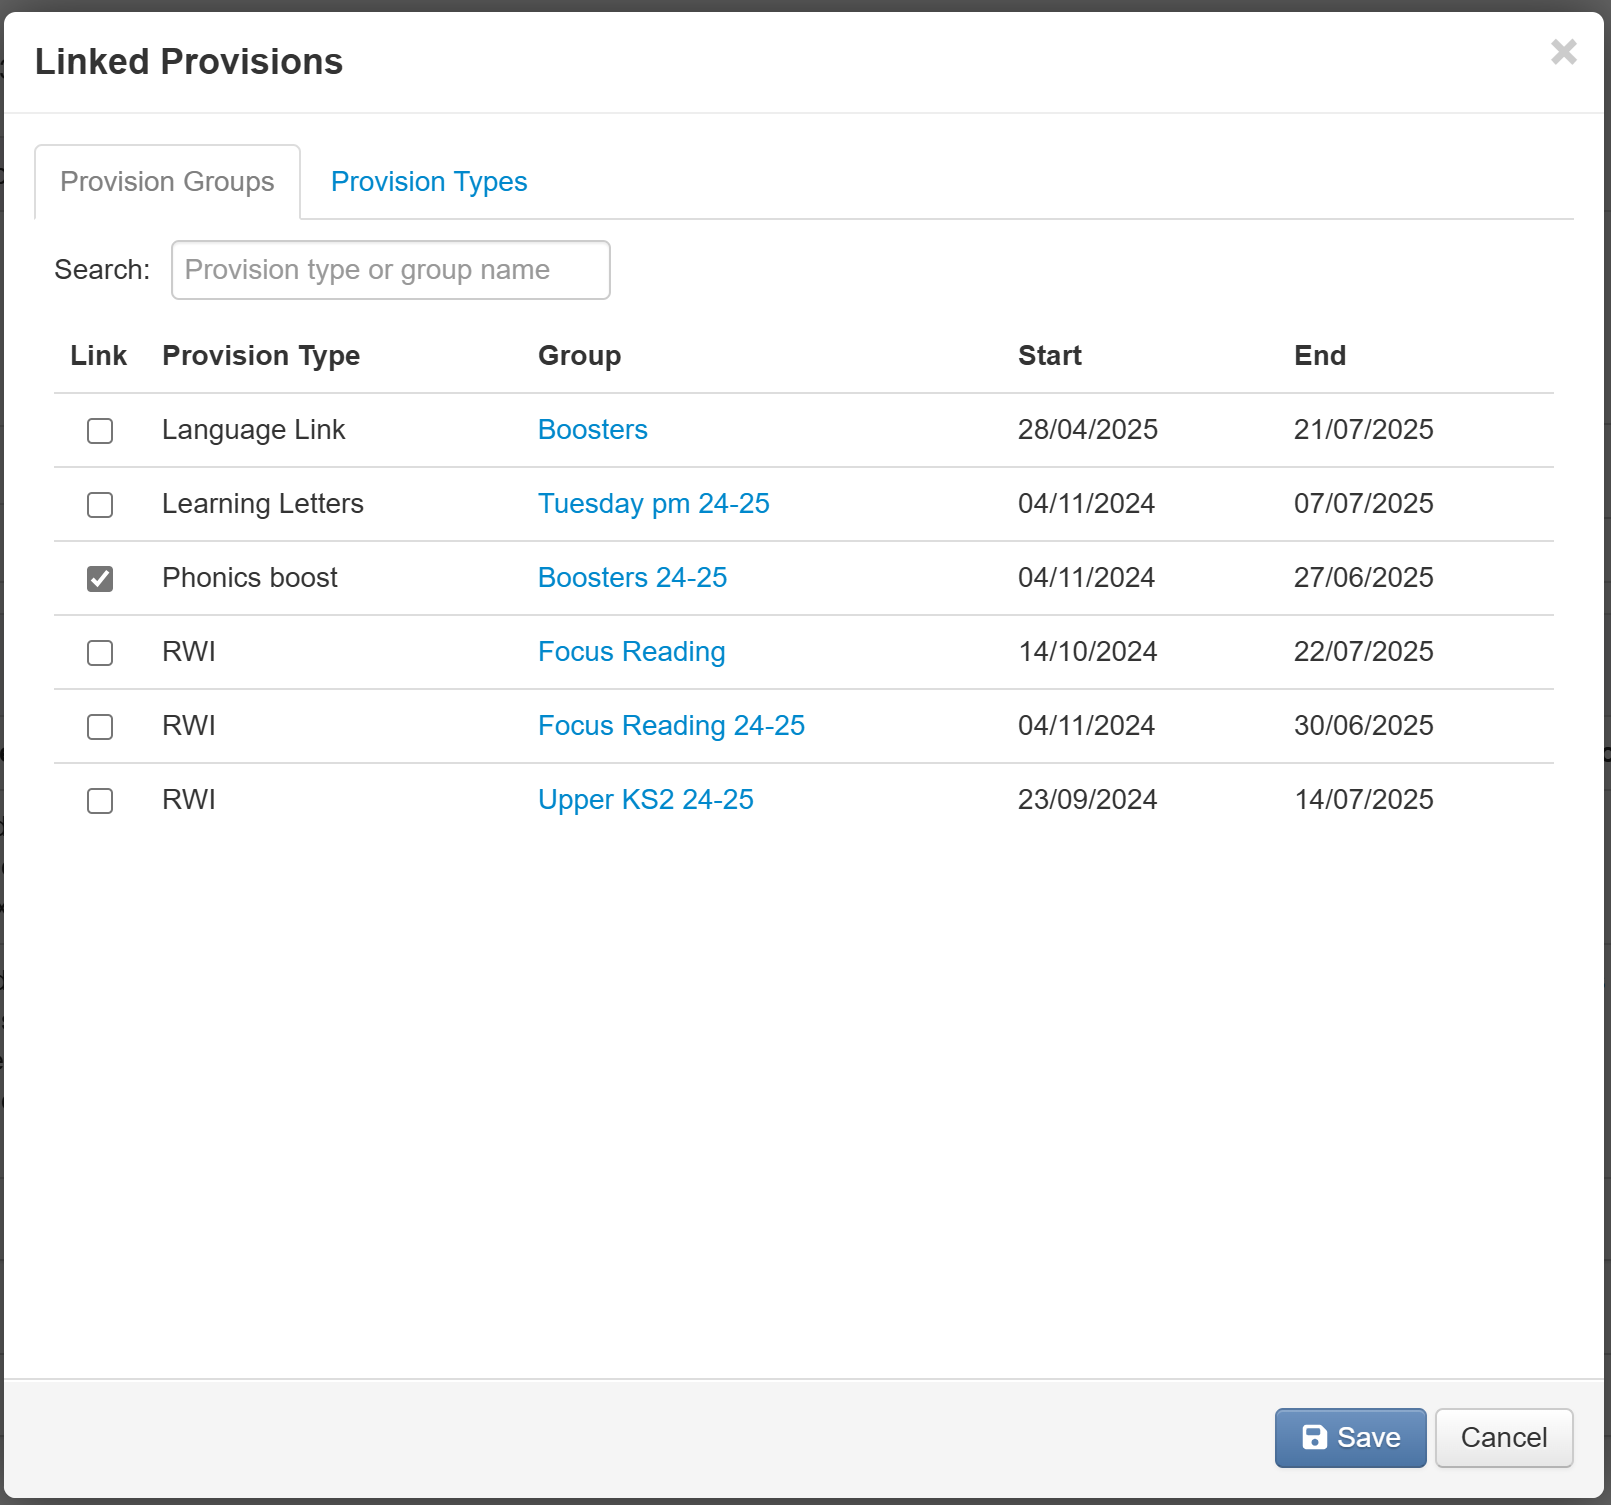
To link the Learning Plan to a Provision Group, click the tick box(es) as appropriate, then click Save. This will add the pupil to that provision group within the Provision Mapping feature. See our guides on Provision Mapping for more detail.
If you're not using provision groups, or not using them for some pupils, you can click the Provision Types tab to choose a type the pupil is in receipt of.
Reviewing the target
The Review cell enables you to give a broad indication of outcomes for each target. Click in the cell and choose the appropriate option.
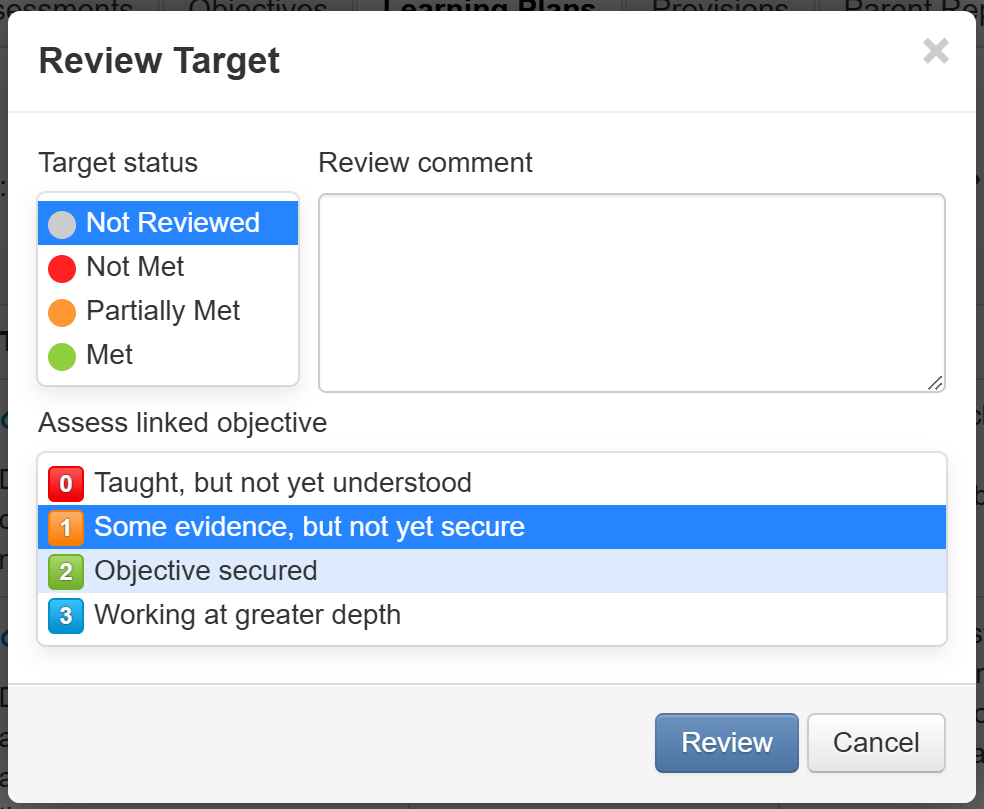
If the target has a linked objective, you will also have the option to assess it, independently of the overall Target status. For example, you might want to indicate that the learning plan target has been met, but the pupil is now working at greater depth against the objective.
Objective assessments made against the learning plan target will also be visible in the main Objectives grid and vice versa.
If you have linked a provision group for a target, when you add a review outcome, it can also add the equivalent effectiveness review to the provision group for that pupil. If a pupil has any linked provision groups, a tick box will appear in the review box. If ticked, the assessment will also be added to any linked groups. For example, adding a review of Partially Met will add Partially Effective to the provision group.
Emailing a learning plan
It is possible to email your learning plans directly to parents/carers and for them to enter comments directly.
See our emailing learning plans guide for full detail.
Deleting a Learning Plan
If a Learning Plan has been created in error, or maybe as a practice, you may want to delete the plan completely.
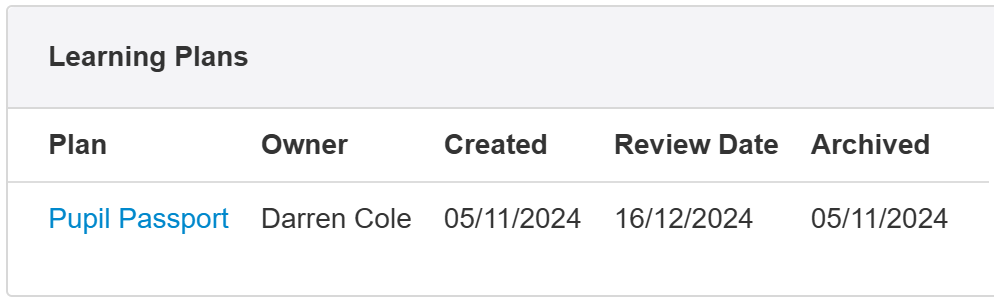
Only Archived Learning Plans may be deleted. See the section on Review above.
Any pupil with archived plans will have them listed in their Learning Plans tab.
Click the plan you want to delete to open it on screen.

A Delete button will now be available to permanently delete the Learning Plan.
If you archived the plan in error, the Un-Archive button will make it active again.