Learning Plans - Making in app template changes
 Updated
The built-in Learning Plan templates have been designed to meet the majority of needs. But you may have specific requirements in your school that you'd like to reflect in your headings, content and layout.
This guide, and the below tutorial video, details how an Admin user can make changes to a template using tools within Insight.
Making changes to a Learning Plan template will also apply those changes to any existing pupil Learning Plans, including any archived ones. It is worth double-checking that any destructive changes, such as removing comment boxes, are acceptable. If not, it may be better to create a new template.
When making changes to templates, you have two choices. Many customisations are possible directly in Insight. If you want a more bespoke template, Insight supports using a Word template for learning plans. Word templates afford complete control over the content and appearance, but can be time-consuming to create and maintain.
Once you use a Word template, you lose many of the in application customisation options, so it is worth exploring these first.
Future changes to a Word template can also be more complex compared to an in application template.
If you think you may require this level of customisation, see our additional advanced guides, beginning with editing a Word template.
Making template changes in application
To begin, view the learning plan templates via Admin > Learning plan templates
For this guide, we'll use a template based on the Learning Plan template type. Most of the below applies to the other template types too.
Click the Learning Plan name link to access to the edit area. This has some buttons at the top and a lower section, split into six tabs.
Renaming, archiving or deleting the template
If you think you might require additional templates, perhaps for specific foci, it is worth naming this template according to its intended usage. Use the Rename button to achieve this. Renaming a template will change the template name for any Learning Plans that are using it.
You can also Archive the template. Archived templates are not available for any new learning plans, but any active plans will remain. This may be useful if you create several templates and want to tidy up, to make sure other staff use the intended template going forward.
If a template is no longer in use, and there are no historical learning plans using it that you want to keep, the Delete option is available. This is also useful if you have created a template to experiment and just want to remove it.
When you click the Delete button, a confirmation warning will be displayed. If your template has current or archived plans using it, the number will be shown, and you will be required to type the name of the template to confirm the deletion.
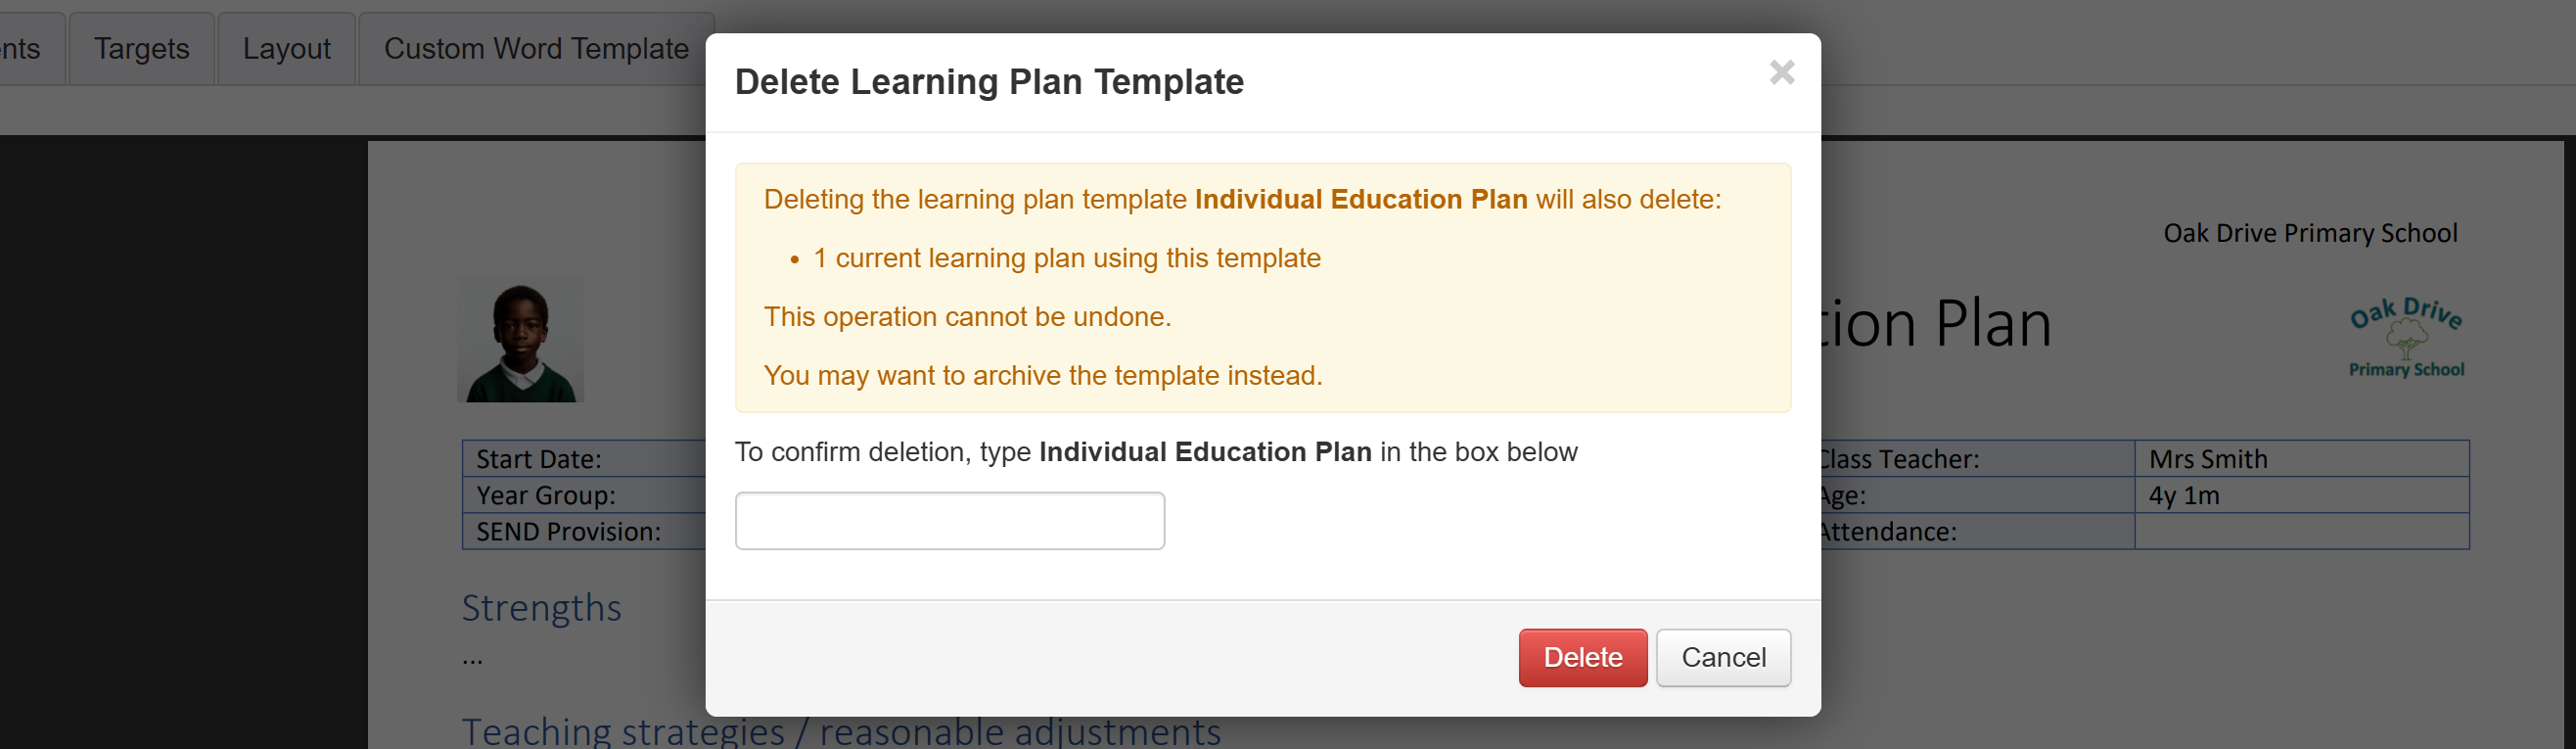
If there are no learning plans using the template, you will not be required to type the name, as there are much reduced implications for the deletion.
Deleting a Learning Plan template is final and there is no way to restore it, once deleted.
Restoring an archived template
Occasionally, you may decide that an archived template is required after all. Or perhaps it was archived in error.
To restore the template, click its name in the Learning Plan template list.
You then have a button to un-archive the template.
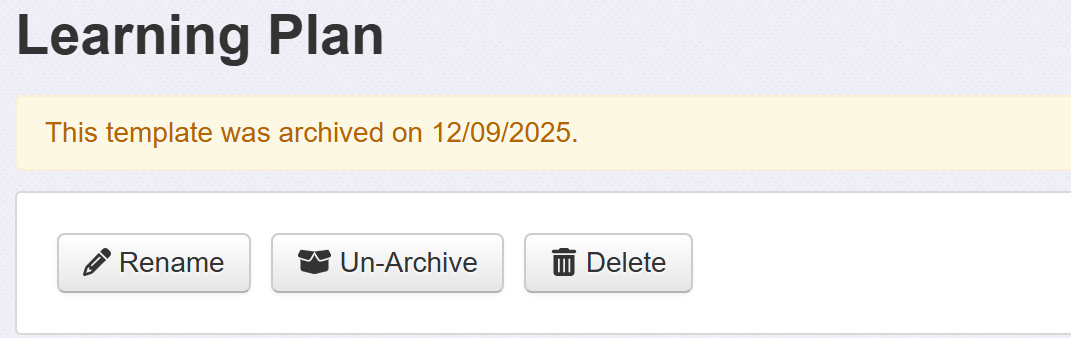
Doing so will make the template available for other to use when creating new Learning Plans once again.
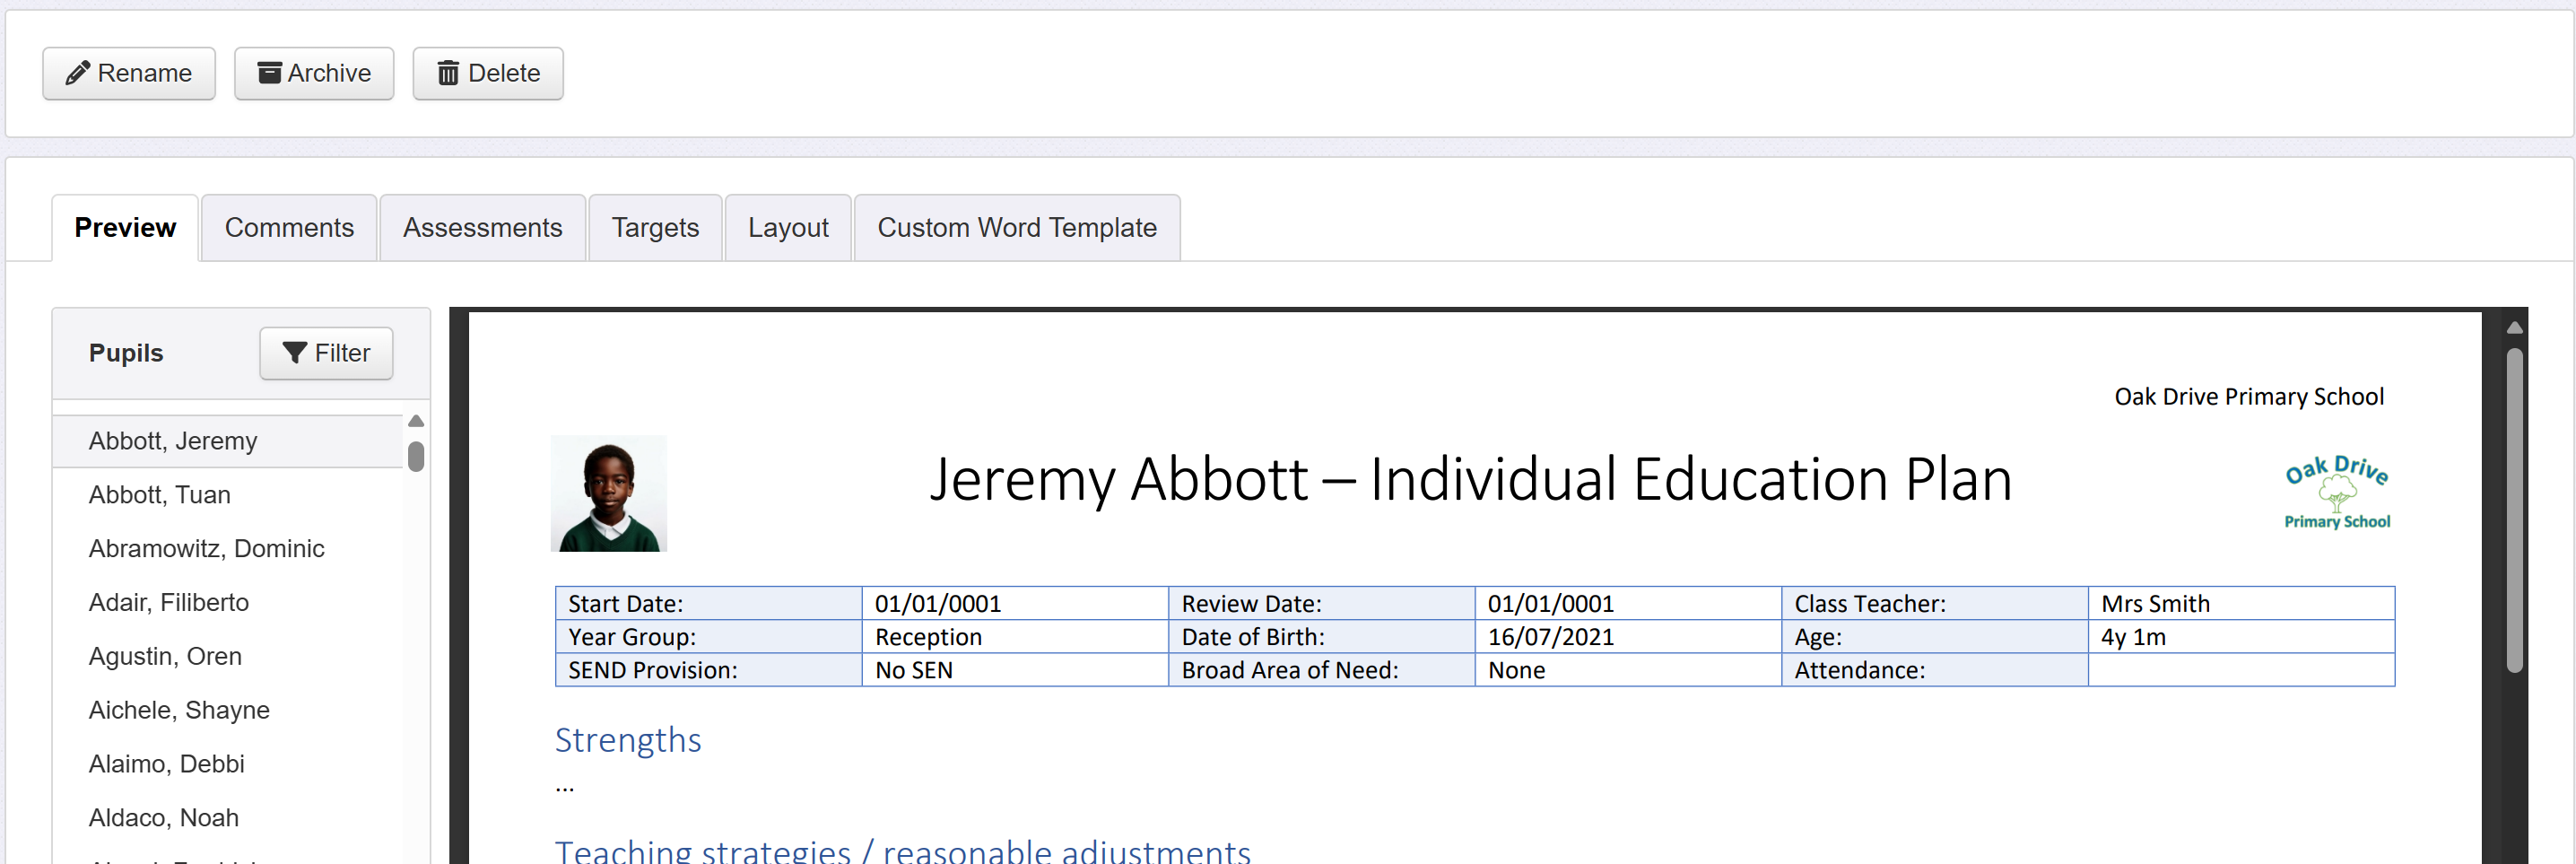
Previewing the template
The first tab, Preview, enables you to see what the template looks like.
You can choose which pupil to preview, on the left. If you choose a pupil who has an active plan using the selected template, it will be displayed. If you choose a pupil who does not have an active plan using the selected template, you'll still see a preview but content such as comments and assessments will be blank.
Editing the Comment boxes
The second tab, Comments, controls the comments that appear in your plan.
Simply click within any existing name to make changes.
Click in the lower box, and type, to add a new comment.
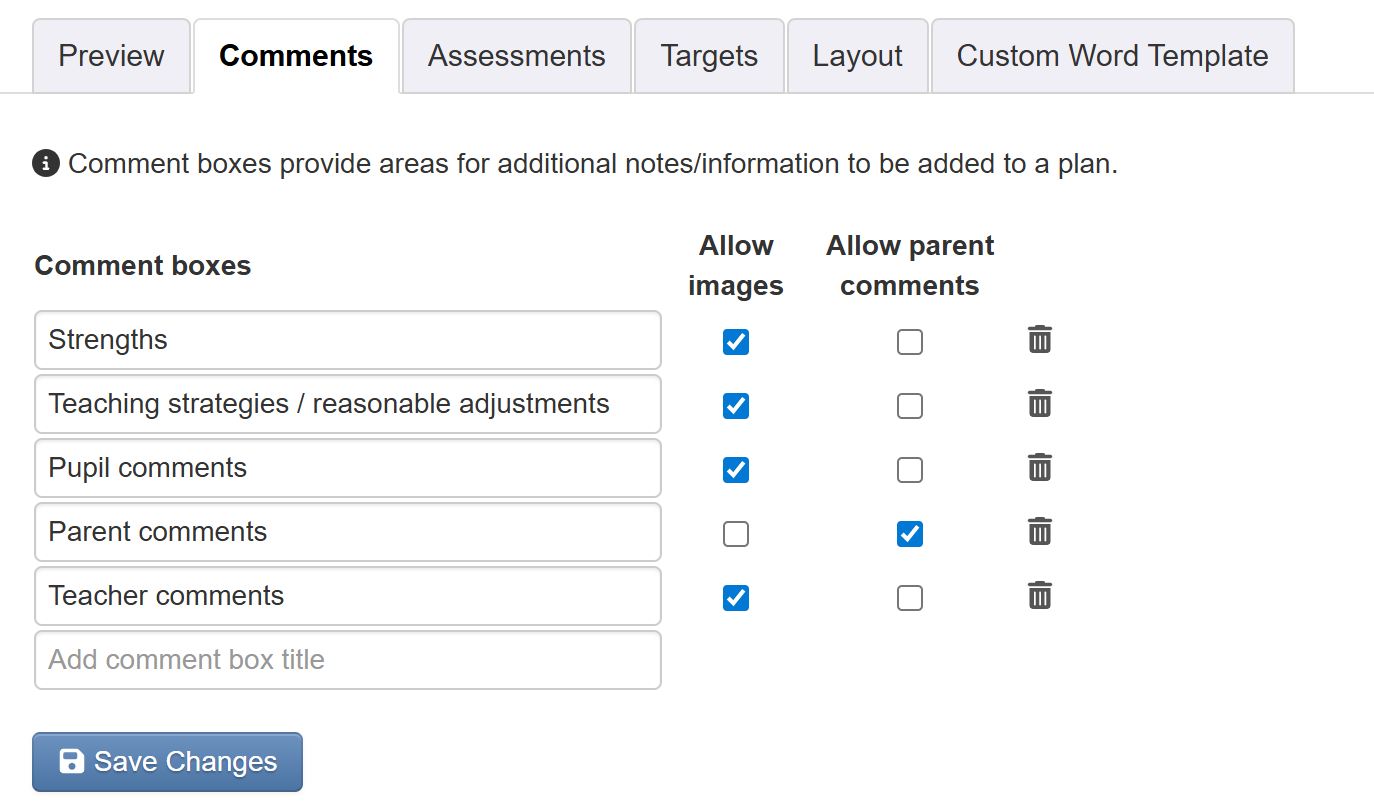
If you want to allow images (for example, photos of pupil work) to be uploaded as part of any comment, ensure Allow images is ticked for that comment box.
If you're choosing to email learning plans to parents/carers, using Insight, putting a tick in the Allow parent comments box will invite parents to type comments in response. See the guide on Emailing learning plans for full detail.
Use the trash icon to delete a comment box. Deleting a comment box will also delete any comments that have already been written in any pupil learning plans using that template, so it is advised to be cautious.
Then click Save Changes when complete.

Including an Assessments table
The third tab allows you to decide if you'd like to include an Assessments table in your plan.

Editing Target Tables
The fourth tab, Targets, controls any target tables in your template.
The Allow targets tick box, at the top, allows you to decide if you'd like any Targets tables in your plan.
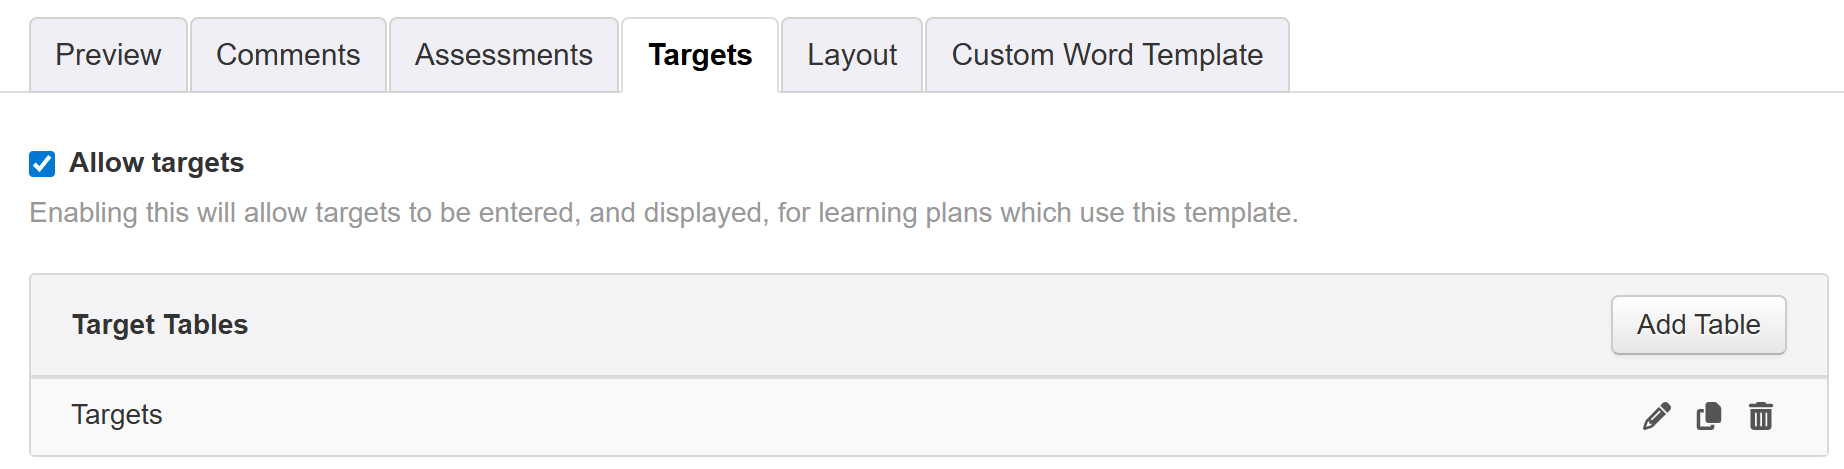
The Insight Learning Plan template appears as below, for example.

Adding a new target table
Learning plan templates can have multiple target tables. For example, if you want a whole year template you may want a separate target table for Autumn, Spring and Summer terms.

You have two choices when adding a new table. The Add Table button will add a blank target table, requiring you to add any columns you want. The little Copy icon (in between the pencil and trash icons), next to any existing target tables (if you have any), will create a new table the same as the one you copied.
This can save time. If we take the example above, of a whole year template, then you'll probably want target tables with the same columns and settings for each of Autumn, Spring and Summer.
Editing a target table
To edit a Target Table, click the little pencil icon on the right-hand side.
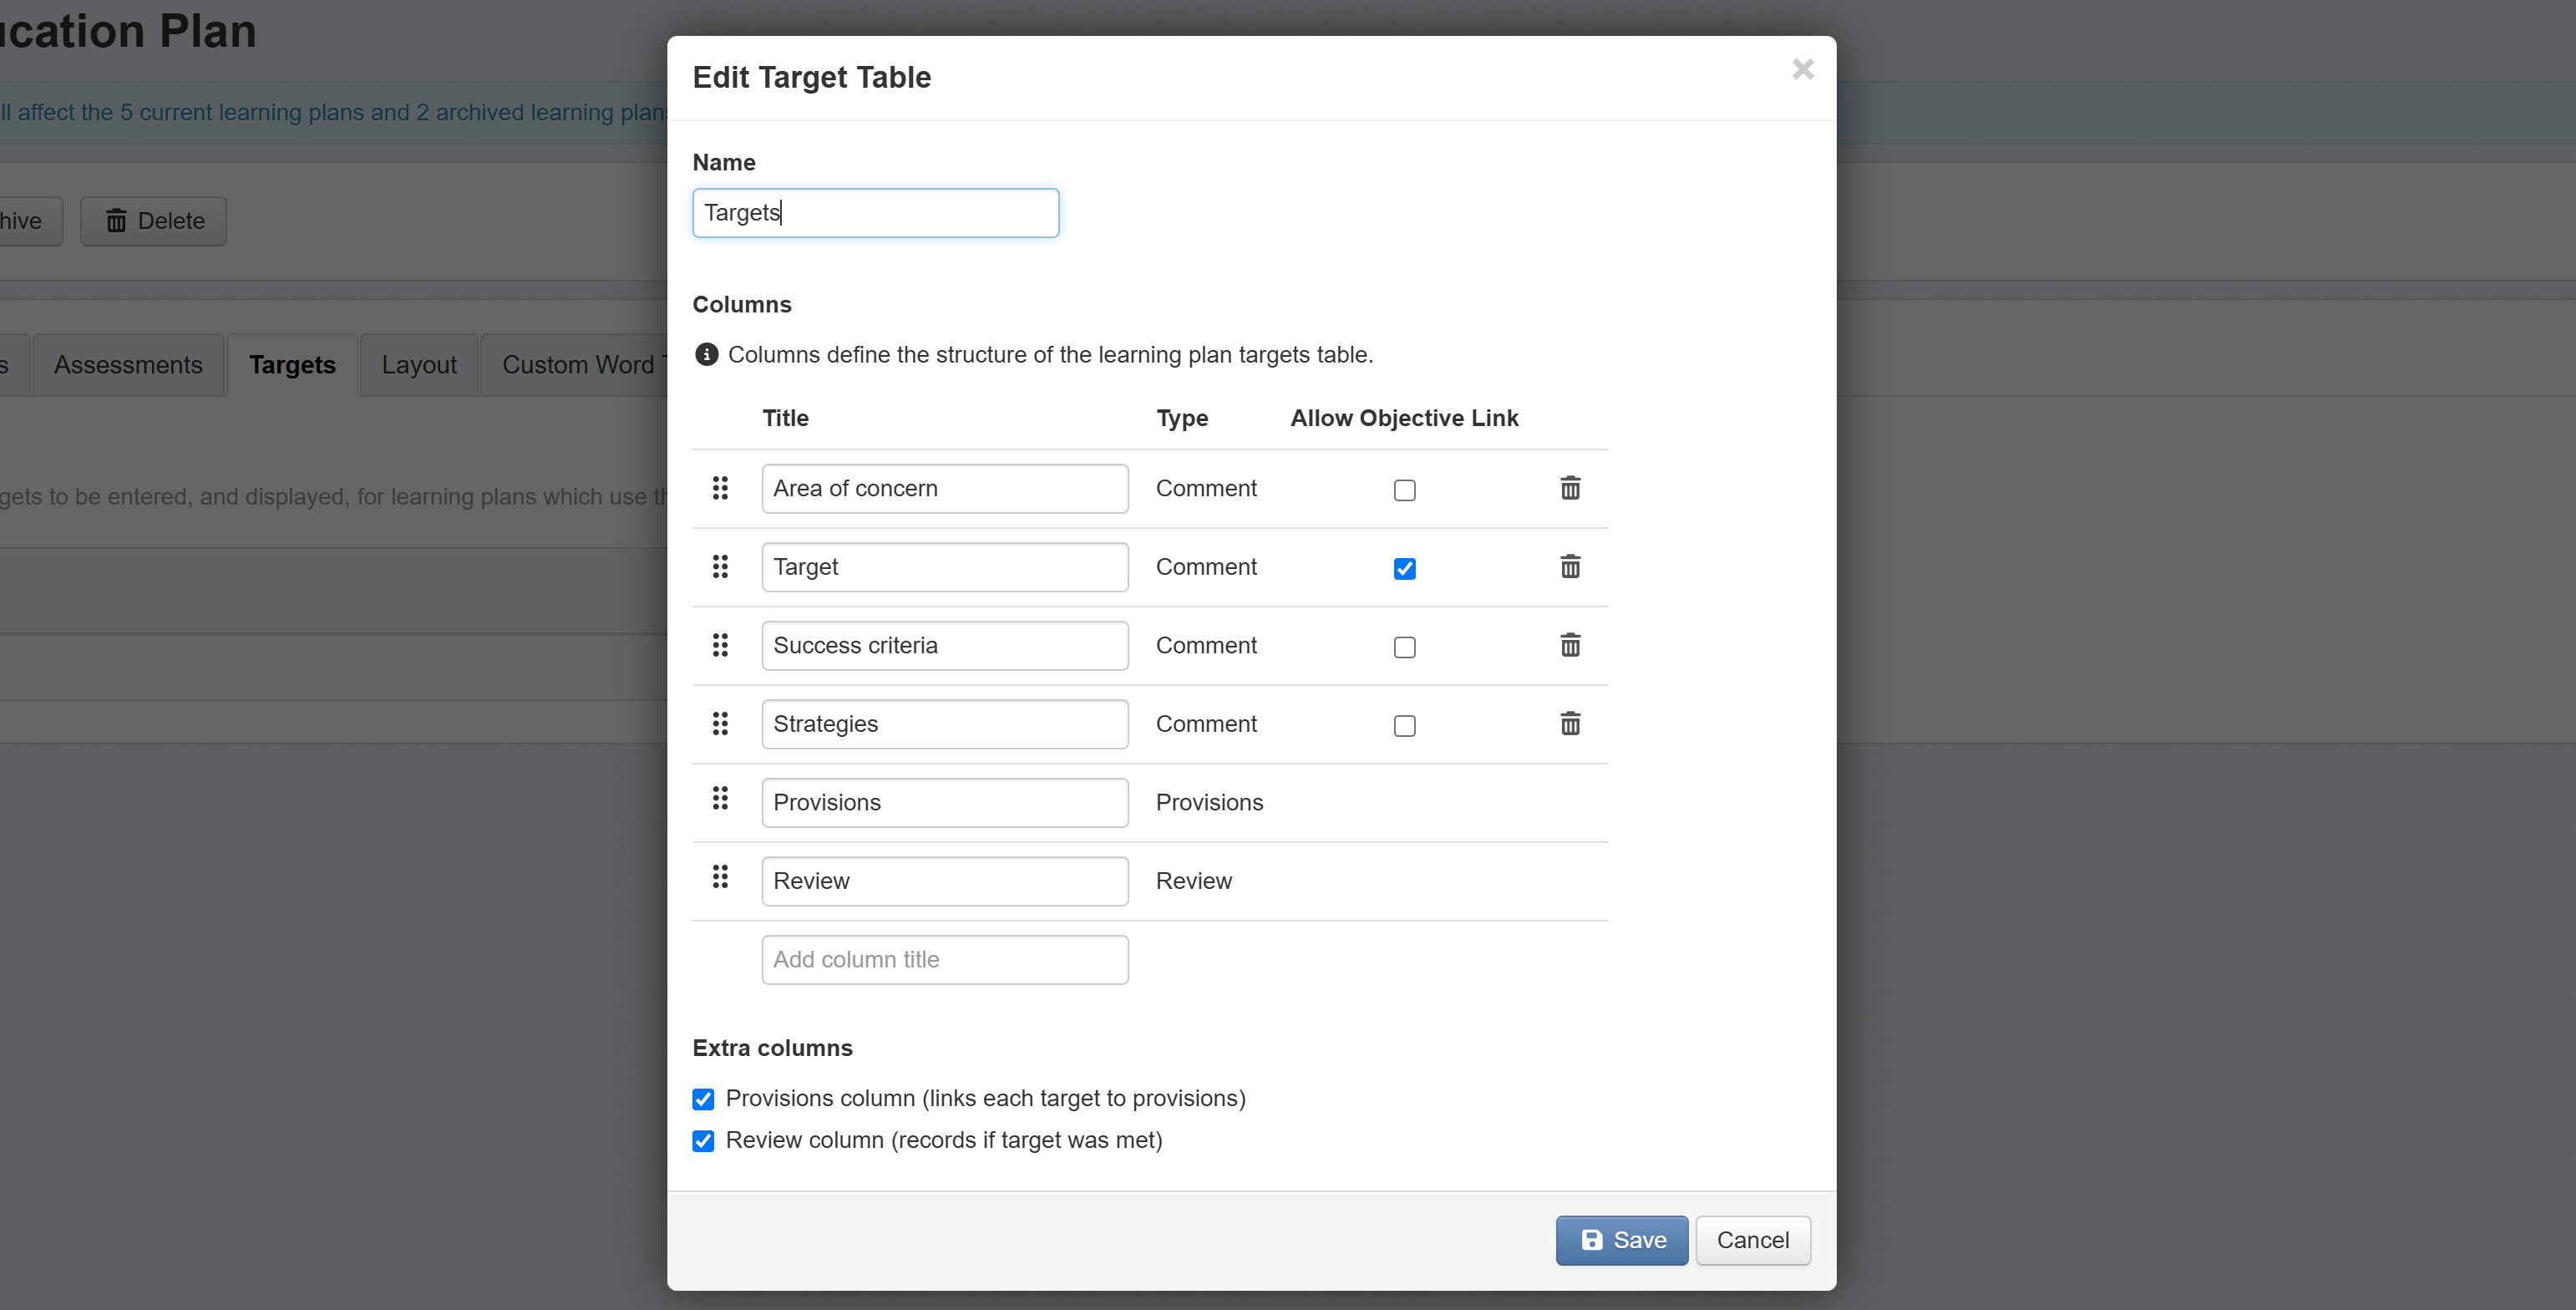
Simply click within any existing name to make changes.
Click in the lower box, and type, to add a new title.
Use the tools to rename, add or remove as required. You can drag and drop the title boxes, using the drag handle icons, to change their order in the table (the top one appearing on the left and so on). This includes the optional Provisions or Review columns.
If you use Objectives for formative assessment, in your school, it may be useful to tick the Allow Objective Link box. This will enable users to choose an Objective to include as a target. See the guide on Adding and Using Plans for detail.
The Extra Columns are where the interactive table cells can be toggled on or off.
If you are making use of the Provision Mapping feature in your school, the Provisions column gives you an interactive cell in which staff can indicate if a particular Provision is part of achieving a target in a learning plan. If you are not making use of this feature, simply untick the box.
The Review column provides an interactive cell in which staff can enter an outcome against each target (with options for not met, partially met or met). Again, untick this if it's not something you need.
If you want to name the Provision or Review column differently, just type a new name in the box. It will still function in the same way, but it will use your new name in all learning plans using this template.
Click Save Changes when complete.
Changing the Layout
The fifth tab, Layout, allows you to organise your plan content into the order you want it to appear.

If you have Assessments, comments or any target tables in your template, these will all be listed in the order they appear in the plan.
Simply use the arrow icons to drag the content into the order you want.
Click Save when you're done. It can be useful to click the Preview tab, at this point, to check the template appears as you intended.
Using a Custom Word Template
The fifth tab, custom Word template, is an advanced option and requires you to download, and edit, a template in Word. It is useful if you require greater control over the visuals in your template.
This is covered in our specific guide.