In order for a font to display, or export, correctly it needs to be available for Insight to use. If a template is added with an unusual font, one that Word does not come with by default for example, you may need to embed it in the template for it to work.
The text should still display, but using a standard font rather than the one you wanted.
Follow the instructions below to embed the font or fonts. You will need to be an Admin user to upload it to Insight.
Use a computer with the required font installed
In order to embed the font, you will need to open the template on a computer that can display it. This will probably be the one the template was originally created on before uploading to Insight.
Alternatively, you may need to identify the font that is not displaying, download it from the original source and install it.
Once you have the font (or fonts) displaying correctly and available to use in documents, proceed through the following steps:
On a Windows PC
Open the report template in Word.
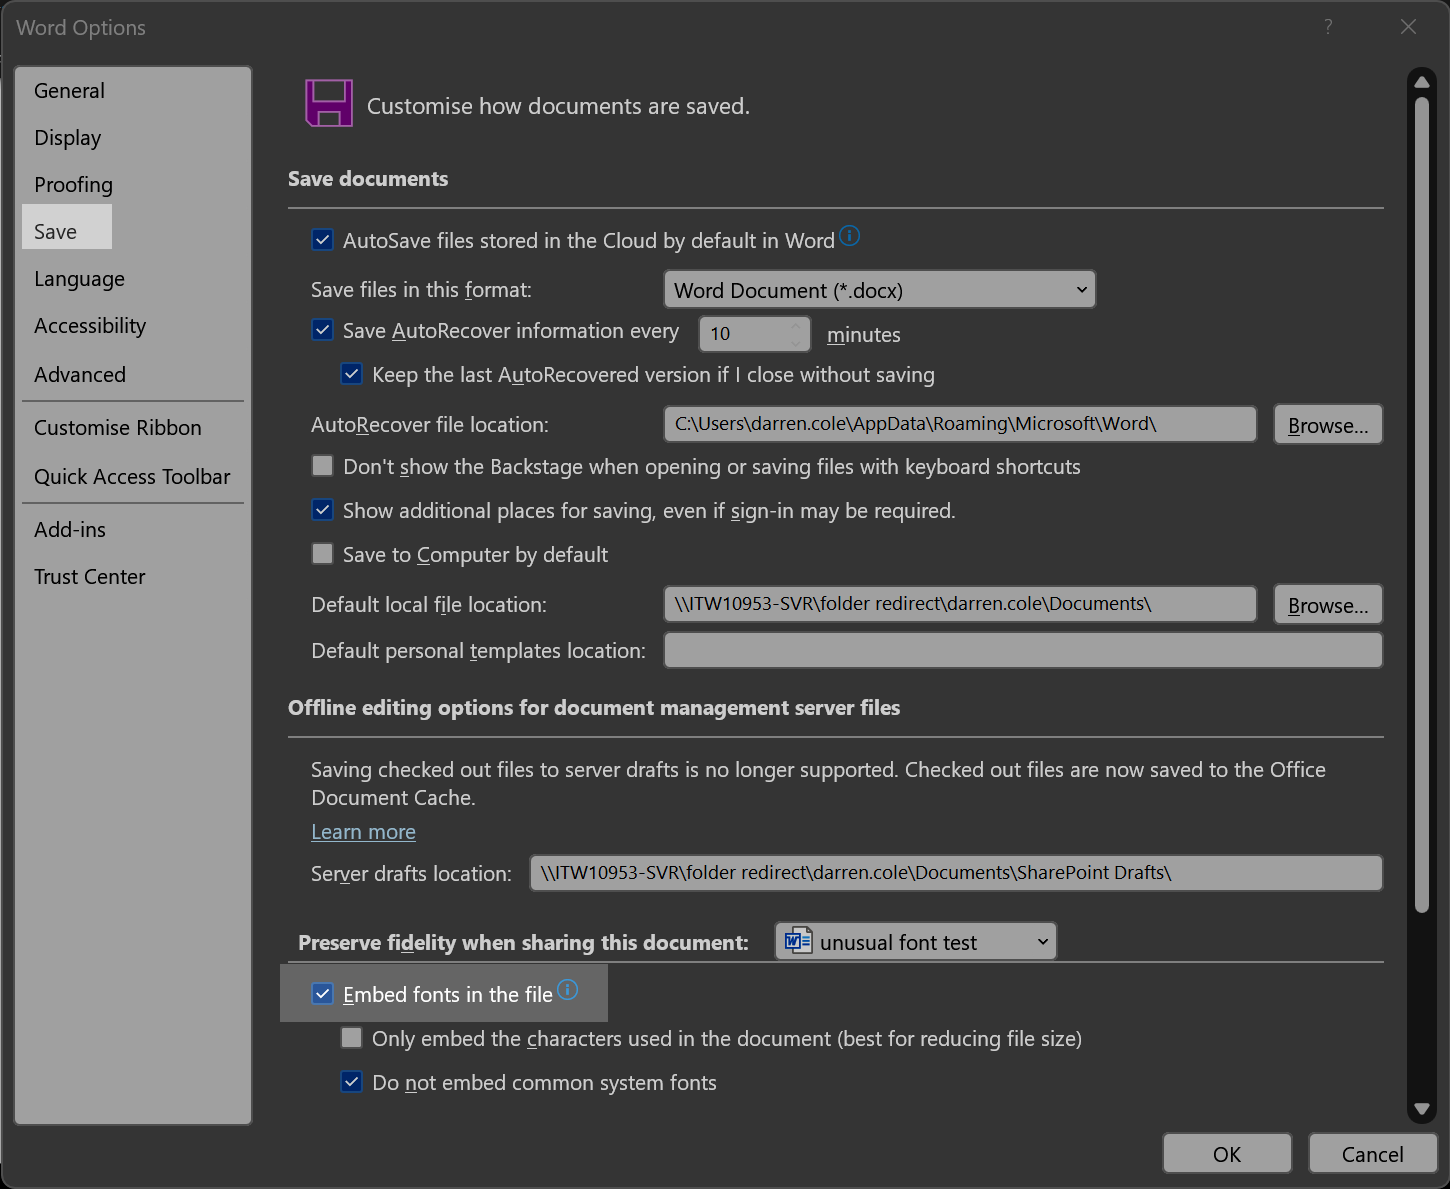
Click the File tab and then click Options (it's near the bottom left corner of the window).
In the left column, select Save.
At the bottom, under Preserve fidelity when sharing this presentation, select the Embed fonts in the file check box.Selecting Embed only the characters used in the presentation reduces the file size but limits editing of the file using the same font. It is recommended to leave this check box blank.
Click OK.
Save the file.
In Insight, navigate to Admin - Parent report templates and settings. Find the template you embedded the font in and click Replace Template. Browse to the file you saved in step 6 and click Open.
Go to Reports - Parent Reports. Choose the newly replaced template and Preview Report. The embedded font should now display correctly, including when exported as a Word file or PDF, regardless of the computer used to download or display it.
On an Apple Mac
Open the report template in Word.
Select Word -Preferences.
In the dialog box, under Output and Sharing, select Save.
Under Font Embedding, select Embed fonts in the file.
When you save the file, the fonts used in it will be embedded in the file.
In Insight, navigate to Admin - Parent report Templates and settings. Find the template you embedded the font in and click Replace Template. Browse to the file you saved in step 6 and click Open.
Go to Reports - Parent Reports. Choose the newly replaced template and Preview Report. The embedded font should now display correctly, including when exported as a Word file or PDF, regardless of the computer used to download or display it.
Embedding the font does not solve the display
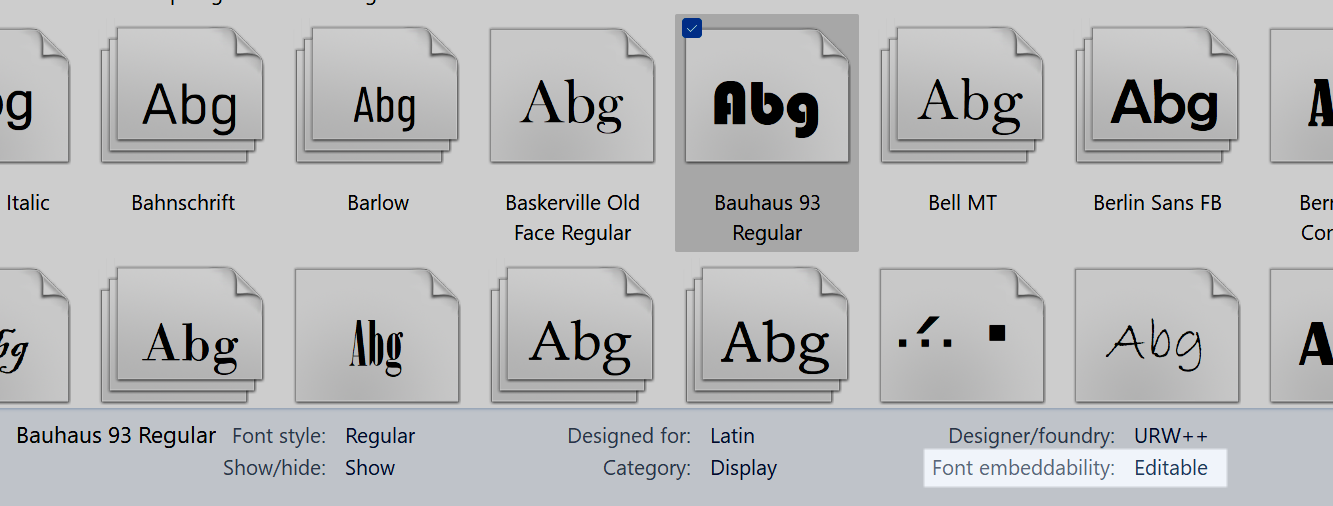
Not all fonts can be embedded. Font creators can set different options for their fonts, including: Non-embeddable, Preview/Print, Editable, and Installable. To see what level of embedding your installed font is on a Windows PC, go to Control Panel and click Fonts. Clicking on the font shows the Font embeddability setting.
Even with the font embedded, not all fonts will work. If the font does not display correctly in the Parent Report Preview pane then you may need to try a different font.
The Word file size is now very large
Certain fonts can be very large compared to others, so if file size is a concern, consider using alternative fonts. If you want to remove the embedding, you can turn off the Embed setting in the File - Options dialog box (described above) and save the file. Then, once you close and re-open the file, a different font is substituted for the font that had been embedded previously.
Occasionally you may find that your reports, when produced, don't appear quite as they did in your original template.
Usually this is down to the items in the template, such as text boxes or images, moving when the report text is added for the pupil.
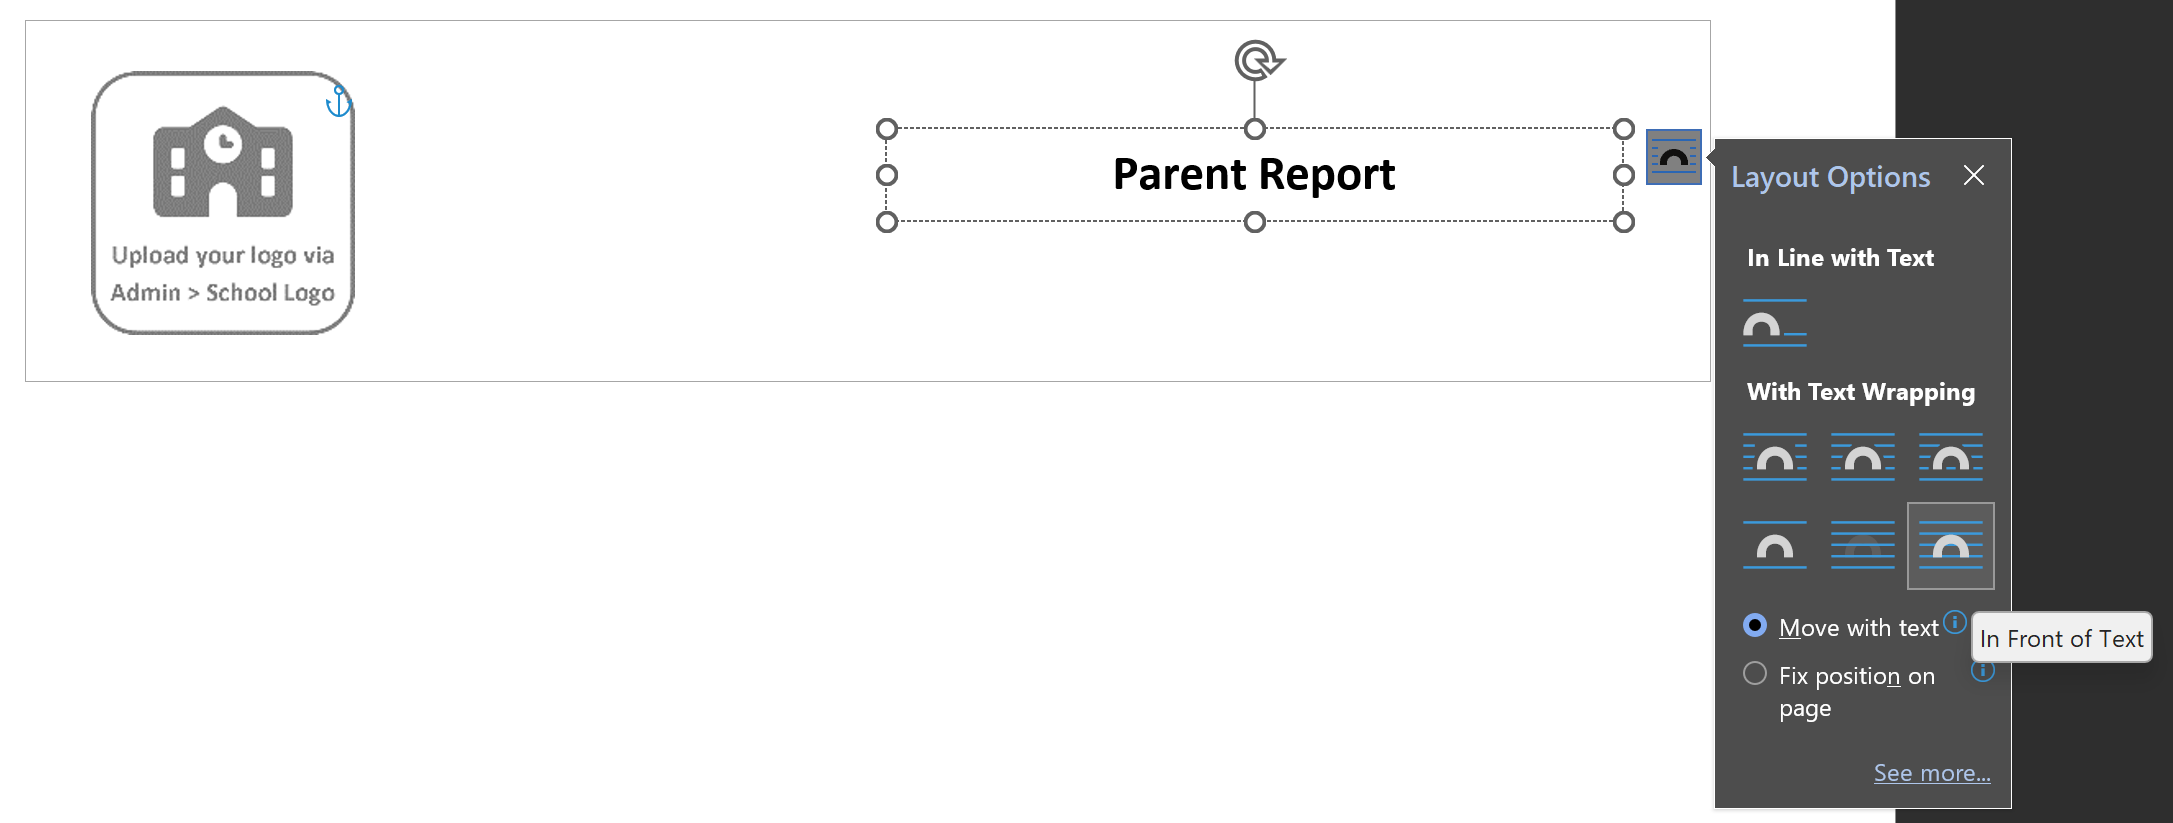
Layout Options
When you add a shape, text box or image, there are a number of layout options available.
Select the item to see the Layout Options icon, then click the icon to see the options.
The best way to ensure your item remains in position is to choose the In Front of Text option. This should ensure it remains in place regardless of any text surrounding it. However, you will need to be cautious if you have a placeholder near the item that could insert text of varying lengths, as a longer piece of text could go behind your item. Pupil names are a good example of this.
If you're producing report exports with pupils in a single file, as a long PDF or Word file, you may also need to ensure the Object Anchor is positioned appropriately.
Again, click an item to see its anchor. In the example above, you will see that the anchor for the selected text box is positioned on the school logo image. In most cases, the anchor should be positioned to the left of the document. Click and drag the anchor to its desired position.
Unable to select a picture
If you can't select a picture, it may be behind another block of text.
To select the picture, use the Selection pane:
In Word, select Home > Select > Selection Pane.
In the Selection pane, select the picture.
If necessary, you can now use the arrow keys on the keyboard to move the image.
Text area troubleshooting
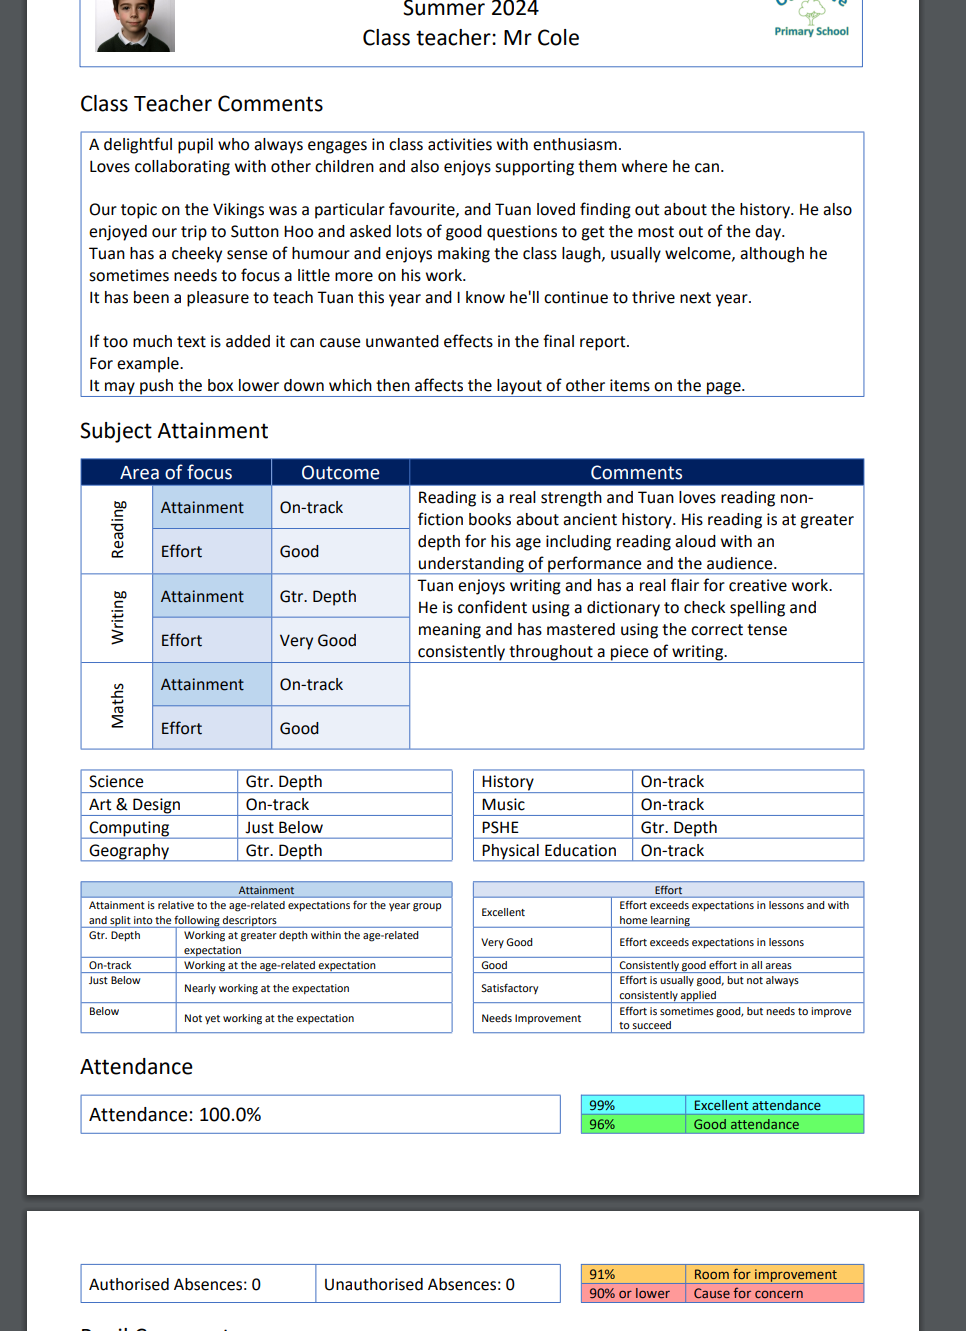
When adding text to text boxes or tables, it is important to understand your intention as to the amount of text you expect to be entered. If too much text is added, it can cause unwanted effects in the final report.
For example, It may push the box lower down the page, which then affects the layout of other items, such as the Attendance section in this report.
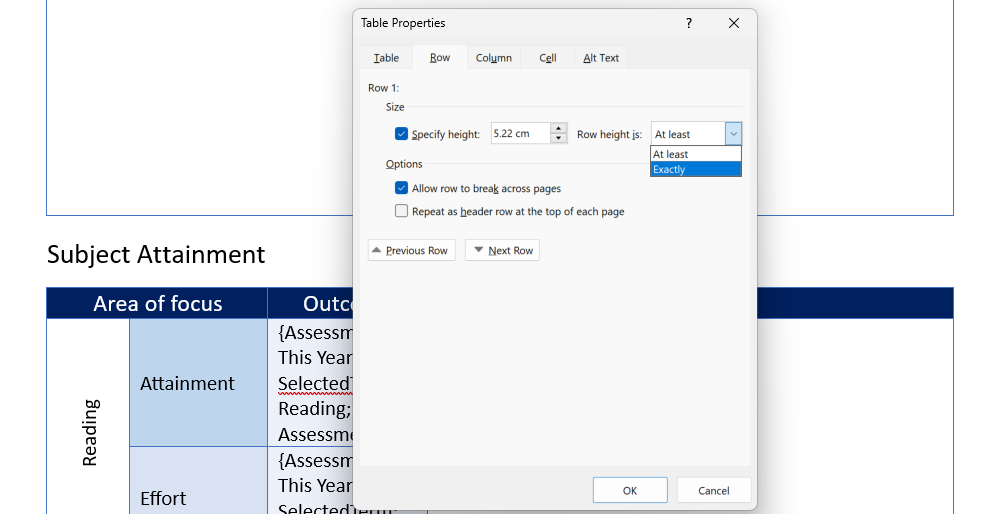
If you want to fix the size then Word does allow this. To do so, open the properties of the table (via the right click menu) and choose the Row tab. Make sure Specify height is ticked then ensure the Row height is menu is set to Exactly.
Save and replace the template. When you produce your reports, the table/box will remain the same size regardless of the amount of text entered.
However, this may also be undesirable, as any additional text entered in the report will now disappear out of sight and may not always be noticed when reviewing reports.
For this reason, the recommended approach is to allow the size to increase, so that you can easily spot any issues. If the box only increases in size by a small amount this may still be acceptable in the final report.
Try to make sure your boxes, and font size, in your templates match the amount of content you expect.
Also encourage users to stick to a rough character count combined with regularly previewing the report.
Applying these principles should enable you to maintain a high quality output.
Paragraphs of text appearing on the wrong page
Your template may have a heading followed by a Placeholder to insert a comment.
If your comments are very long, and run on to the following page, you can find that the whole comment appears on the next page, rather than beneath the heading where you want it.
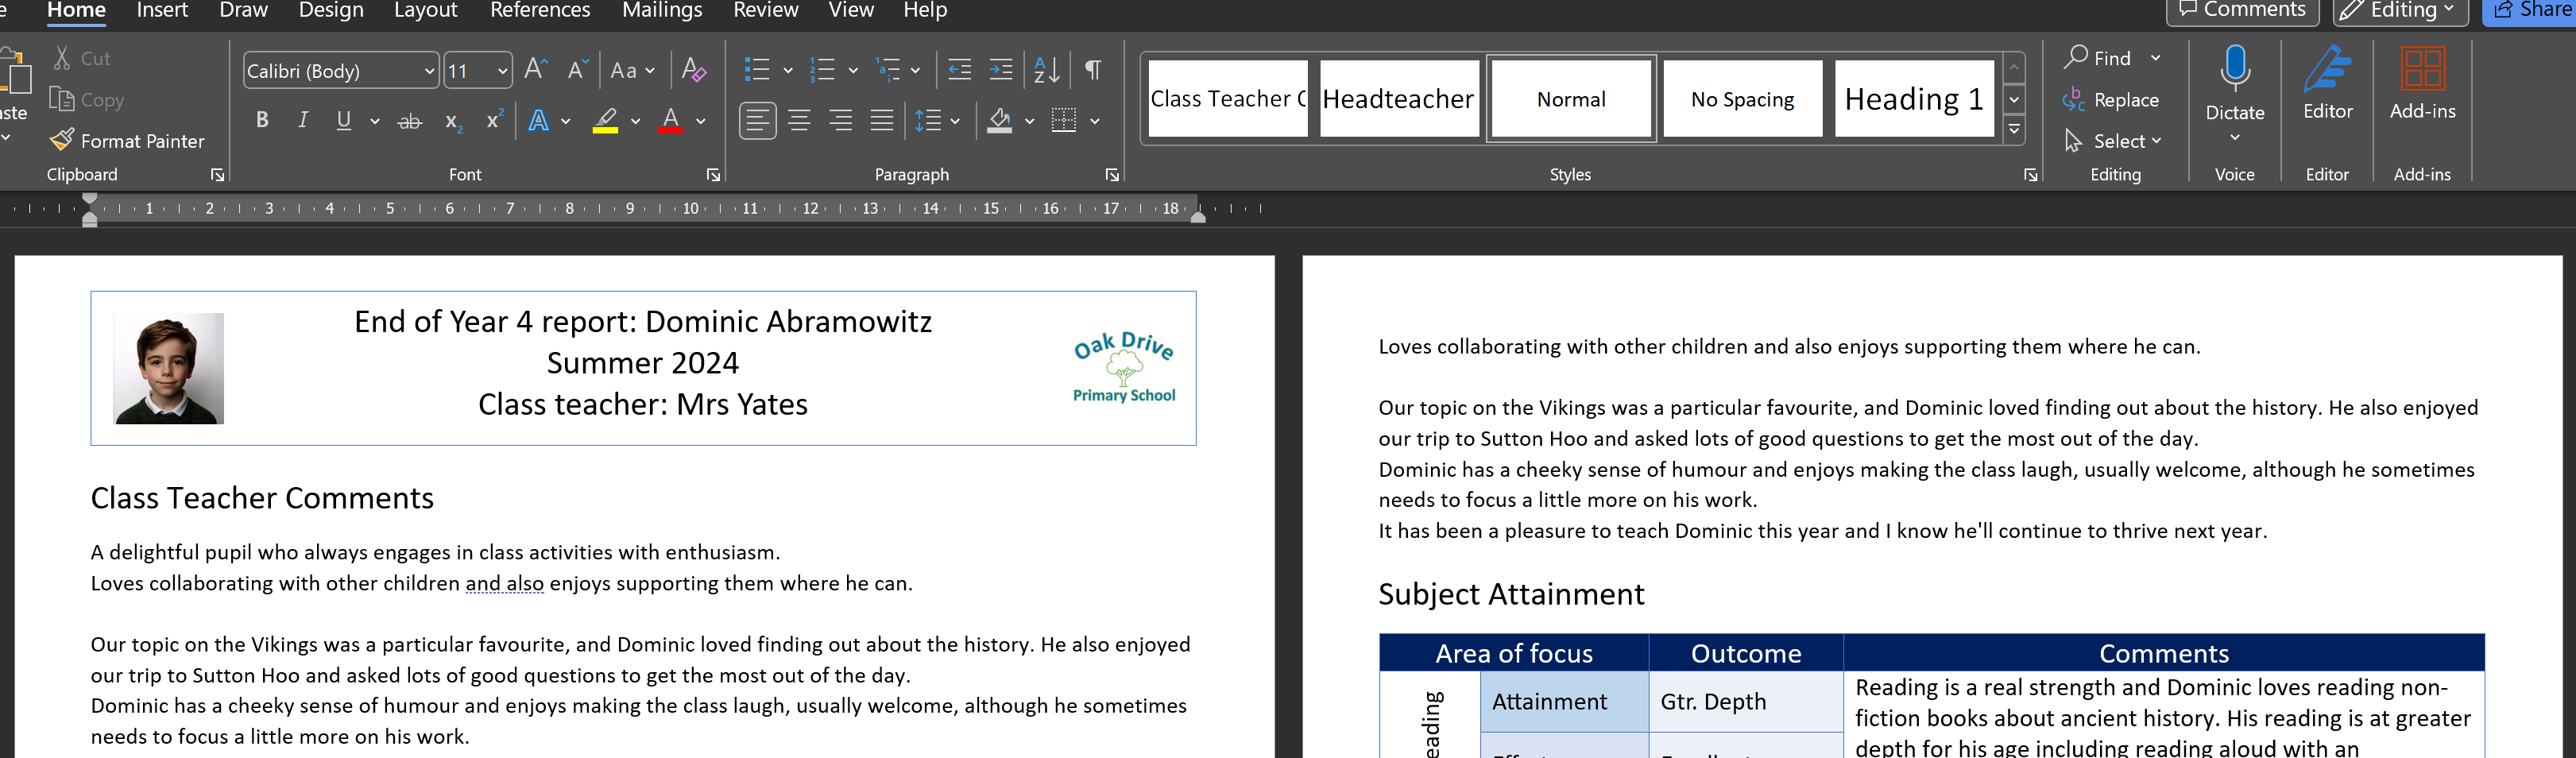
For example.
If this happens, it may be down to Paragraph settings.
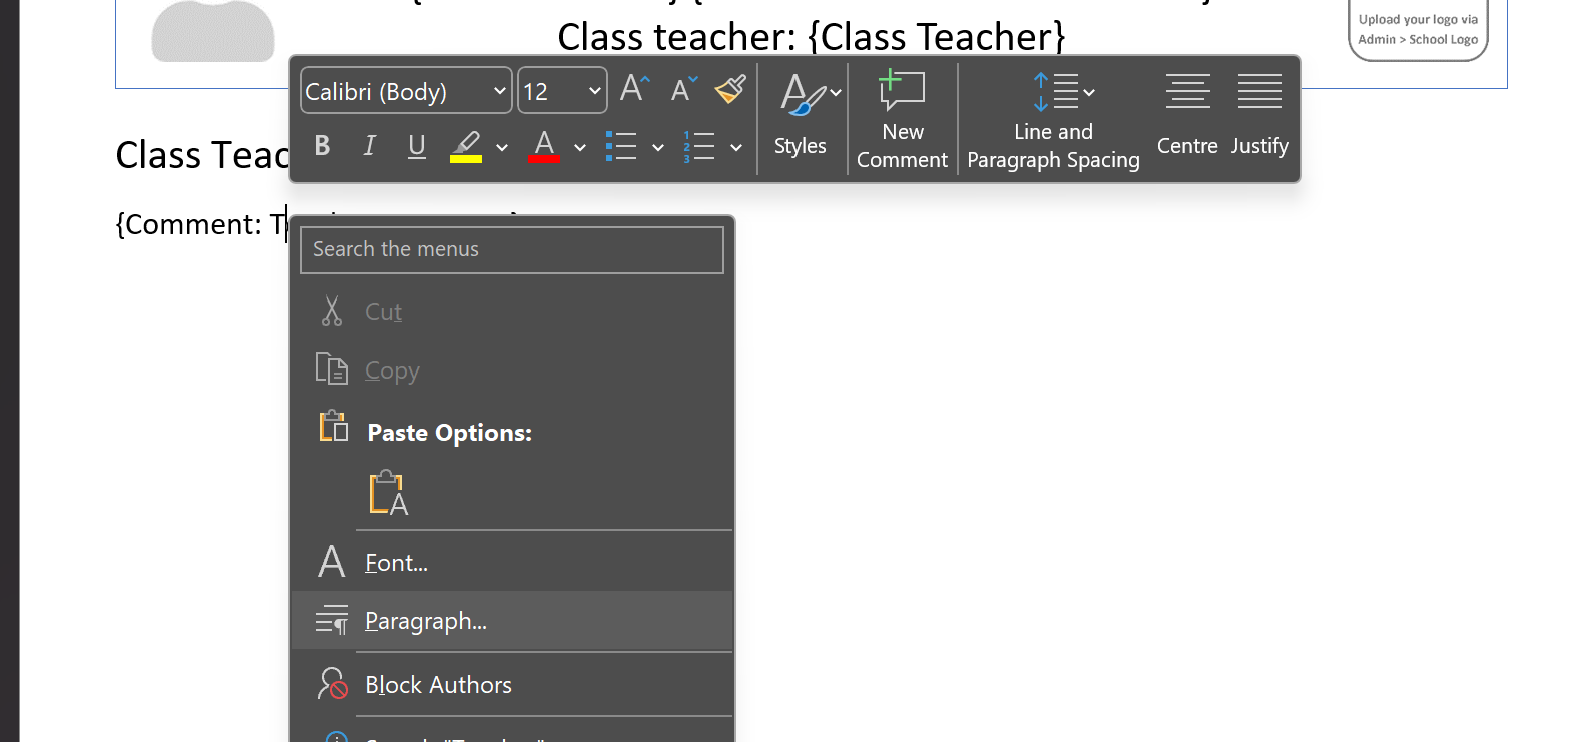
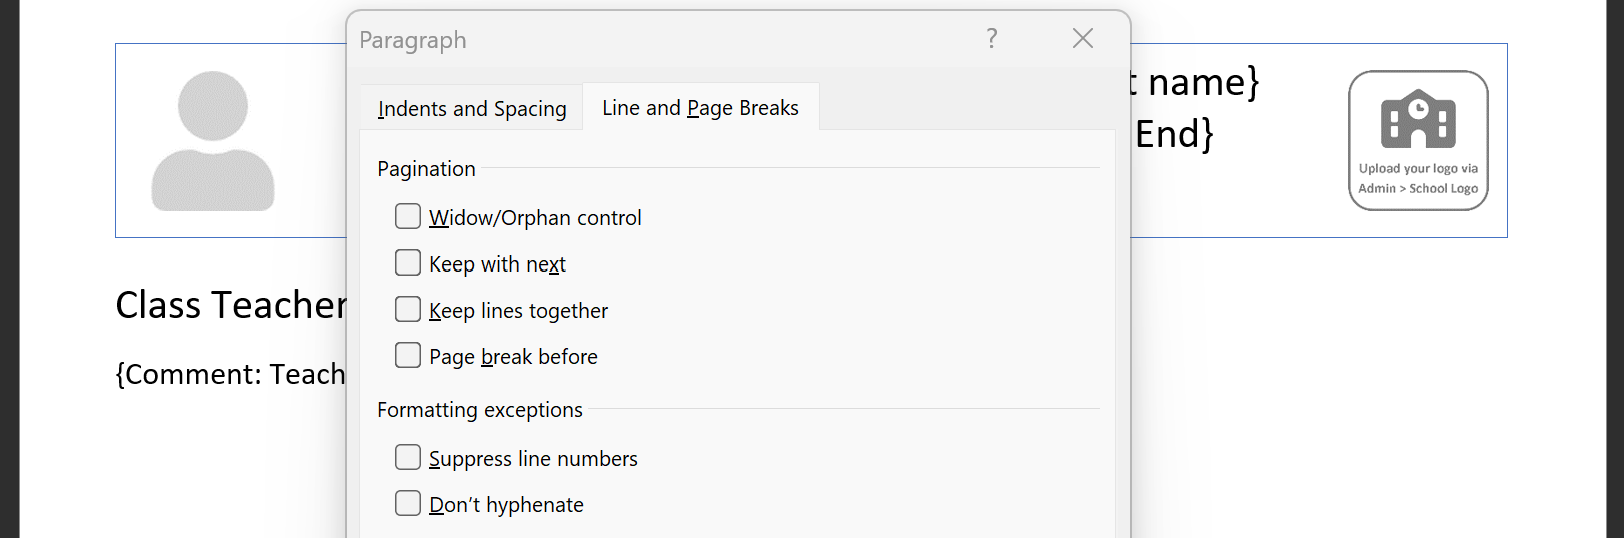
On your parent report template, open in Word, right click on the Placeholder and choose Paragraph from the menu.
In the options that appear, select the Line and Page Breaks tab. Then ensure that Keep lines together is not ticked and click OK to close the options.
Save your template and use Replace Template to upload it to Insight.
Preview any pupil report that previously pushed the comments on to another page, and the text should now appear beneath the heading.
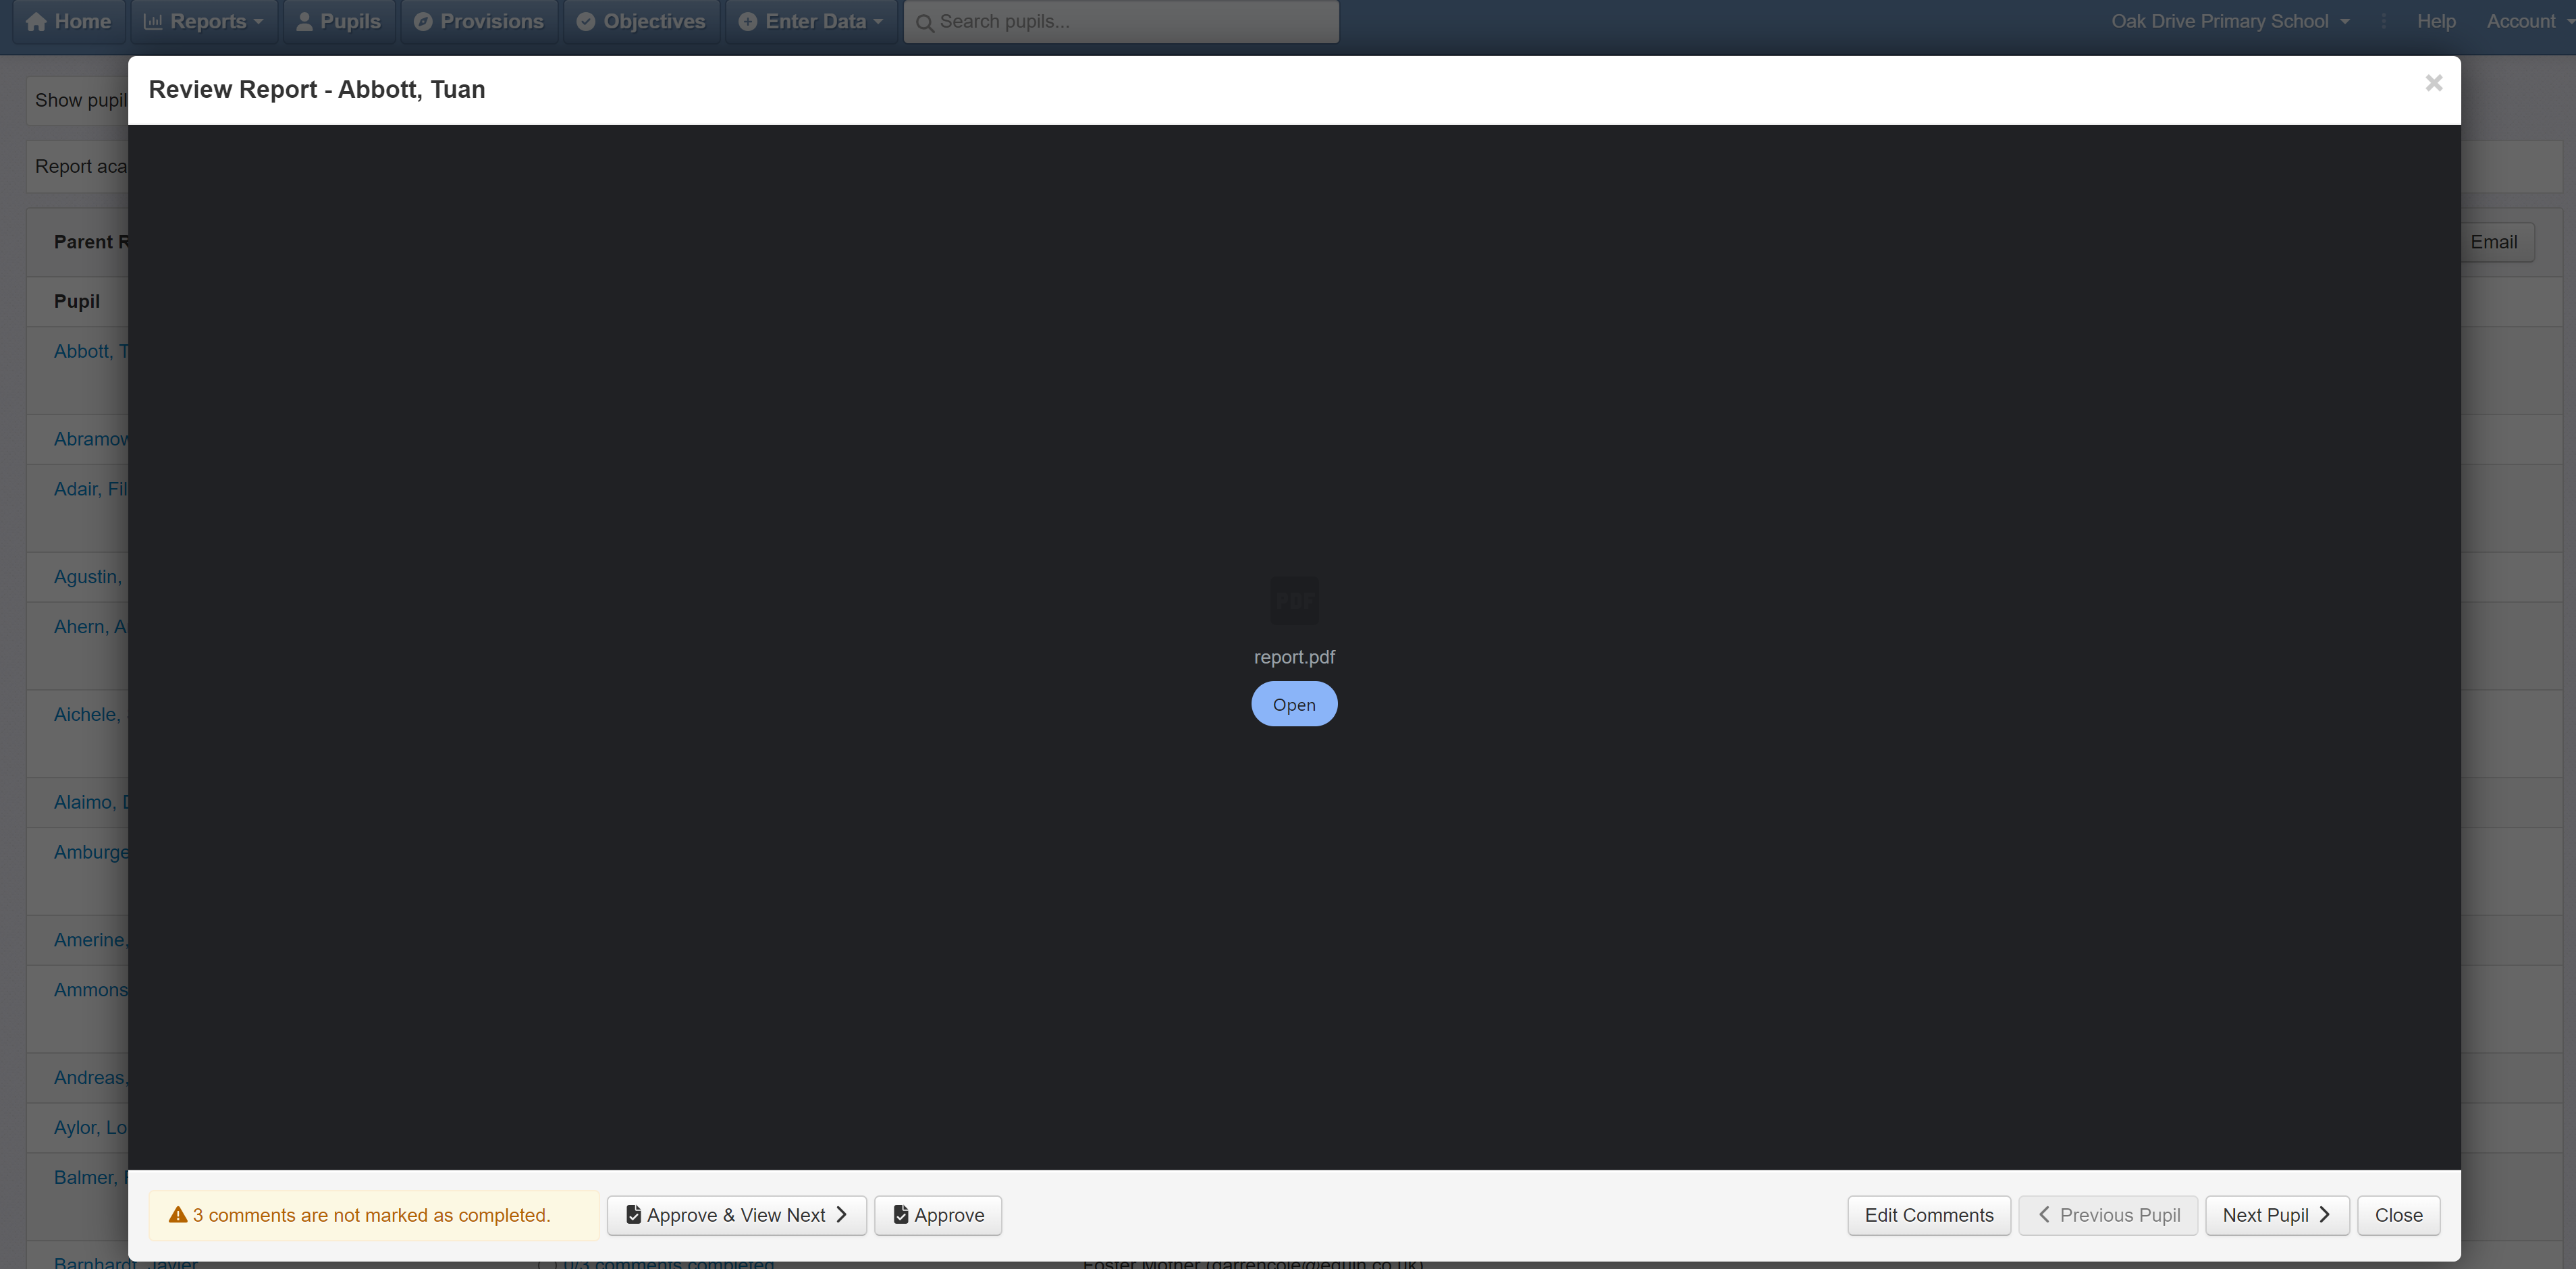
There are various places where you can view a preview of the parent report; when editing templates in Admin, via the Parent Reports tab in Pupils and via Reports > Parent Reports for example.
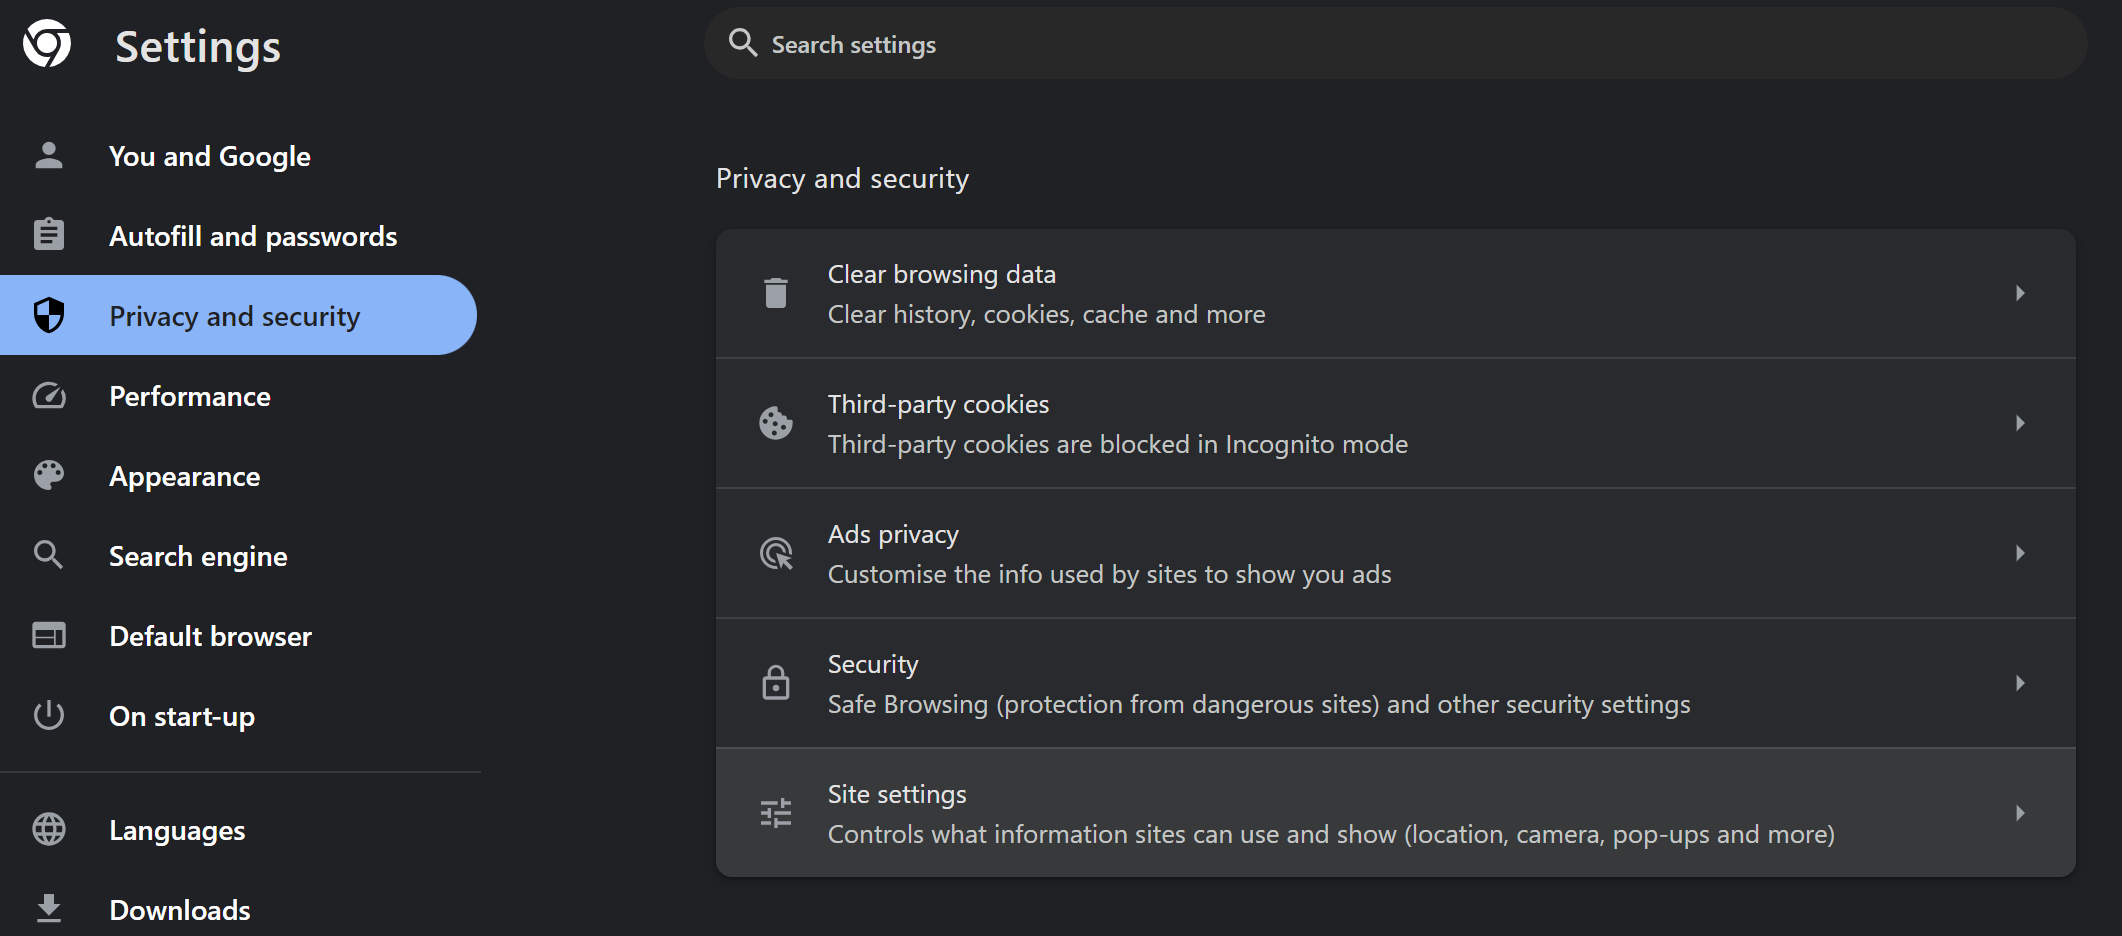
If you find your previews do not display, and offer a download option instead, this may be down to the settings in your browser.
Different browsers have different settings but, for Chrome, this setting may be found by clicking the 'three dot' menu in the top right corner and choosing Settings.
Then select Privacy and Security on the left, followed by Site settings on the right.
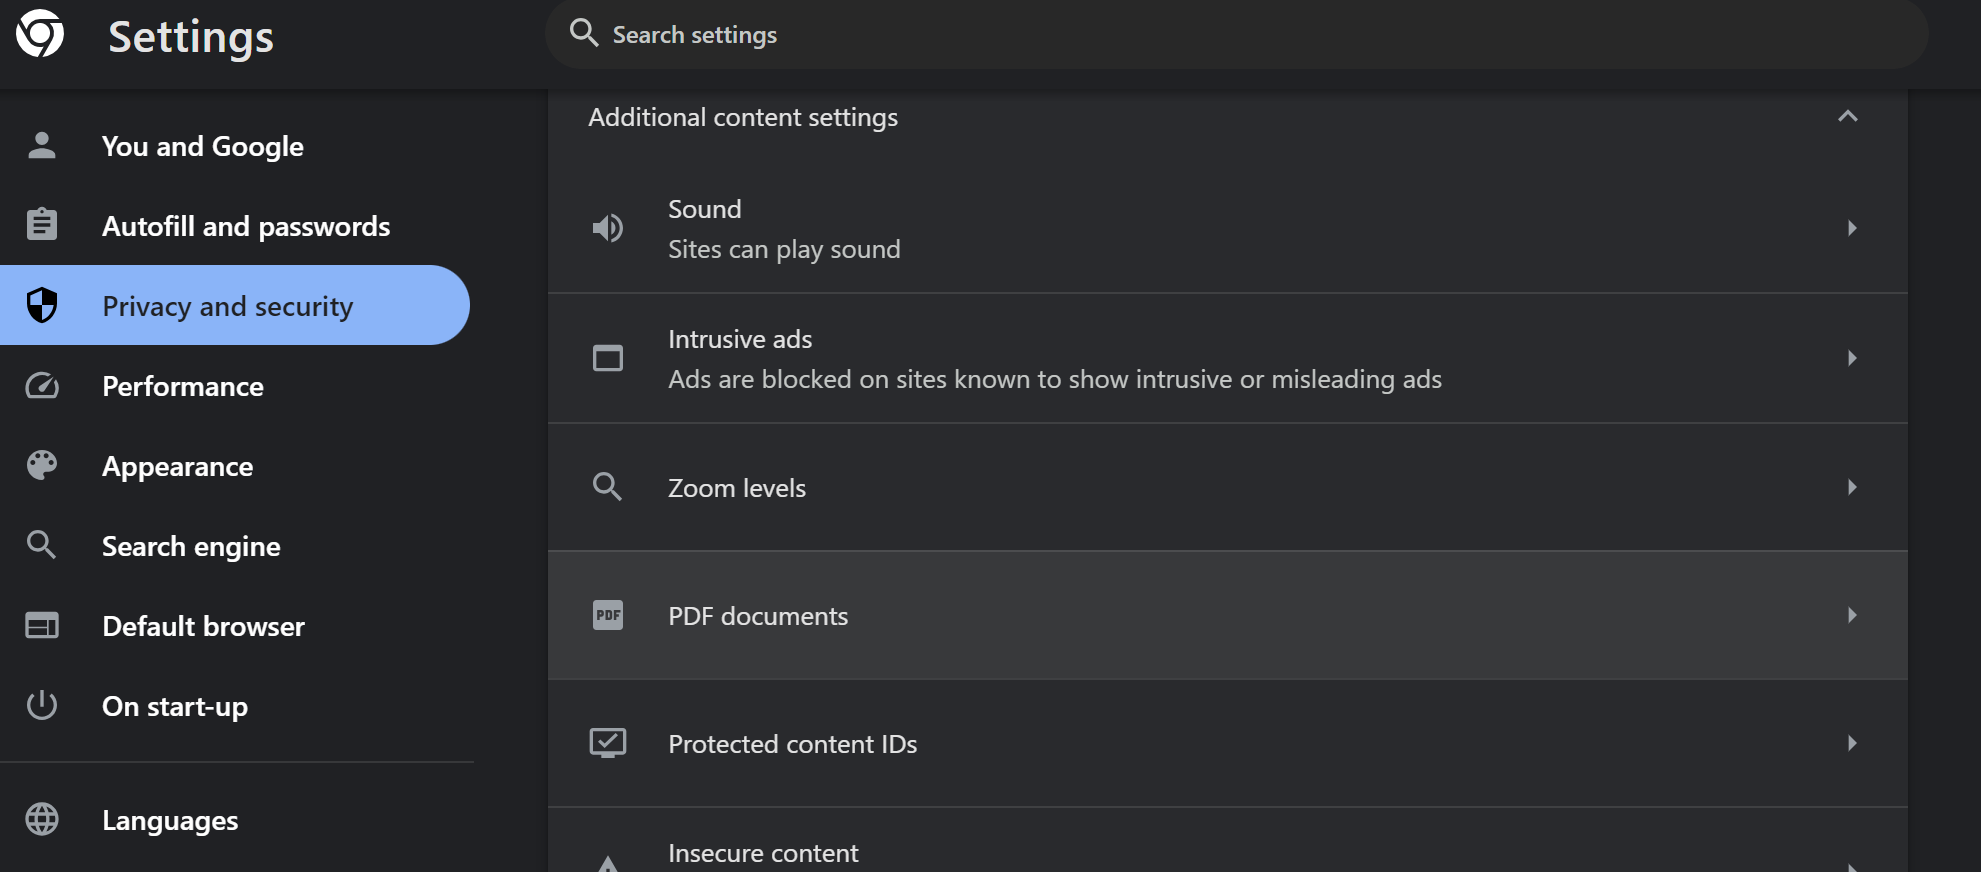
Scroll through until you find the setting for PDF documents and select it.
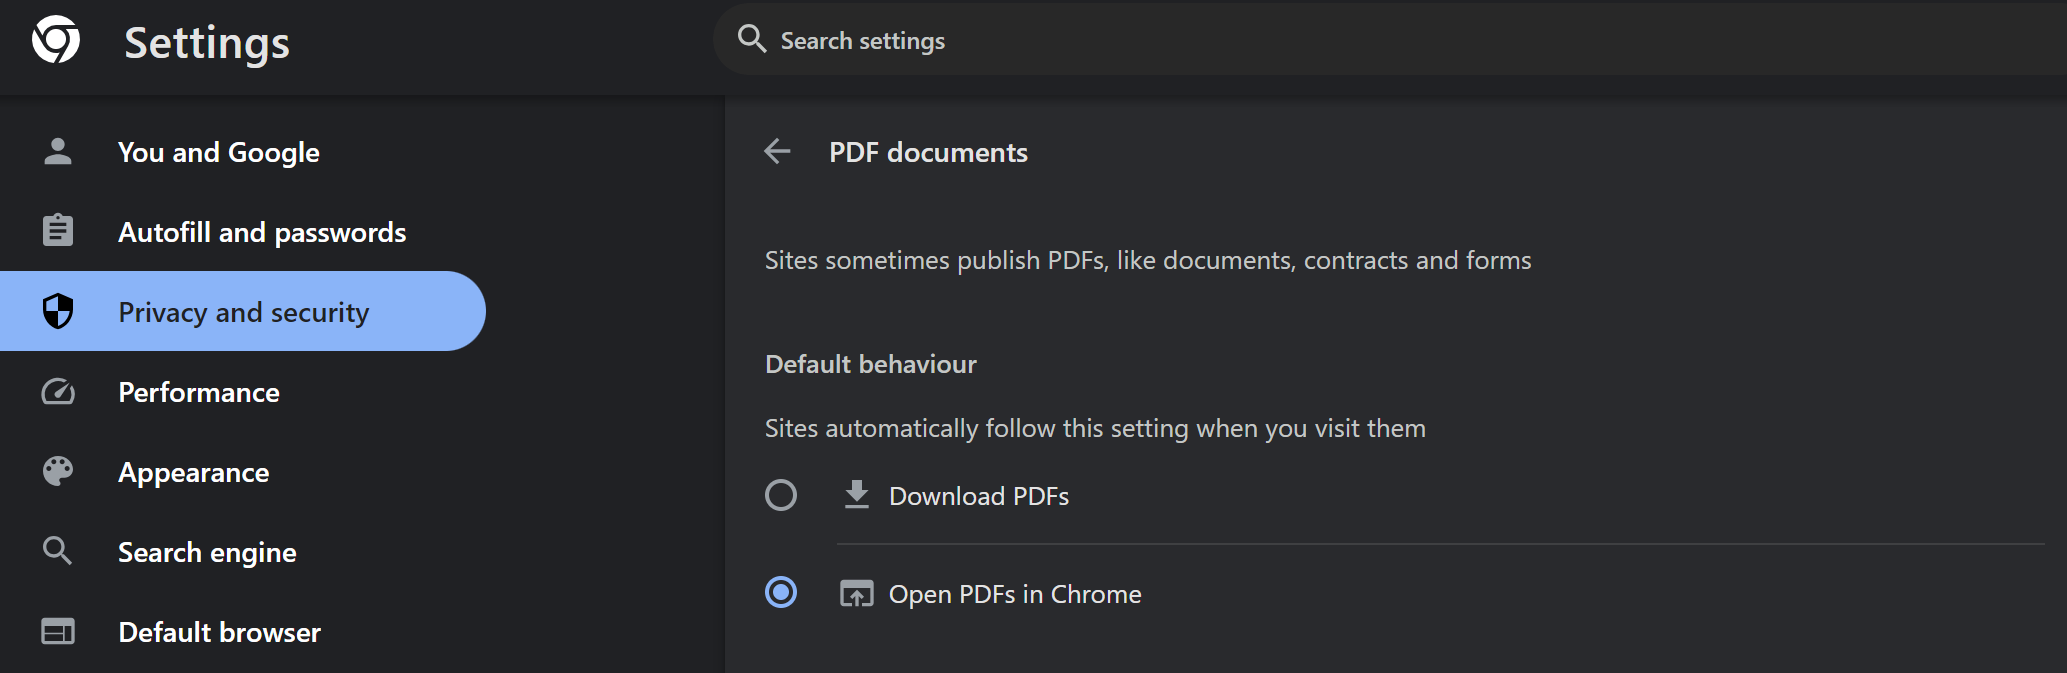
Ensure the setting marked Open PDFs in Chrome is selected then try to preview your parent reports again.
If they still fail to preview, you may need to explore other possibilities.
Image Placeholders not working
If you have created your own template with image Placeholders (e.g. School Logo or Pupil Photo) that are not inserting images, you should check the version of Word used to create the template.
Image placeholders use a feature called Alt Text to function. The earliest version of Microsoft Word to support this is Word 2016. If you're using an older version to create your templates, you will not be able to add functional image Placeholders.
The version information varies in different versions of Word but, in all modern versions, it can be found by choosing File > Account.
Another way to check is to right click on the Image Placeholder. If the resulting menu does not contain an option called View Alt Text... then it's highly likely you're using an older version of Word.
To resolve, load your template in Word 2016 or later.
Attendance image placeholders use SVG images. Word 2019 or a Microsoft 365 subscription, with the latest updates installed, is requried for these.
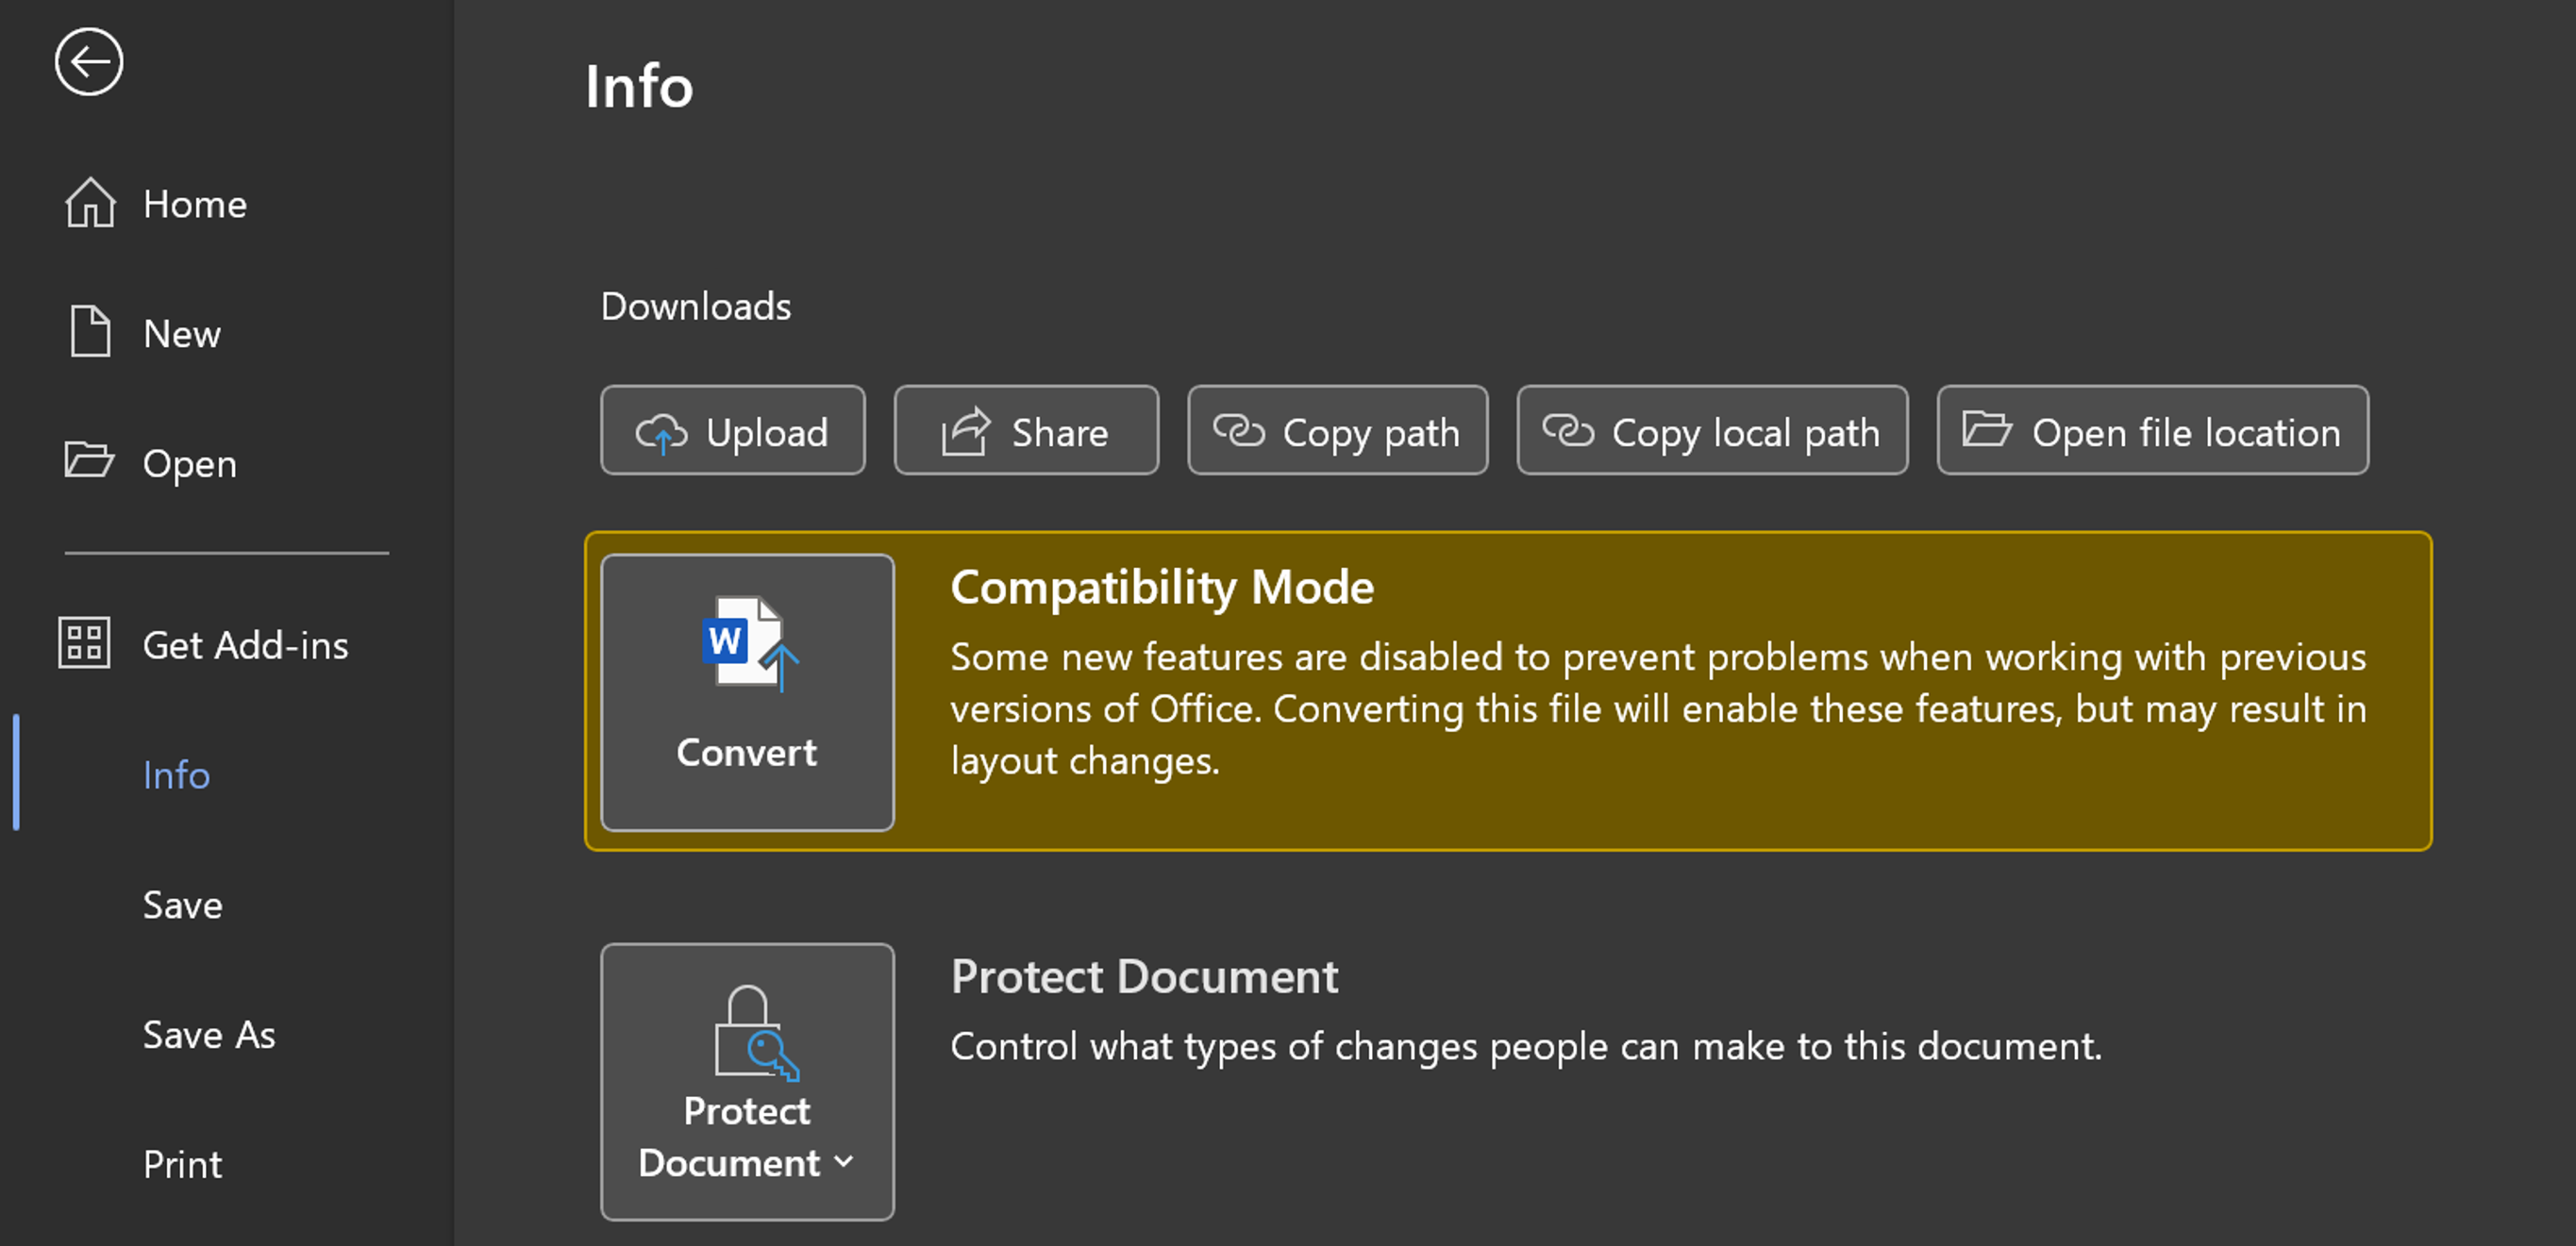
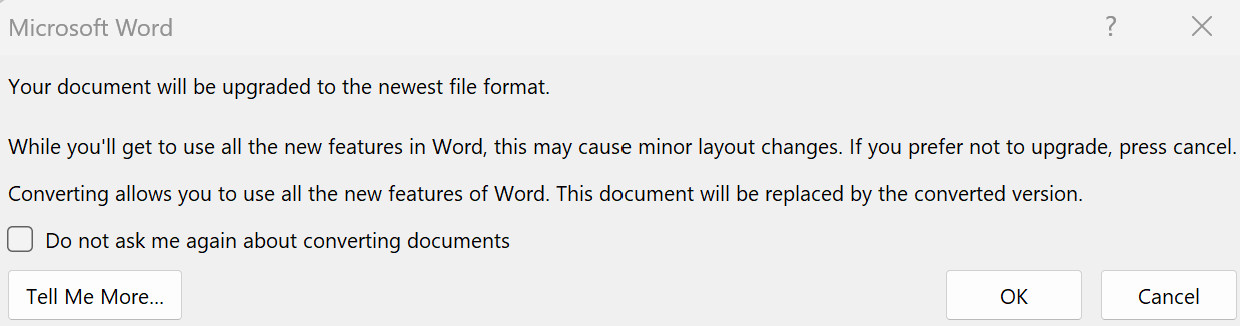
Choose File > Info
If your template was created in an older version of Word you should see that Word is running in Compatibility Mode, with the option to convert the file to the newer format.
Click Convert
Click OK in the dialogue window that appears.
The file should then be converted. If you save the file then replace the template on Insight, you should find that the Image Placeholders are now working correctly.
Attendance Chart placeholders not displaying in Word
The attendance charts use a file type called .SVG and these are not supported in old versions of Word. Word 2019 has partial support but will likely be unable to display them. A modern version of Word is requried to see these images.
Text does not use the selected font in produced reports
If you are changing font selection, and maybe size, in the template but the produced pupil reports appear to be ignoring the selection, this may be down to Styles. These are a feature of Microsoft Word that are designed to promost consistency throughout a document.
See our help guide describing how Styles are used in the Insight templates for more.
 Updated