Adding and Editing Custom Objective Statements
 Updated
This guide follows on from Adding Custom Objective Collections.
Custom (school-owned) collections can be edited.
Choose Objectives from the page at Account > Admin to get started. Choose the collection you want to make changes to from the Objective Collections list.

Adding new objectives
Click the + New Objective button on the right of the screen.
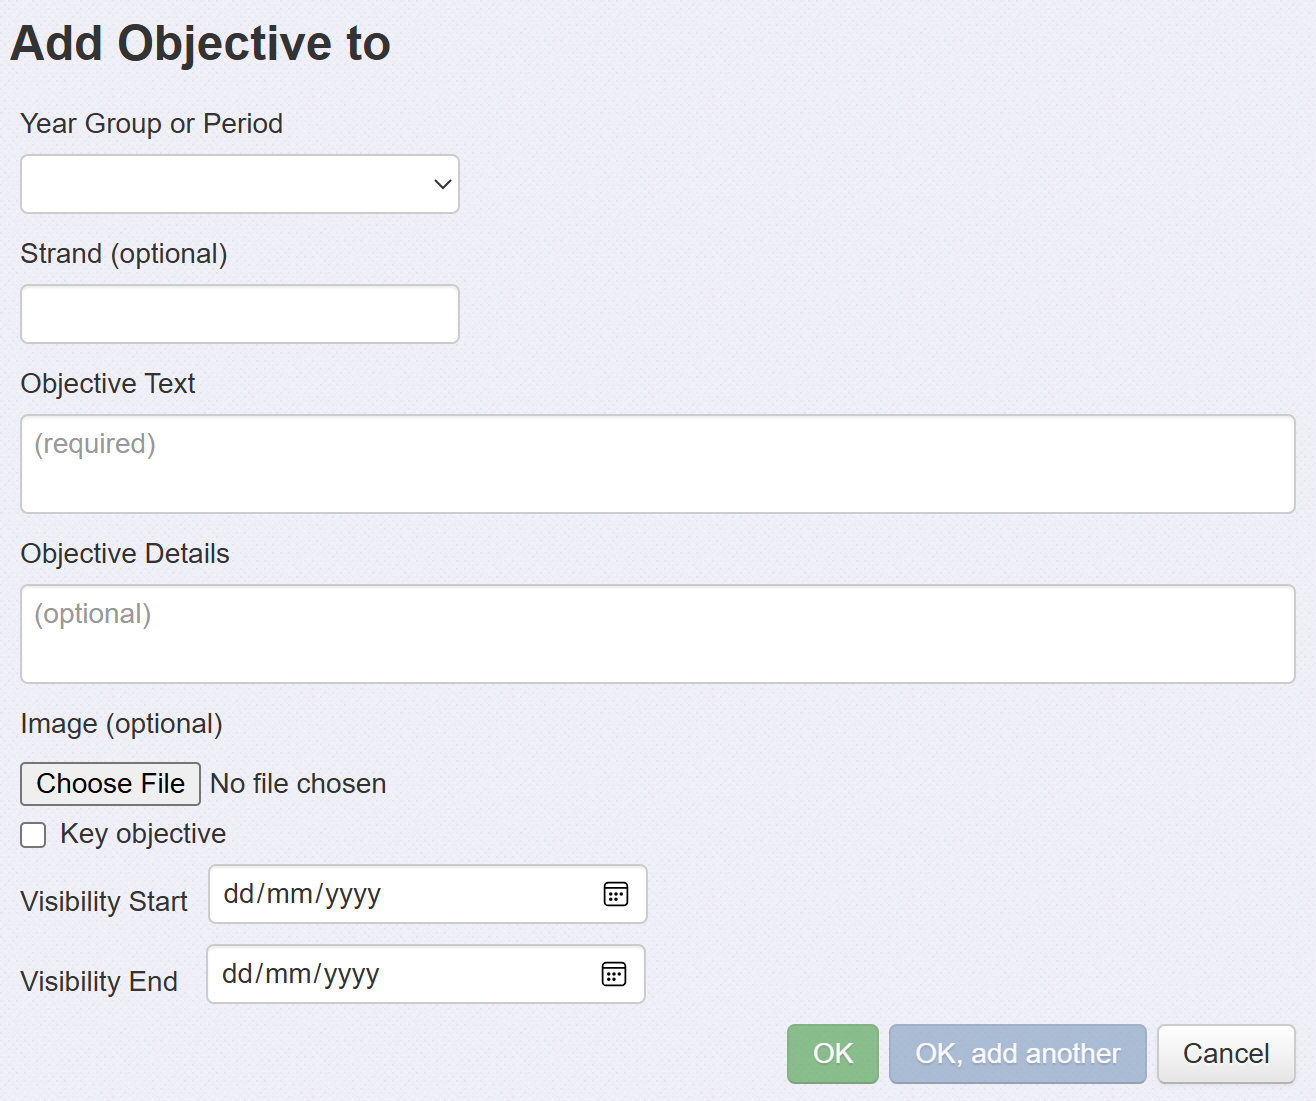
You'll need to choose the Year Group or Period your objective relates to. This might be a year group, a key stage, a Development Matters age band or something else.
Once you've selected your Year Group / Period / Band, you can enter a Strand, the Objective Text and mark whether the objective is a Key Objective or not.
Strands enable you to better categorise your objectives. For example, Maths objectives are often broken down into year group then components such as Measurement.
Key Objectives enable you to identify the objectives that hold greater significance for your setting. These may be the ones that you want all pupils to, ideally, achieve, for example. Key objectives may be filtered for both data entry and for analysis.
Visibility Start/End refers to visibility on the main objectives screen. For example, you may want all your edits to become available on the same day.
Objective Details enable you to add further notes to the objective, examples of activities or what exemplifies achievement, perhaps. These will be visible in the main objectives grid via a Details link.
Image allows you to add a picture that will appear under Details. This could be an exemplar piece of pupil work for example.
When you're finished, click the OK or OK add another button (or Cancel to discard what you've entered).
Editing existing objectives
You can edit an existing objective if you need to:
- Reword
- Replace
- Archive
- Set as a Key Objective
- Modify visibility dates
- Move to a period / year group / band
- Move to a strand
Editing an existing objective will preserve any data already assessed against it.
Click on the objective you want to edit. A number of editing options will then become available on the right-hand side of your screen.
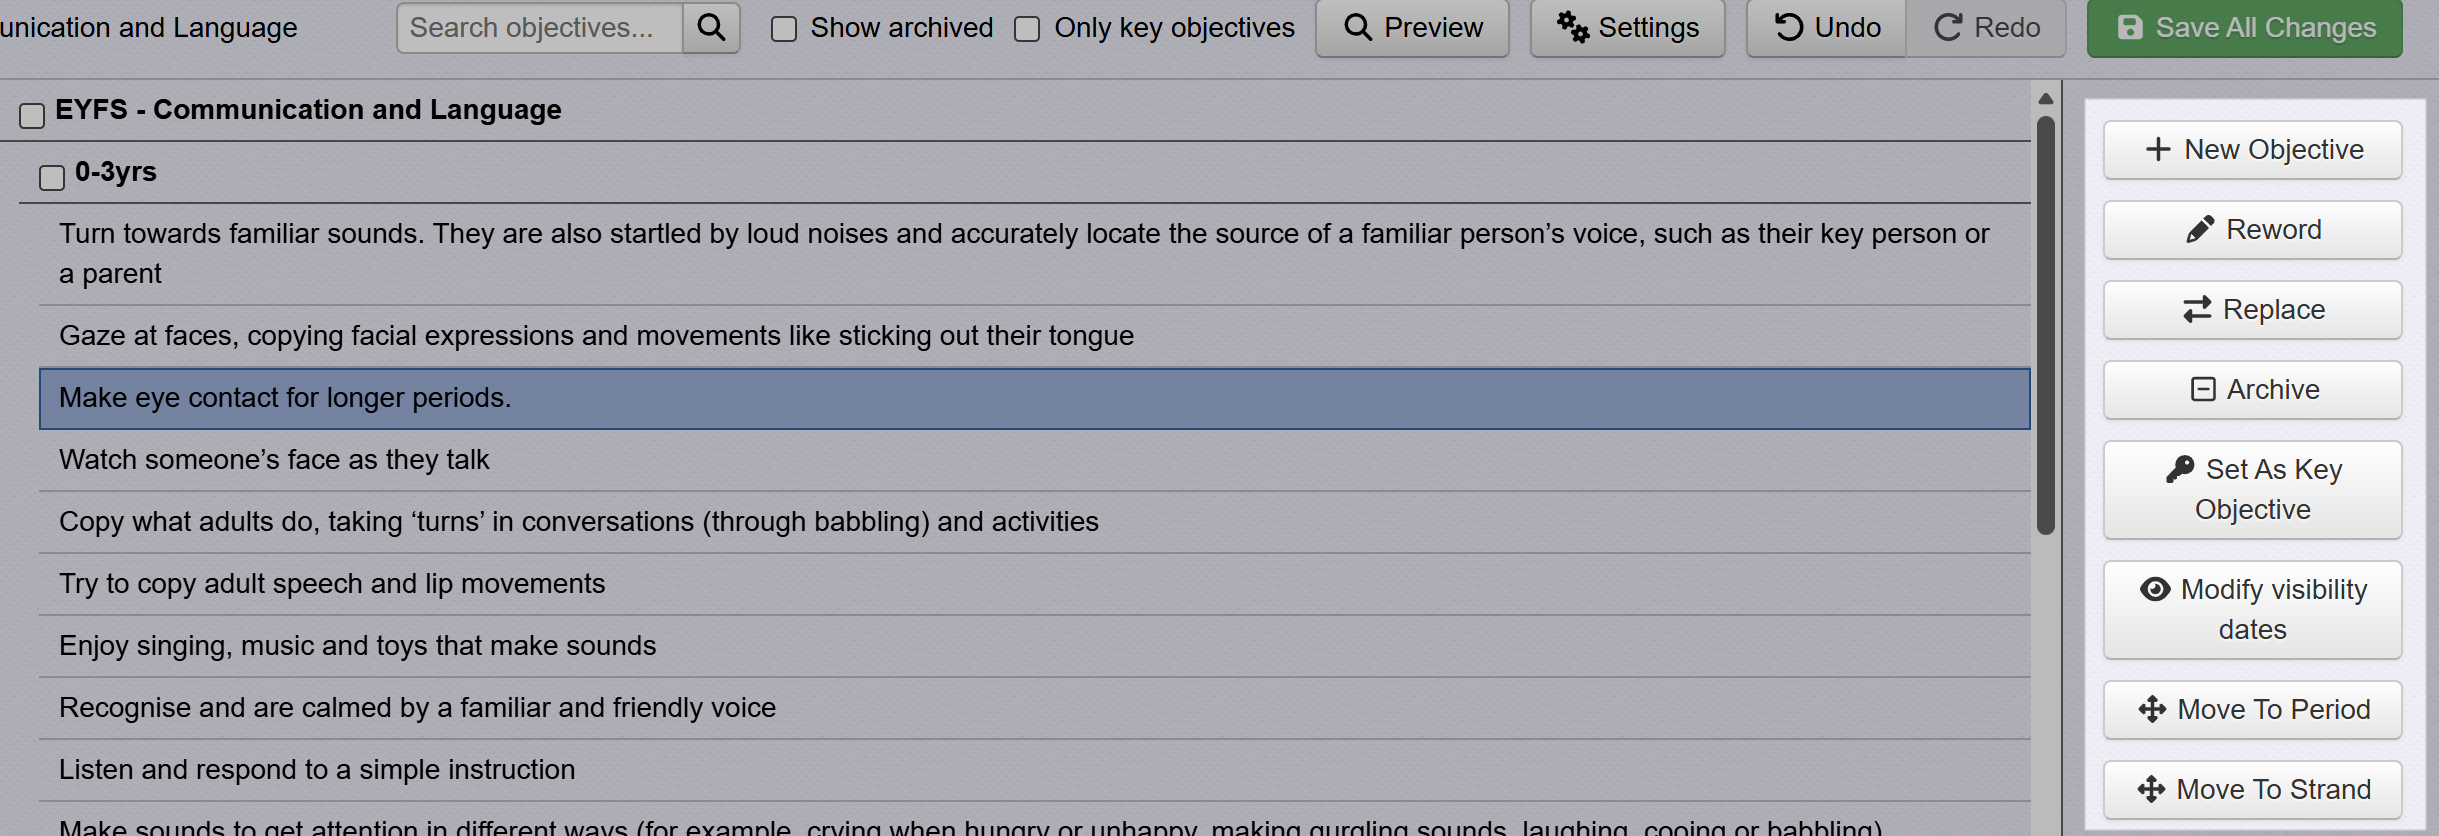
You are able to select more than one objective using the 'Shift' and 'Ctrl' keys.
Select the relevant editing tool, change as required, then click OK when you're done, or Cancel to discard your changes:
All the statements that have been edited will be colour coded until you select Save all Changes.
The colours reflect the following changes:

Save all changes before leaving this page